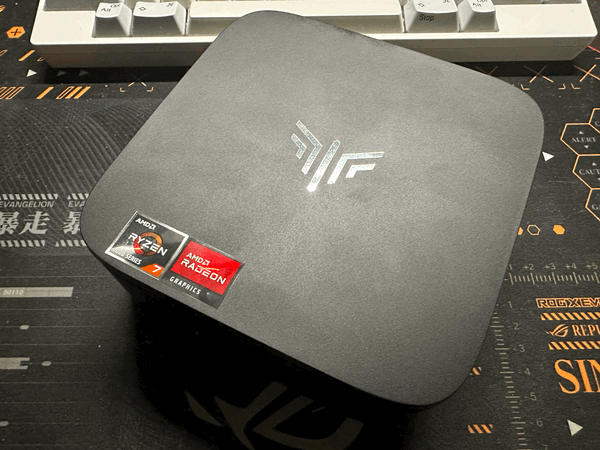
In this blog post, I’ll document a few objectives and parts used for the most recent modifications made to my main Proxmox node.
How it Was
Before I get into the changes made to the server, I have to discuss what it was responsible for prior to the recent work I’ve done in my lab. This server, which housed ten 3.5’ WD Red Pro 12TB HDDs and two 2.5’ Crucial MX500 512GB SSDs, was used for storage and compute.
I ran a virtualized TrueNAS Scale with a Perc H310 HBA passed through, driving a striped 4-disk Raid-Z array, for a total of eight HDDs. Additionally, I passed two SATA SSDs from the motherboard SATA controller to this instance for another mirrored Raid-Z pool for hot data storage. This TrueNAS instance was used for mission-critical VM backups and other important data I needed to keep.
Then I ran a virtualized Unraid with the remaining two HDDs. I used the M.2 HBA to do this job. The reason I ran Unraid alongside TrueNAS was that I have a license I bought for the retired Dell R730XD, so I wanted to at least use it for something. I also like how easy it is to manage Docker containers with Unraid. I had all the *Arr apps running in this Unraid instance, so naturally, this became my media storage.
Additionally, I had other VMs running. Two of them stand out: a Windows 11 VM and a Jellyfin LXC, both of which utilized the SR-IOV functionality of the iGPU provided by the i5-12500T. I daily drive an M1 Mac Studio, and I have software that would only run on Windows, so I used Parsec to remote control this VM, which wouldn’t happen without SR-IOV for the hardware-accelerated video encoding. The same goes for the Jellyfin server, too. With SR-IOV enabled, I passed one of the virtual functions to the LXC, and Jellyfin used it for hardware decoding and encoding for media streaming to my PCs, TVs, tablets, and smartphones.
Last but not least, I populated the PCIe x1 slot with a Mellanox CX-311A 10G NIC for all the VMs to share the not-so-10G connection. In the real world, the bandwidth peaked at 6.3 Gbps. As for the Proxmox boot drive, I used a Samsung 980 Pro 2TB NVMe SSD, but it died, so I replaced it with another Samsung drive, the 970 Evo Plus.
The Challenge with Do-it-All Server
So that was the main node. It ran a lot of my stuff, and it performed remarkably well. However, I did find the one-node approach kind of burdensome. I couldn’t shut down the host easily because many of my services depend on it. In fact, the very blog you are reading was running on the main node. If I, for some reason, needed to shut it down, the blog would go down with it, and Google would tank my search rating because it was inaccessible.
Plus, having the critical backups stored in a virtualized storage server isn’t the best idea. If the node goes down, I can’t recover the backups anyway. Remember I said the Proxmox boot drive died? That was a nightmare to recover from. Although I was doing rsync daily to a standalone Synology DS418 NAS, I couldn’t restore the VMs easily because the VM configuration files weren’t backed up with the VM disk. In the end, I didn’t really gain anything out of this setup besides speed. I could just as easily have backed up my VMs directly to the Synology as I did to the TrueNAS, but it would take twice or three times as long. Since I only had fewer than 20 VMs and LXCs running at the time, I realized the TrueNAS wasn’t really necessary.
Finally, having ten HDDs spinning 24/7 does take a toll on energy consumption. When all the HDDs are removed, the main node only consumes about 35 watts at idle. But with twelve 7200 RPM HDDs along with the HBAs used, that number is close to 115 watts. No matter what I do, the HDDs won’t spin down to save power. I searched all over forums and subreddits, tried so many “solutions,” and ended up empty-handed.
After running the numbers, for a 120W-idling node, it costs nearly $260/year for me to run. Although I don’t think this number is prohibitively high, I believe I can do a lot better by optimizing the setup I have on hand.
Phase One - Clustering and Moving Services
Therefore, I deployed two N95-based Mini PCs to run the less demanding workloads. These Mini PCs consume about 7 watts at idle, and I’ve set the PL2 to 13 watts. This blog, some other websites I self-host, and Jellyfin, now all run on those two Mini PCs. This allows me to work on the main node without having a complete blackout for my services.
I’ve also configured the storage location and NICs in Proxmox to have the same names across all cluster nodes, so these VMs can be moved back and forth from one node to another, including the main node.
Phase Two - Getting Rid of Unraid
The first and most important thing to do was back up all the data. I ran the backup script to back up all VMs and LXCs to the Synology. For extra caution, I even used a Seagate 8TB external HDD to make an extra backup.
The Unraid instance was the next to go. After I got my Mac Mini NAS up and running, I transferred the entire media library to it from Unraid. Then, I set up Docker and the *arr stack on the Mac Mini to pick up where Unraid left off. During the process, I backed up my main node again to this Mac Mini NAS.
The Mac Mini NAS, as I’ve written before, with a four HDD setup, idles at around 47 watts with HDDs active.
Phase Three - Tearing down TrueNAS
Now it was time to axe the TrueNAS instance. Come to think of it, having an intraday hot backup for all VMs isn’t a bad idea at all, but it is important to keep a daily copy outside of the cluster. So, I drew out a game plan. I will virtualize a Synology instance, use four HDDs for the intraday backups, then do a daily backup to both the Mac Mini NAS and the Synology DS418 for warm and cold storage. Why a Synology instance, you might ask. Well, after all the NAS systems I’ve tried, I still find Synology has the best usability. Although not sanctioned, a virtualized Synology is actually quite usable.
With that, I changed some hardware on the server. Here’s a list of parts that I used:
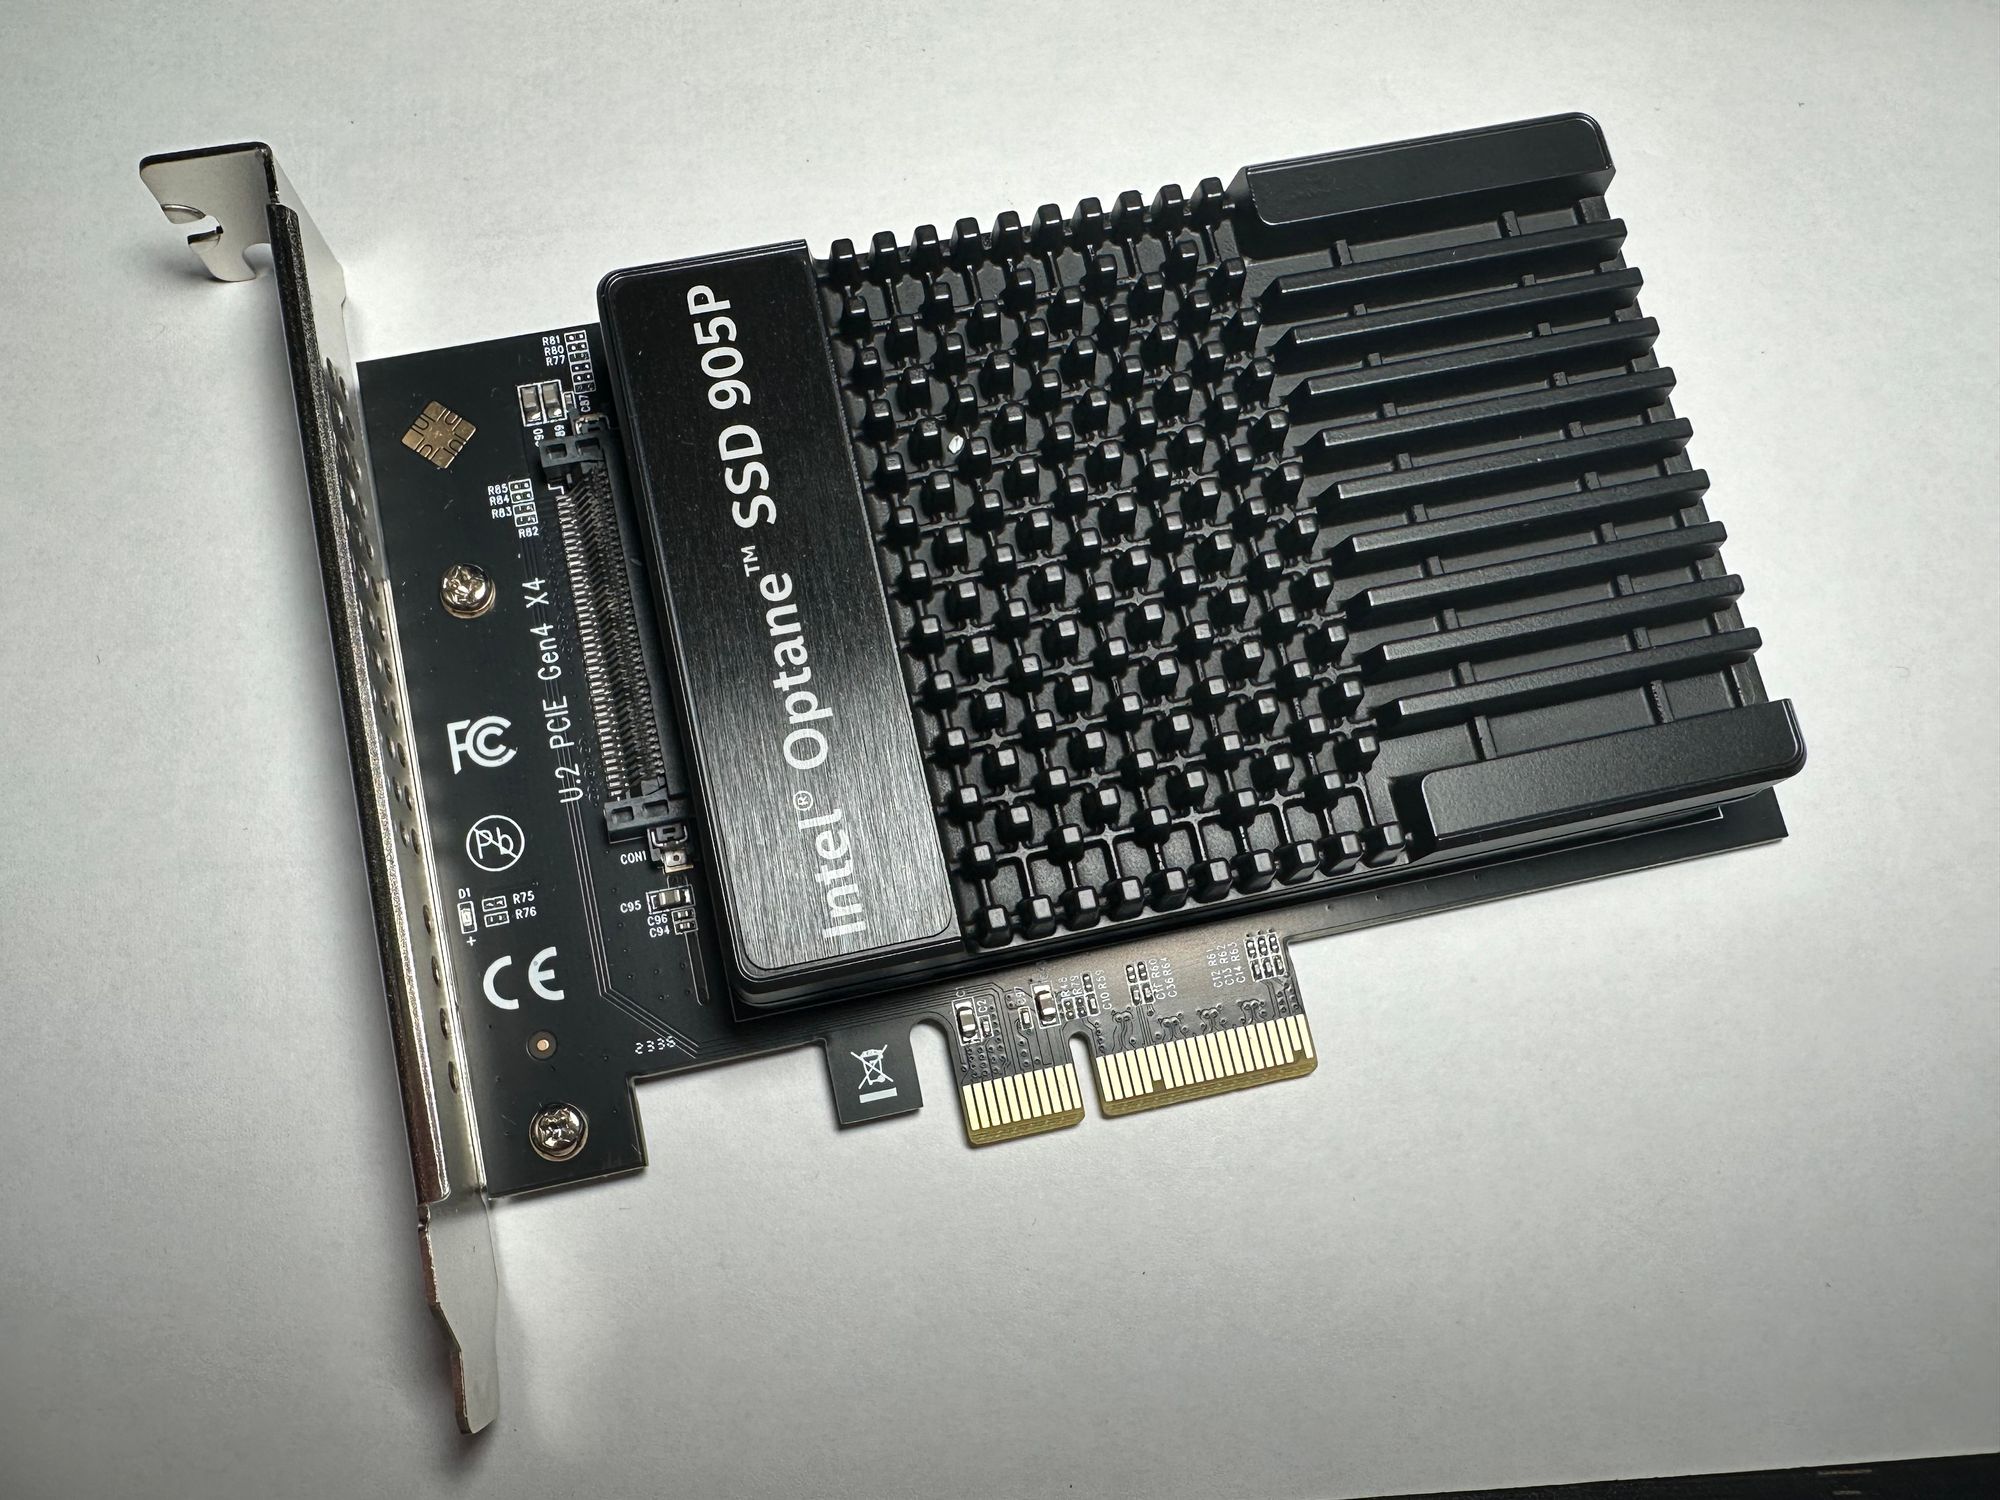
- Intel Optane 905P 1.5TB SSD, U.2
- IOCREST U.2 to PCIe x4 Adapter
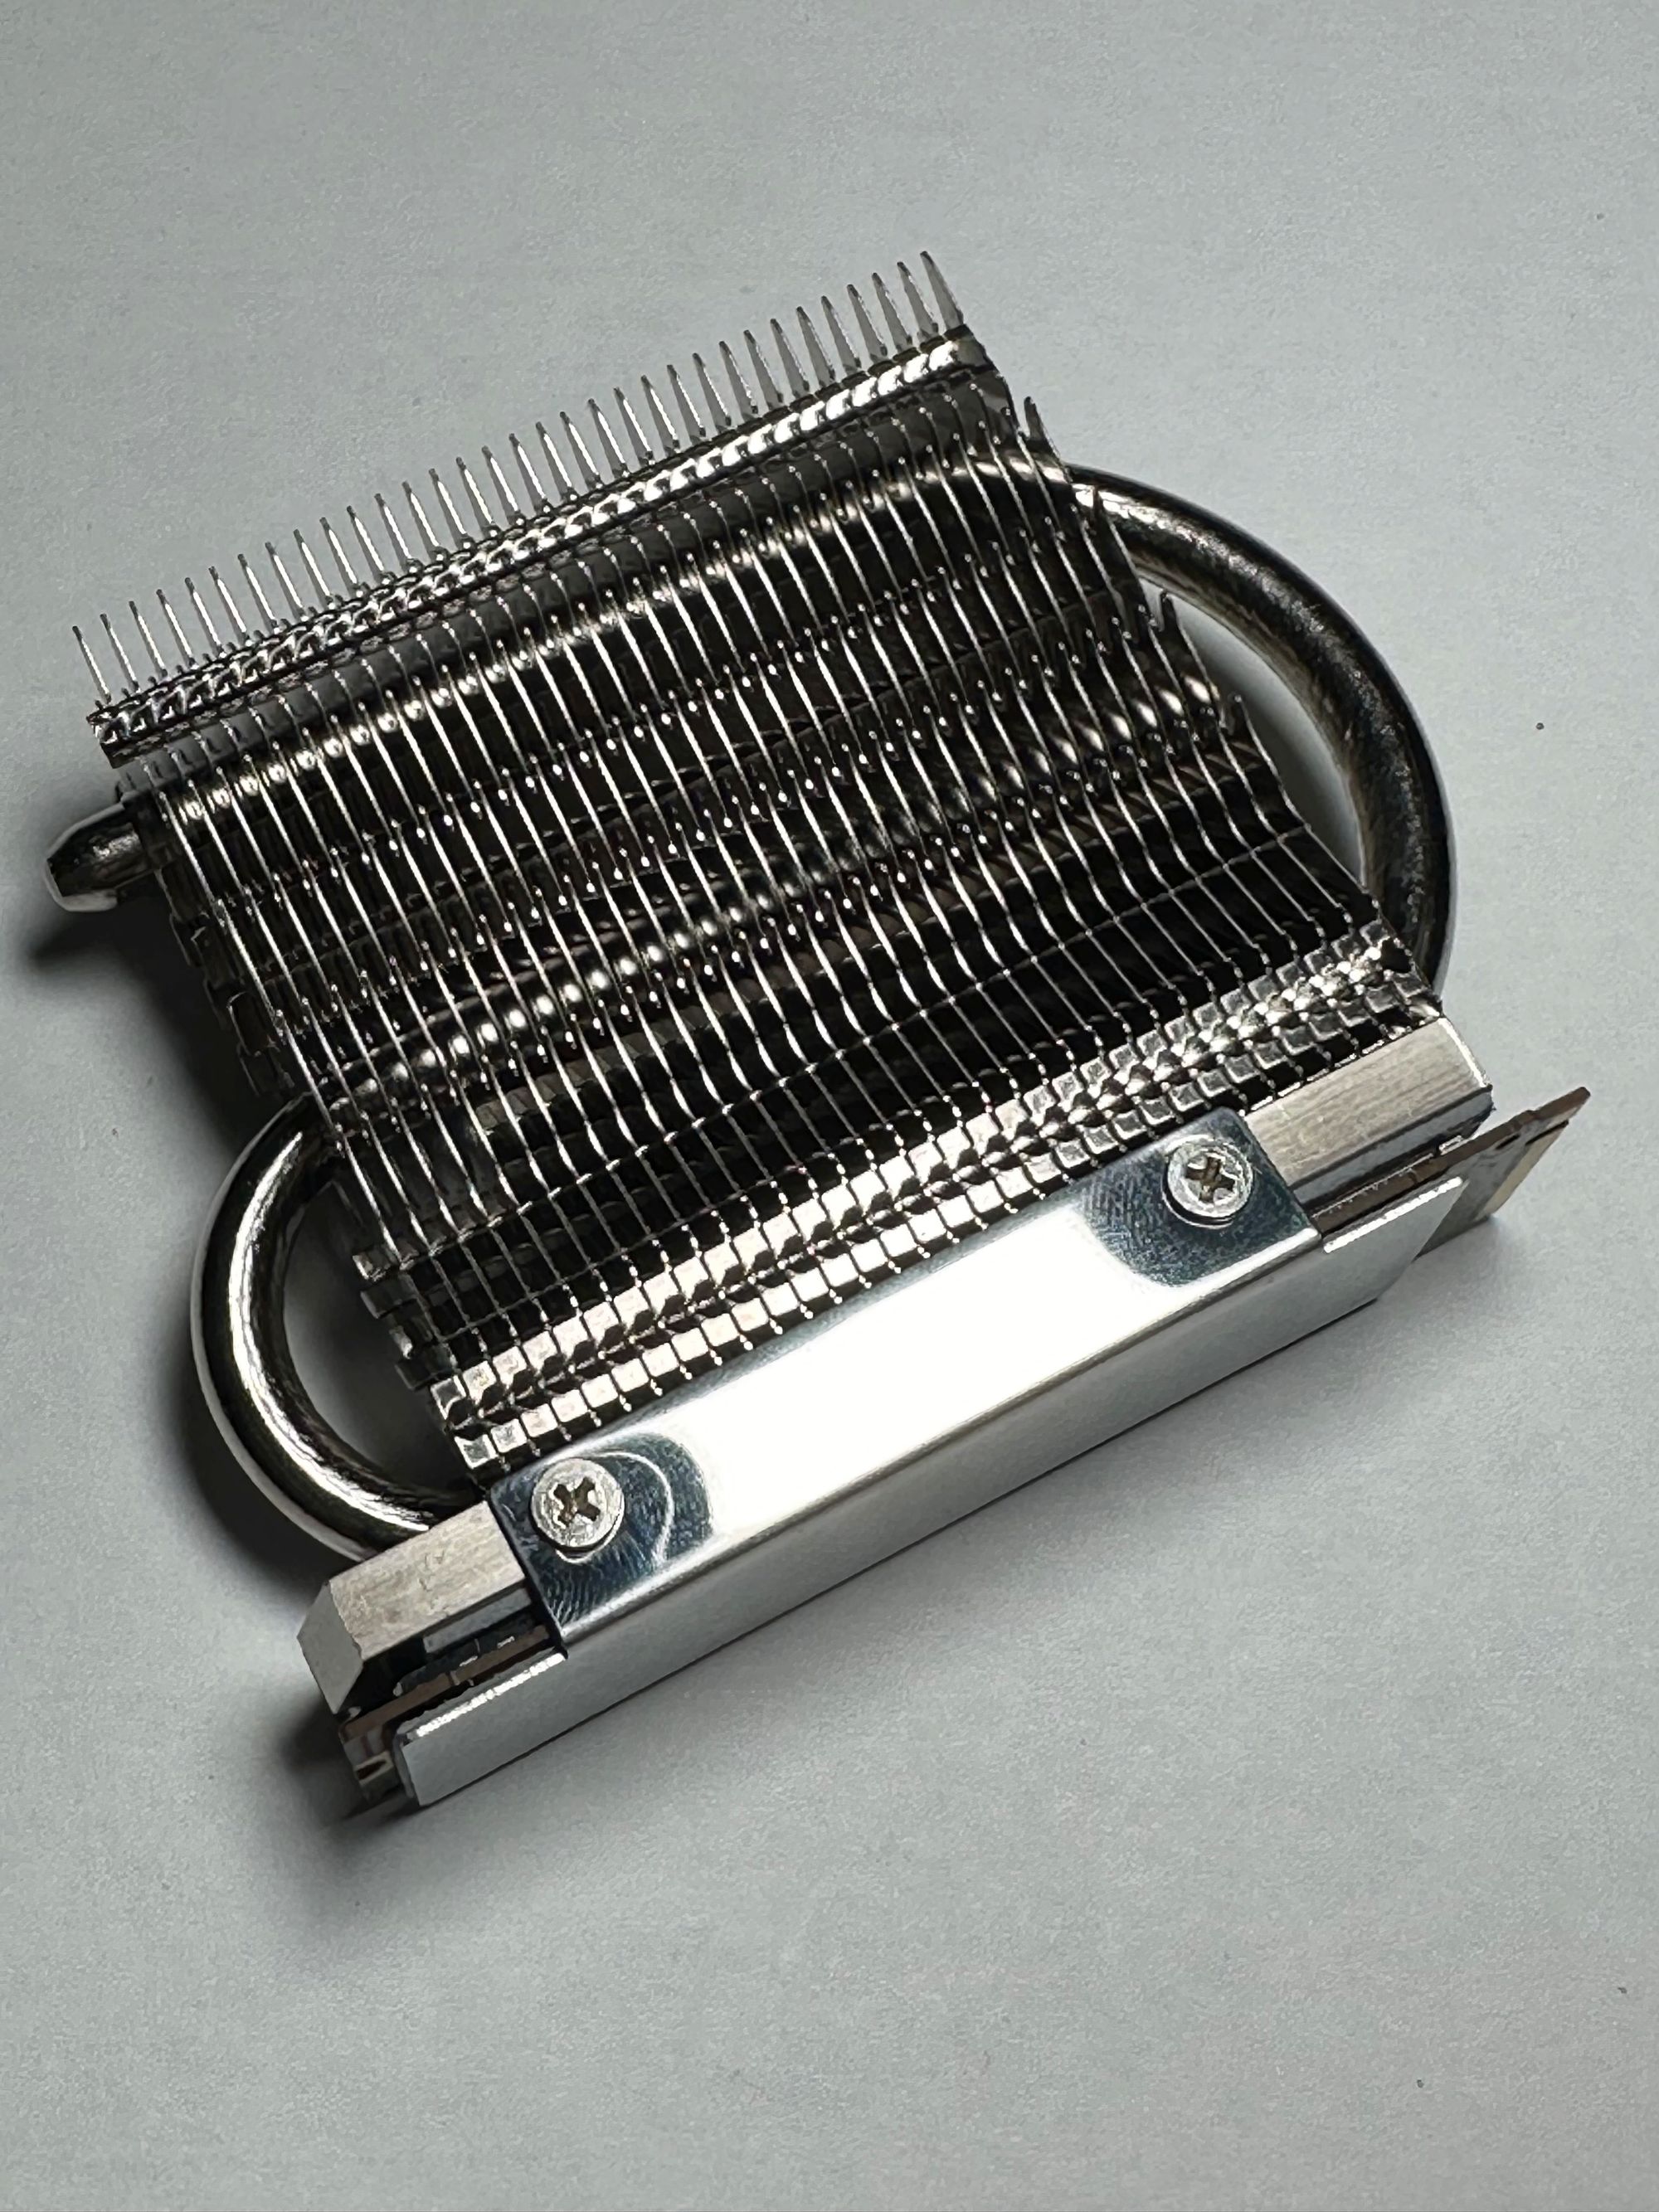
- Thermalright M.2 SSD Heatsink
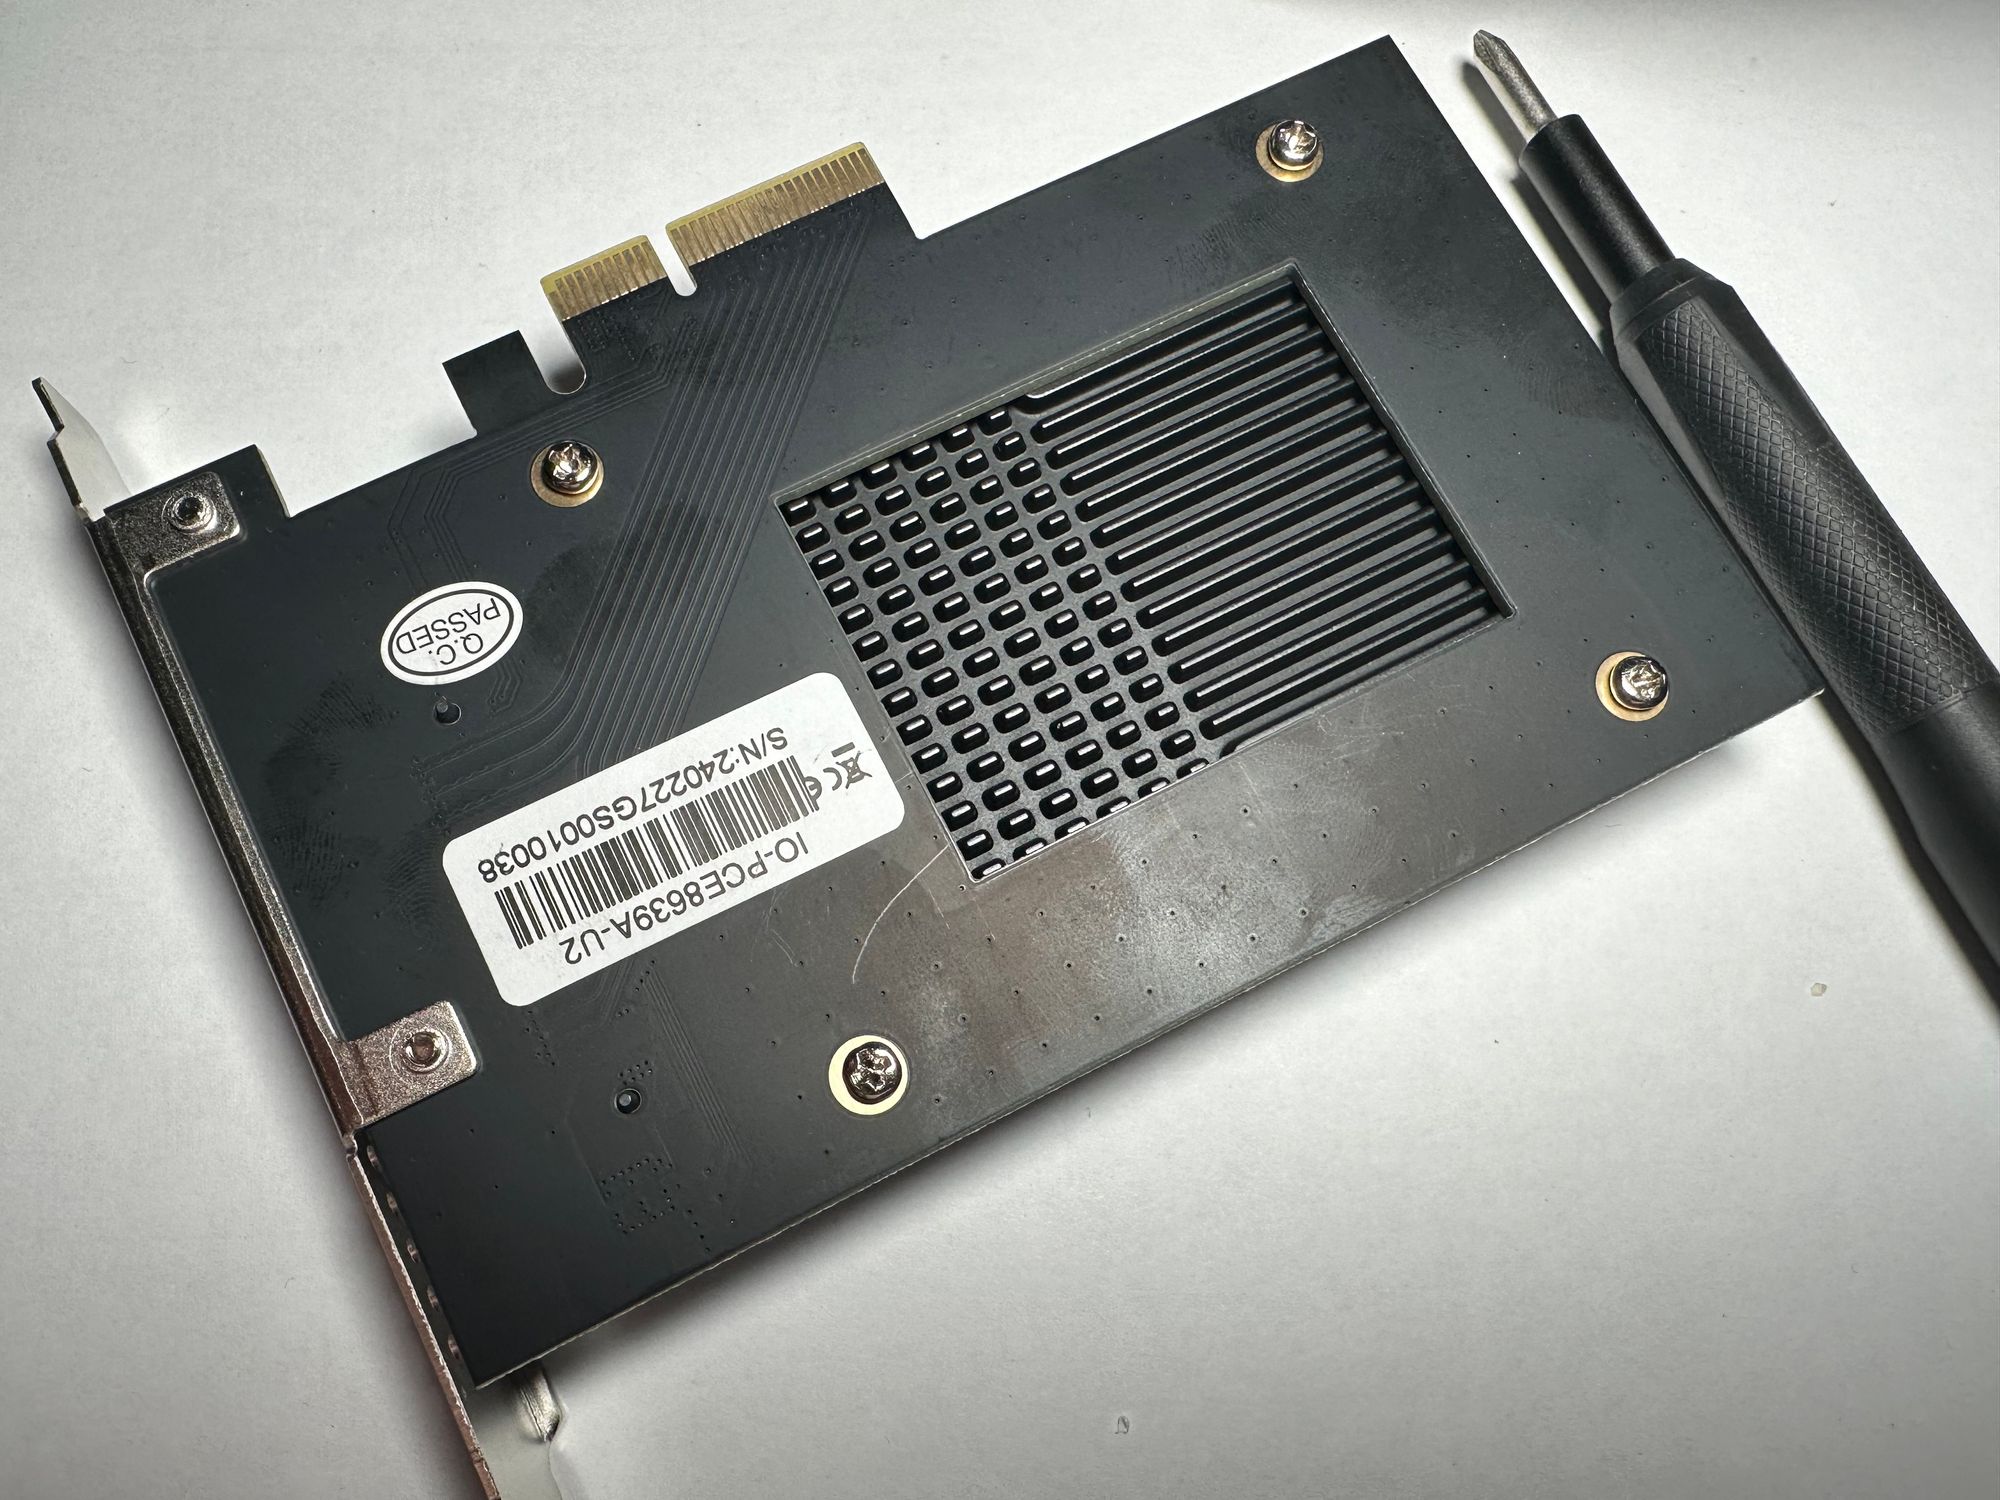
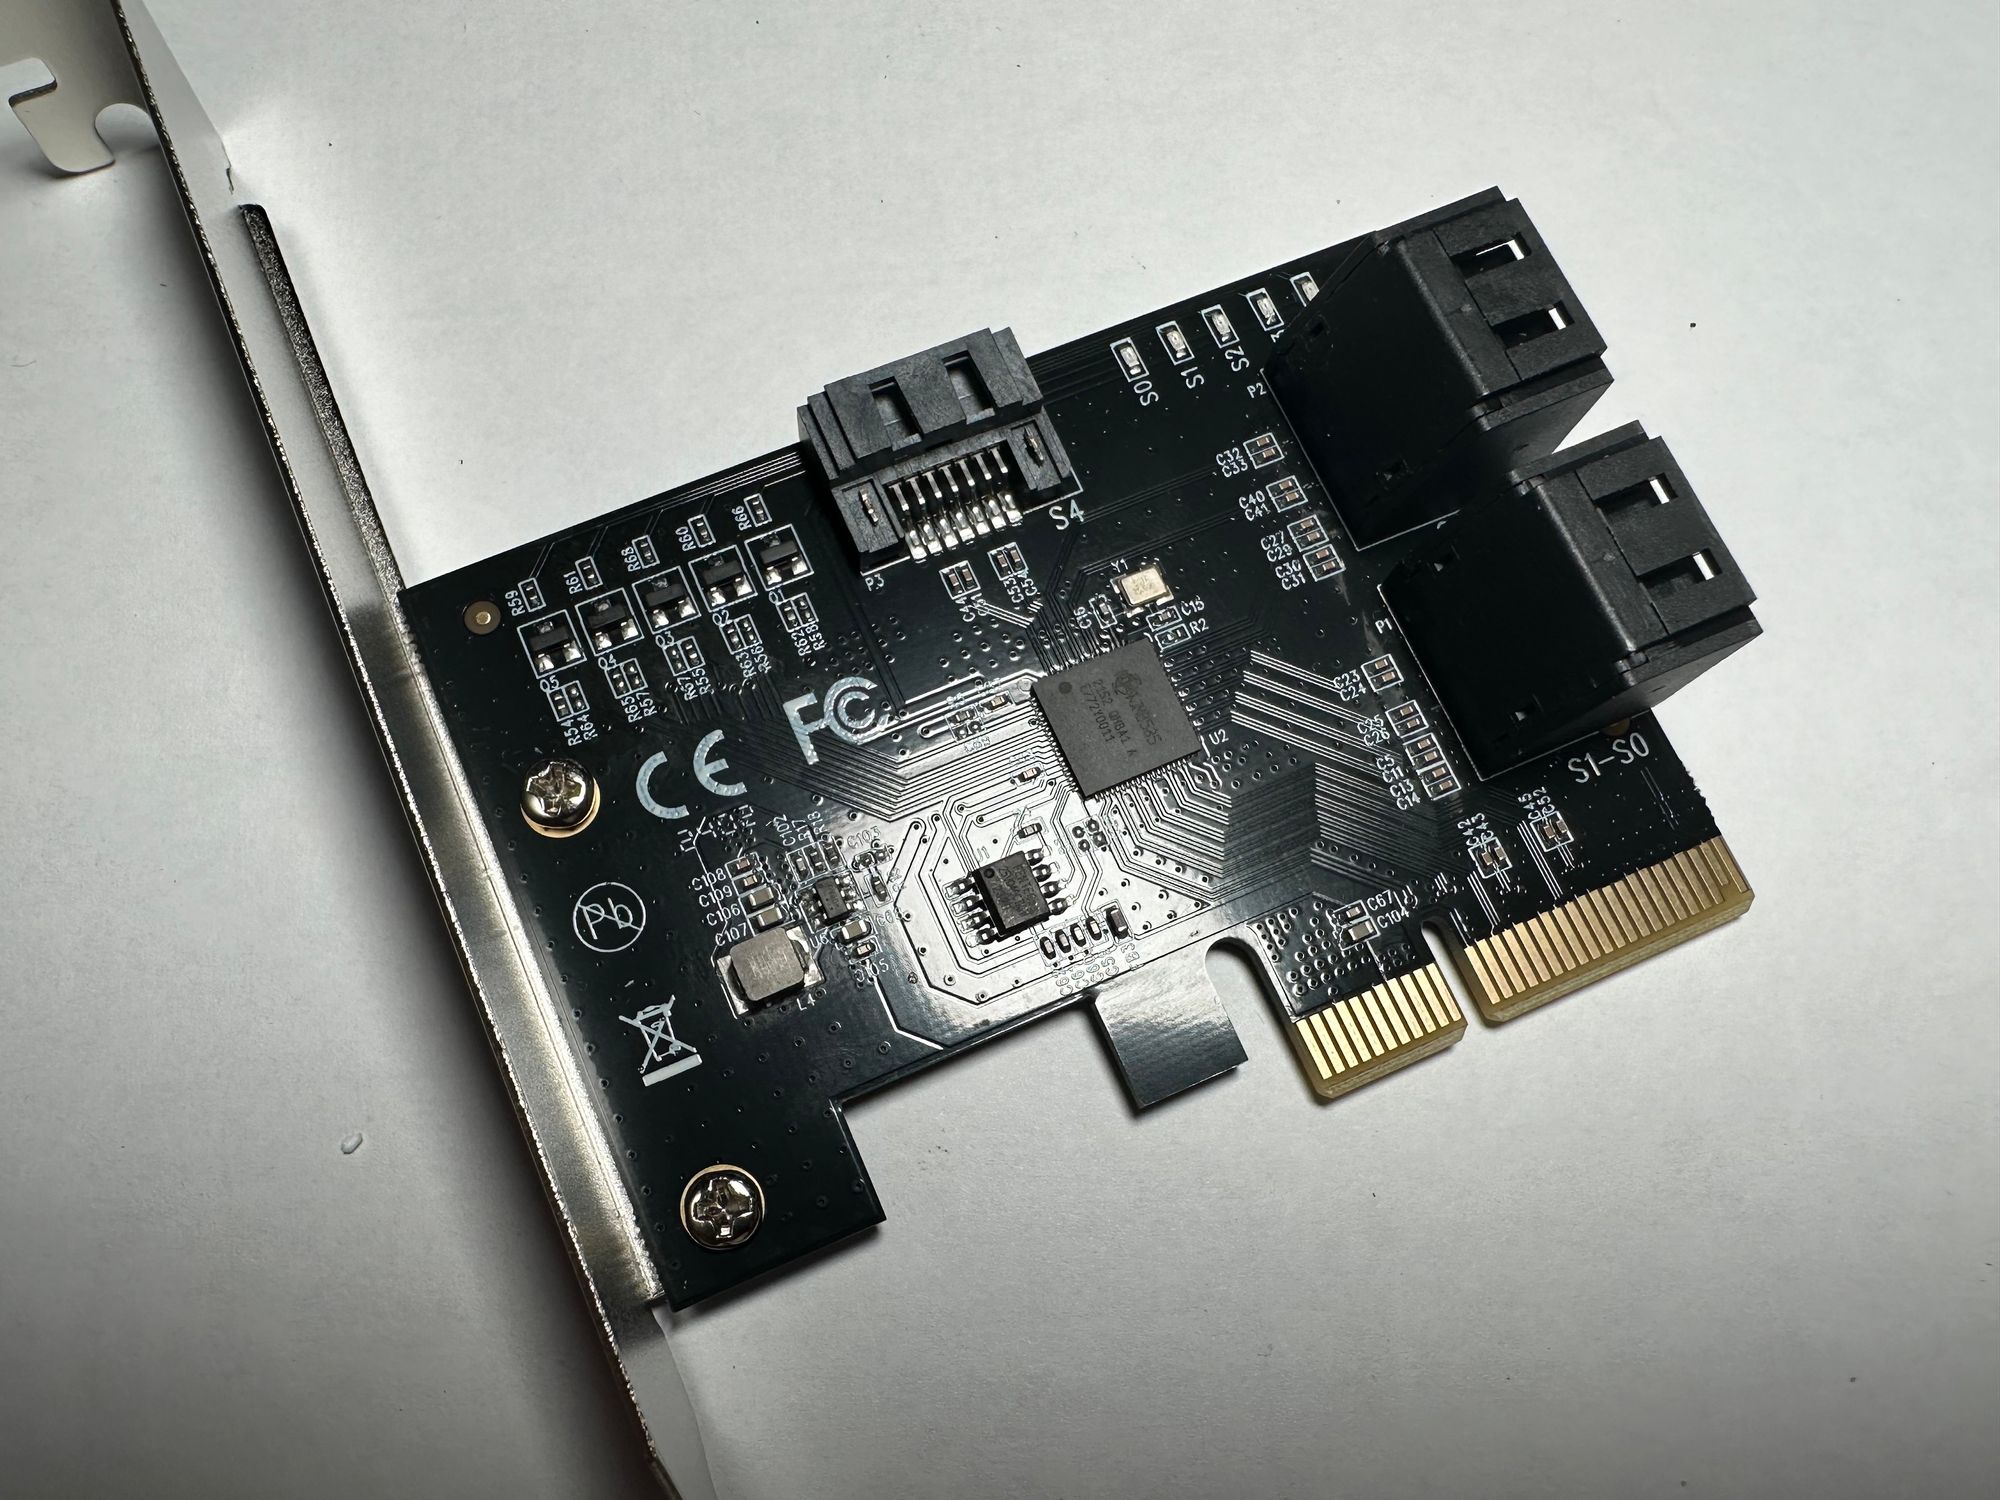
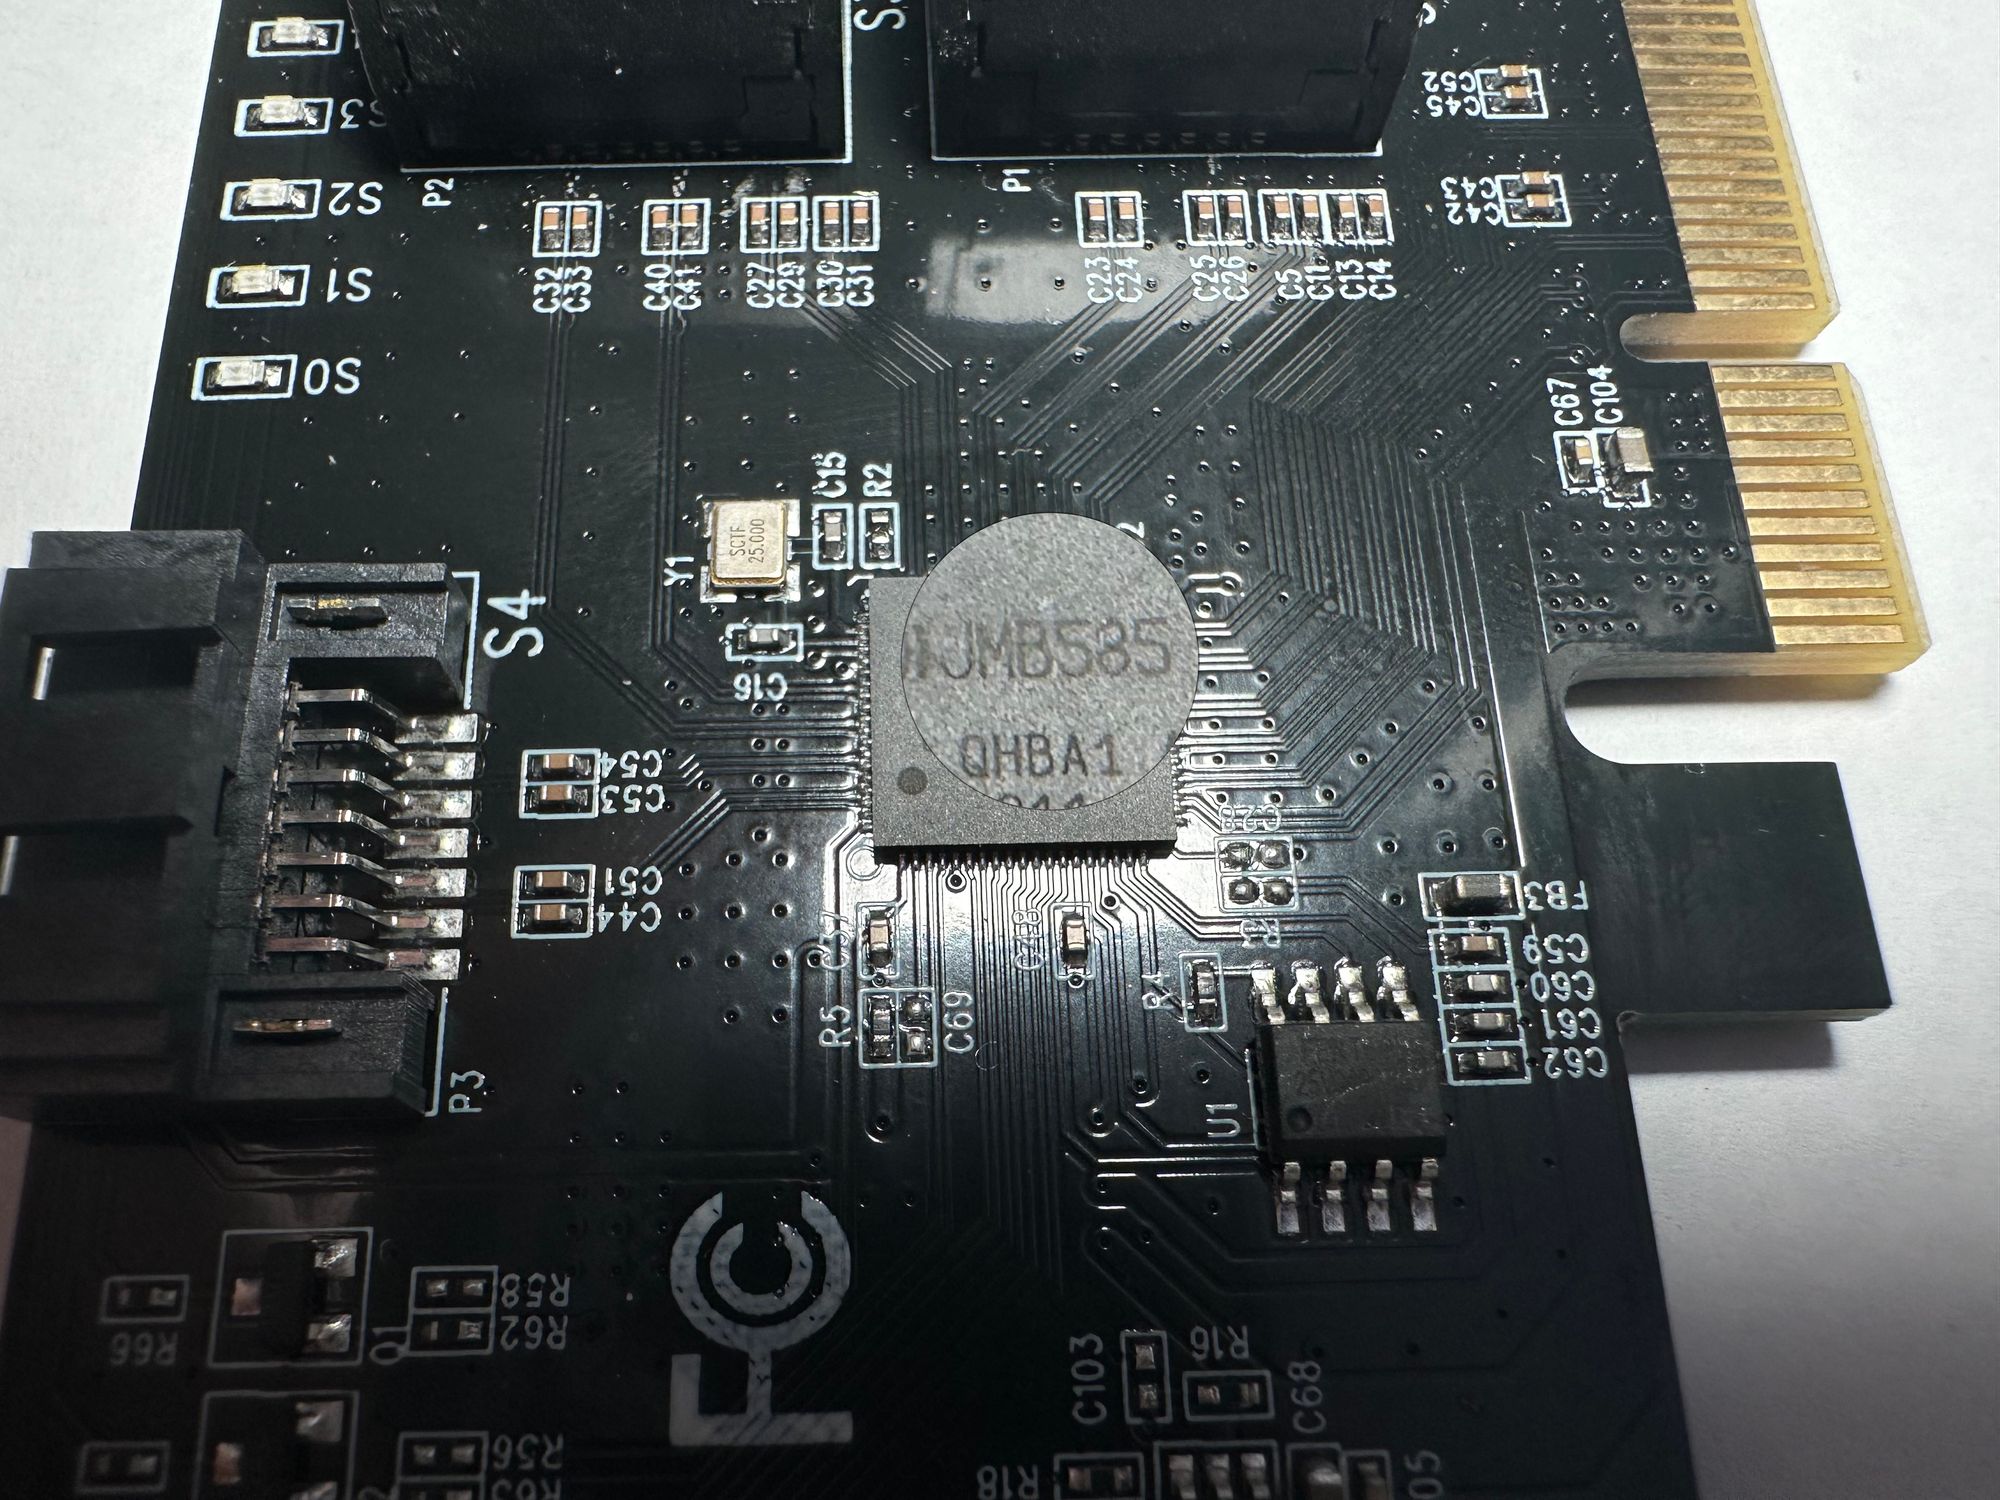
- IOCREST PCIe x1 to 5-Port SATA HBA, JMB585 Chipset
- Intel X520-DA2 10G NIC
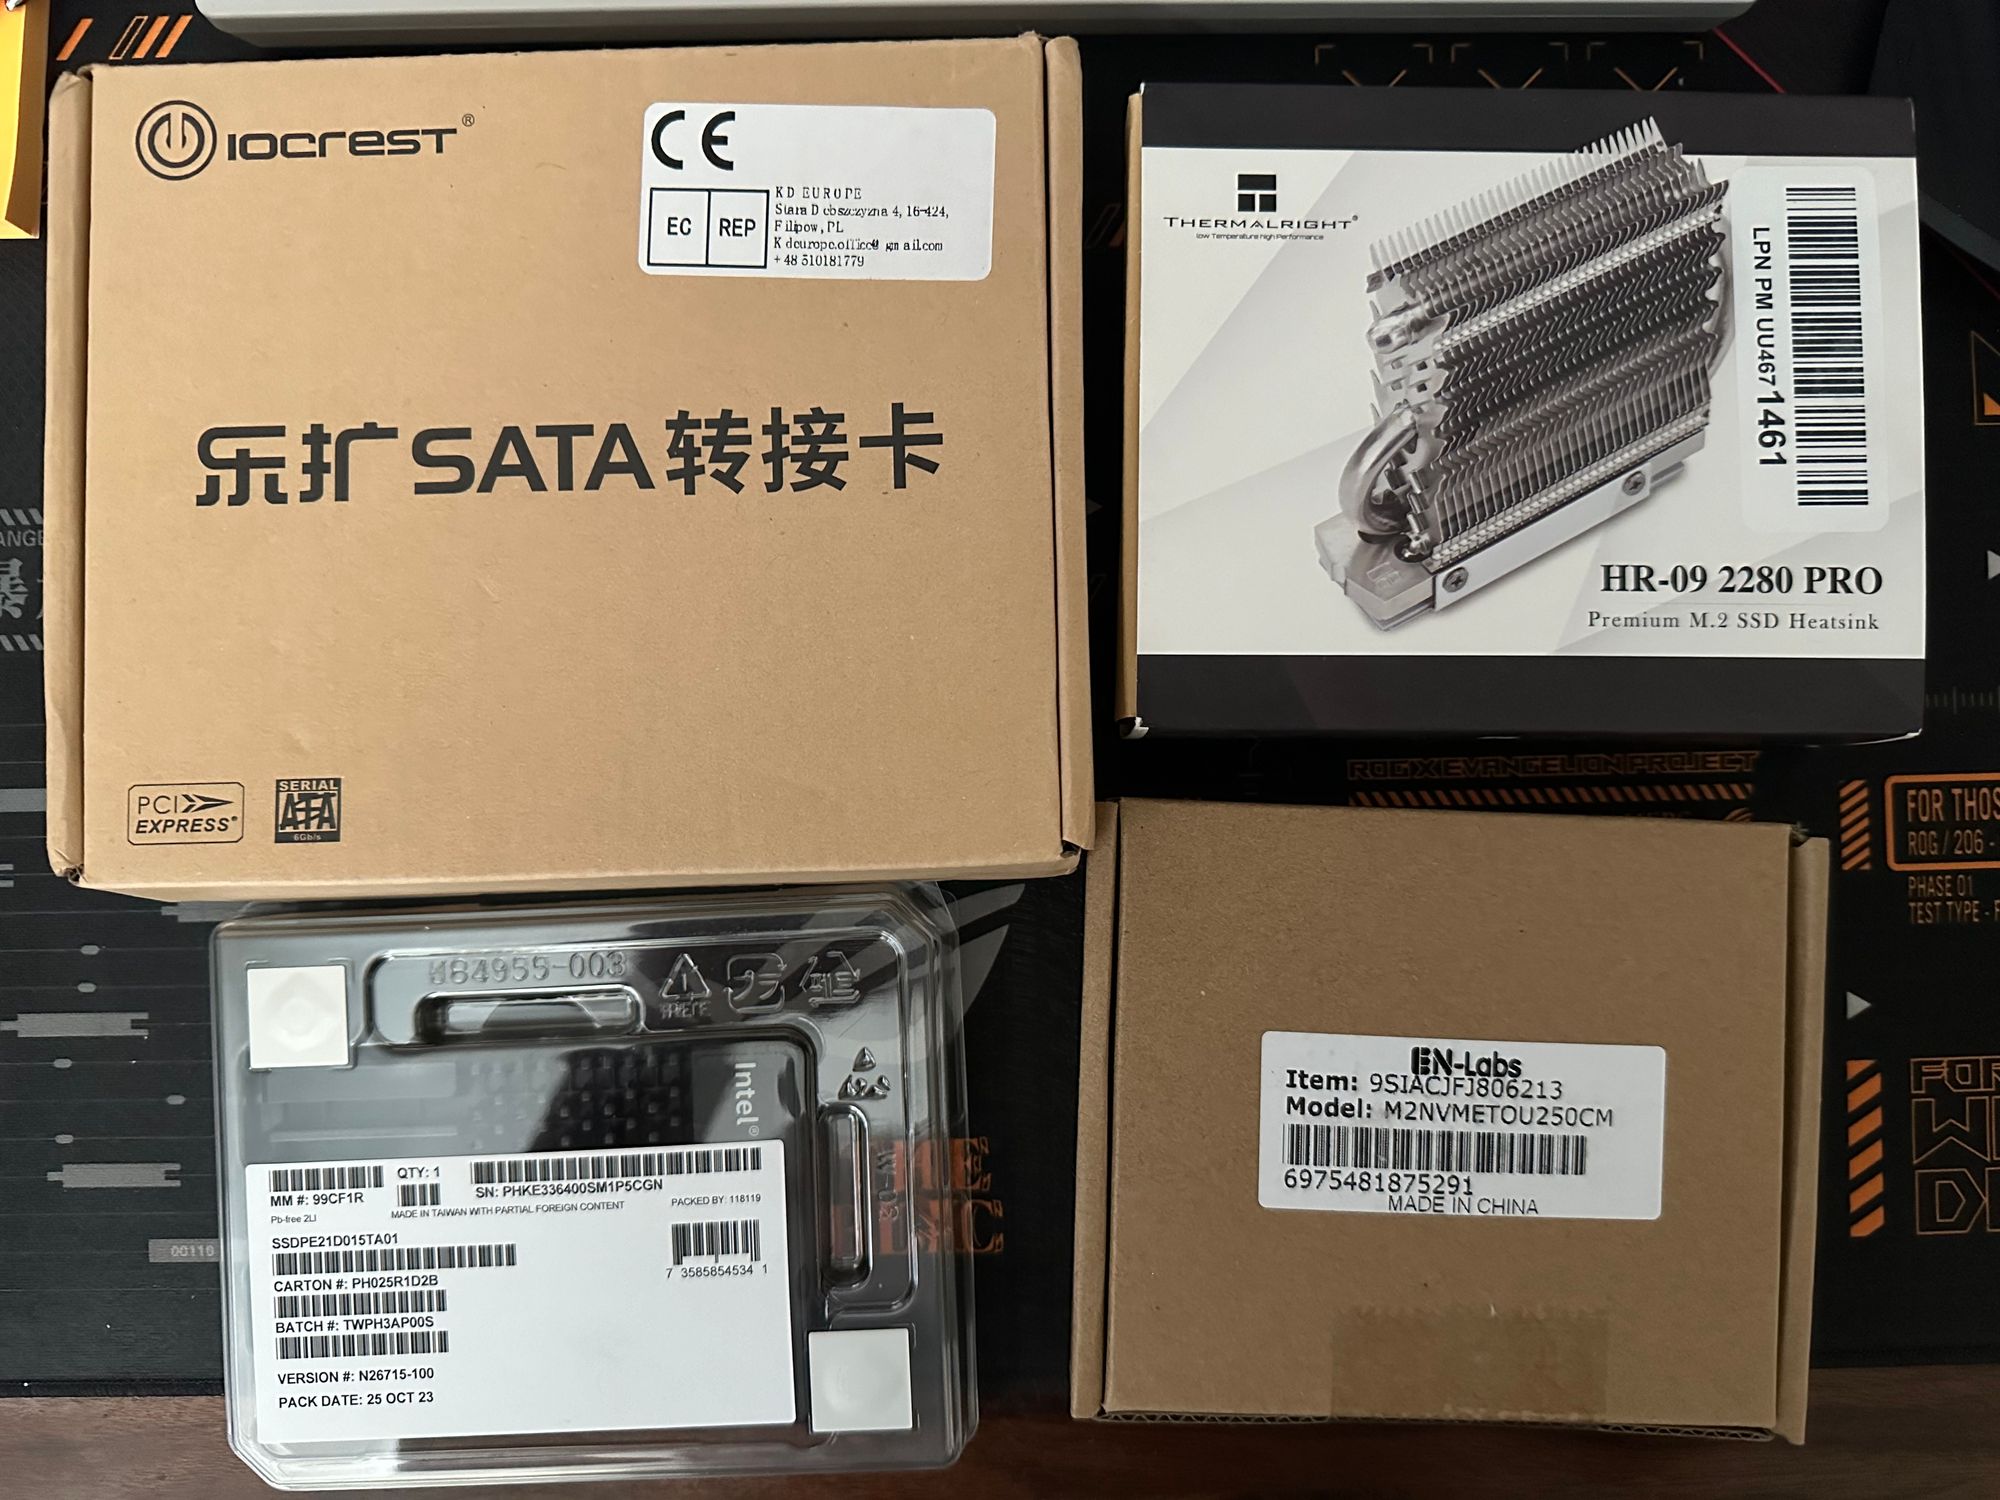
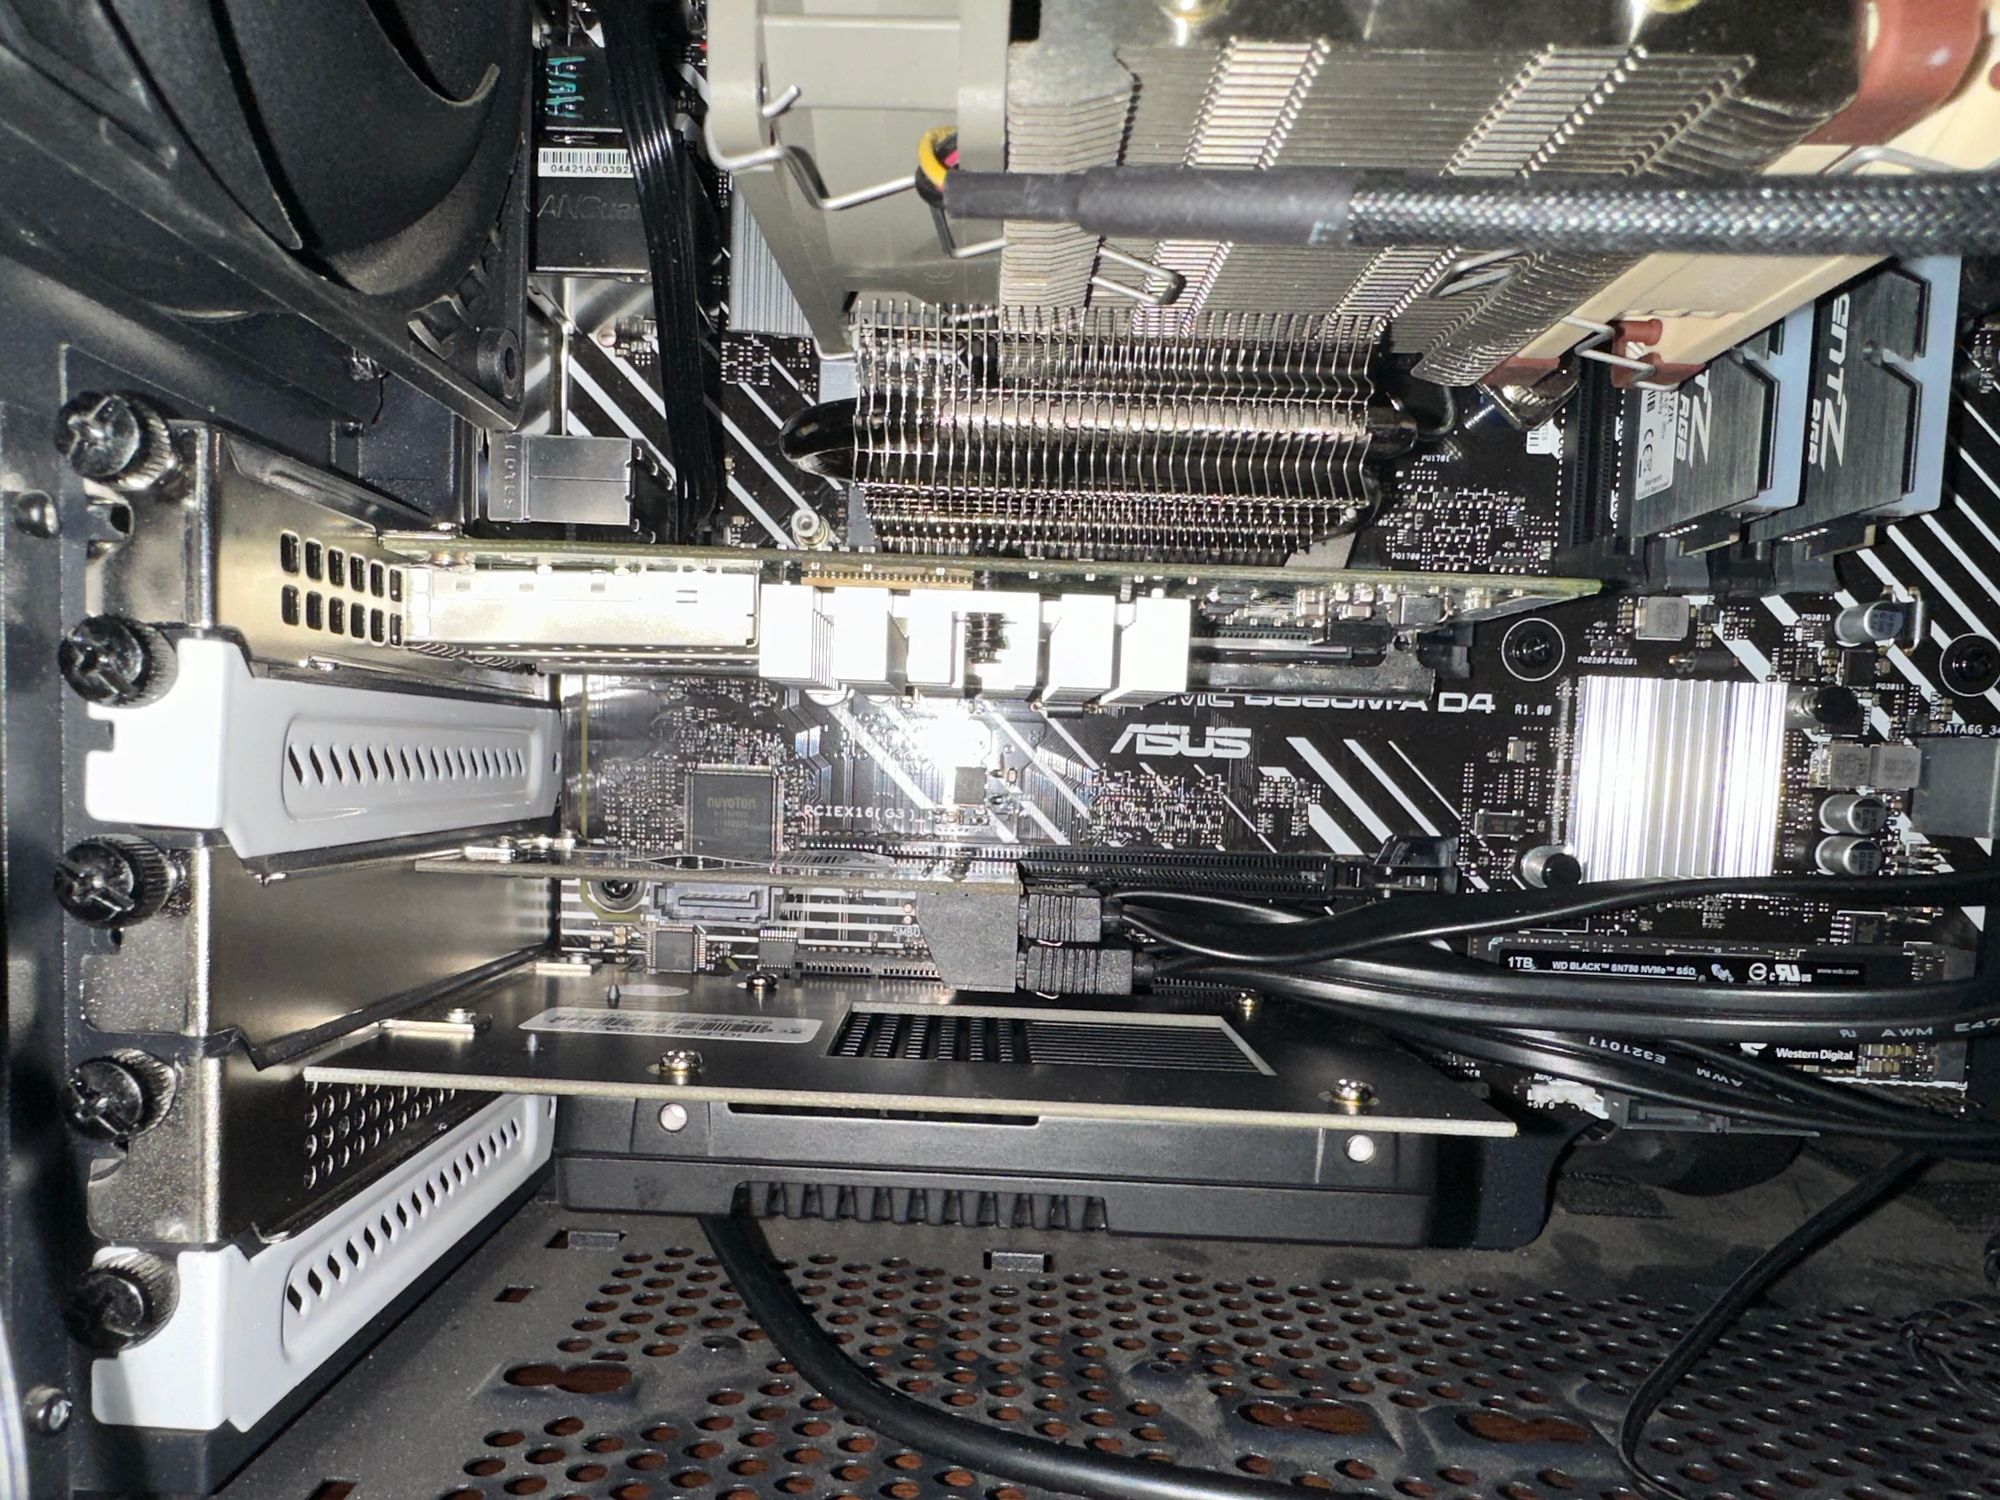
The plan is to use the Intel Optane for VM storage and as shared storage for High-Availability VMs. For the lack of U.2 connection on the motherboard, I used a PCIe adapter from IOCREST which goes into the PCIe x4 slot on the motherboard.
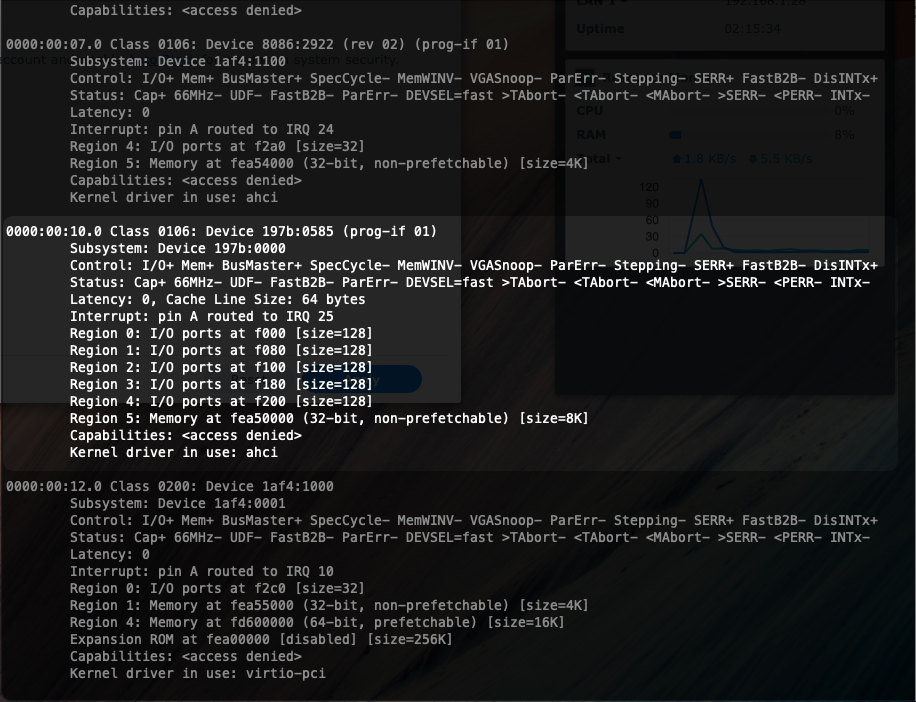
For the x16 slot that was occupied by the Perc H310, I swapped in an Intel 10G NIC that is tried and true. I also removed the M.2 HBA to be used with the Mac Mini NAS, so I installed a WD SN750 1TB drive in it.
For the Synology VM, I used the IOCREST 5-Port SATA HBA, plugged into the PCIe x1 slot.
Last but not least, I installed a hefty heatsink for the Proxmox boot drive which I think may help with prolonging its lifespan.
This is what it looks like when all the PCIe slots are populated on the motherboard:
After replacing the hardware, the power consumption jumped from 36W idle to about 45W without HDDs.
Phase Four - Moving Away from TrueNAS
The transition process took a bit less than two weeks. Since all my VMs are running fine, I decided to just forgo all the backups stored in the eight HDDs used for TrueNAS. I shut down the TrueNAS VM and took out four drives, then swapped out the old Seagate Ironwolf 5900 RPM drives in my Synology DS418. The SHR RAID rebuilding process was abysmally slow. For the first two drives, the rebuilding/reshaping process took about 12 hours each to complete. Then, for the third and fourth drive, the process took three days each, or 60 plus hours.
During this time, I have my Synology VM set up with the ARPL bootloader. The process is very straight forward. I passed the JMB585-based HBA to this Synology instance and the system picked up the HBA and the drives instantly without any hiccups.
After the SHR-2 RAID was built and scrubbed, the Synology VM was ready for the intraday backup task. Since I only need it to be running for a portion of the day where most changes to the VMs are made, I set the Synology VM to power down every day at 2PM, and have a cron job in Proxmox to start this VM every day at 6:30 AM, where the intraday backup jobs will run every 15 minutes from 7 AM to 1 PM.
Moreover, for the daily backups, I set the DS418 to power on every day at 11 PM, where the daily backup jobs will run, then power off at 2 AM.
For the rest of my storage needs, it will be handled by my Mac Mini NAS, which runs 24/7 for now. One thing worth noting is that RAID volumes, even JBOD, created by the MacOS Disk Utility, will not spin down. To my knowledge, MacOS sees this as a feature rather than a bug. I have yet to find a solution to spindown the HDDs gracefully. I wrote a shell script to unmount and eject the volume and the disks and they will spindown immediately, but I do prefer a more elegant way to do this.
“$ show run”
So here’s what I am running at the moment:
Proxmox Cluster:
Main Node:
- CPU: Intel i5-12500T
- GPU: Intel UHD770, SRIOV Enabled
- RAM: GSkill DDR4 3600, 32GBx2
- Motherboard: Asus B660M-A D4
- Proxmox Boot Drive: Samsung 970 Evo Plus, 2TB
- VM Drive: Intel Optane 905P, 1.5TB + IOCREST PCIe to U.2 Adapter
- Spare Passthrough Drive: WD Black SN750, 1TB
- NIC: Intel X520-DA2 10GbE
- HBA: IOCREST PCIe to 5-Port SATA, JMB585 Chipset
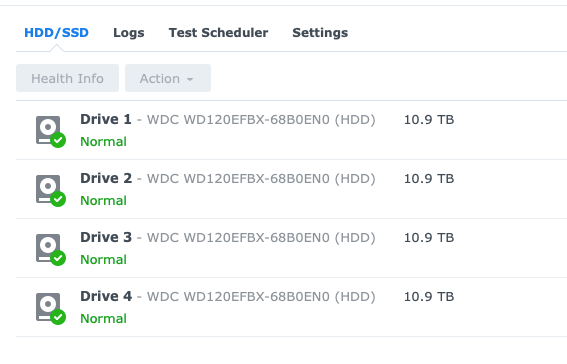
- HDD: WD Red Plus, 12TBx4, Synology SHR-2
Mini Node 1:
- CPU: Intel N95
- GPU: Intel UHD Graphics, SR-IOV Enabled
- RAM: Teamgroup DDR4 SODIMM, 32Gx1
- Proxmox Boot Drive: No name M.2 SATA SSD, 256GB (Stock)
- VM Drive: Crucial MX500, 500GB
Mini Node 2:
- CPU: Intel N95
- GPU: Intel UHD Graphics, SR-IOV Enabled
- RAM: Silicon Power DDR4 SODIMM, 16Gx1
- Proxmox Boot Drive: No name M.2 SATA SSD, 256GB (Stock)
- VM Drive: Samsung 860 EVO, 500GB
Mac Mini NAS:
- CPU: Apple Silicon M1
- RAM: 8GB
- System Drive: 512GB
- Thunderbolt Enclosure: Acasis TBU405
- HBA: IOCREST M.2 to 8-Port SATA
- HDD: WD Red Plus, 12TBx4, JBOD
- SSD: Samsung 870 Evo, 2TB
- SSD: Samsung 860 Evo, 1TB
- SSD: Crucial MX500, 500GBx2
- NIC: IOCREST Thunderbolt 10G-BaseT
Running the Numbers Again
Using the same calculation as before, running the node at 45W 24x7 costs $97/year. Then, the four HDDs will be active during off-peak hours, using 7Wx4=28 watts, which costs a bit less than $14/year. So ultimately, the main node now costs about $110/year to operate.
If I assume the two Mini nodes averages to about 8 watts, then they cost $34.5 per year.
Then, the Mac Mini NAS adds about 46 watts, that comes out to about $100, which I can further reduce by going with more flash storage.
So, in total, the whole setup costs $110 + $34.5 + $100 = $244.5, which is about $15 less than what where it was with one single node. However, the added benefits by distributing workloads to multiple servers made this worthwhile.
Thoughts and Conclusion
The journey to optimize my Proxmox node has been both challenging and rewarding. By breaking down the tasks into manageable phases, I was able to address the most critical issues first, such as reducing energy consumption and ensuring my services could continue running even when the main node needed maintenance.
Deploying Mini PCs to handle less demanding workloads and moving away from a single-node approach have proven to be effective strategies. Additionally, migrating from Unraid and TrueNAS to more energy-efficient and manageable solutions has allowed me to streamline my setup while still maintaining the performance and reliability needed for my lab.
The changes made so far have already shown a significant improvement in both energy efficiency and ease of management. However, there is always room for further optimization. In future updates, I plan to explore additional ways to enhance the energy efficiency of my setup, possibly by fine-tuning the power settings and exploring new hardware options that offer even lower power consumption without compromising performance.
Stay tuned for more updates as I continue to refine and optimize my Proxmox node, pushing the boundaries of what a home lab can achieve in terms of efficiency and functionality.
Potentially Important Foot Notes
The Choice of 10G NIC
I was originally going with Intel X710-DA2 as my 10G NIC since it supports ASPM and can potentially lower the idle power usage by allowing the CPU to go to a deeper C-state. However, the NIC just didn’t want to work with my CPU or motherboard. Every time the card was installed, the system refuses to power on. The PSU would just power on for a split second and then shuts itself off. I’ve tried all the PCIe slots on the motherboard, loaded BIOS defaults, unplugged all devices, and still can’t get it to boot. I’ve even tried taping off the SMBus pins but it just won’t play ball.
At first I thought it might be the firmware that is preventing the system from booting, so I plugged it into a Ryzen 7700X+B650 bench and it powered on with no problem, then I flashed the firmware to Intel OEM version. After installing it into the main node again, the system still failed to boot, so I went with my older X520-DA2 and it worked flawlessly.
Intel C-states
It is very important to know that if any, I mean any at all, activity is going on in a Proxmox guest, the CPU will not go to a package C-state deeper than C3. According to Intel’s documentation, the package will only go into C3 if all IA Cores are in C6 and Graphics cores in RC6, and the IA cores, aka processor cores, will flush the L1 and L2 cache when in C6 or deeper.
For a Proxmox host with a running VM, this is very hard, or nearly impossible to achieve on all cores. This is a screenshot of powertop output when the main node is active and has some light load:
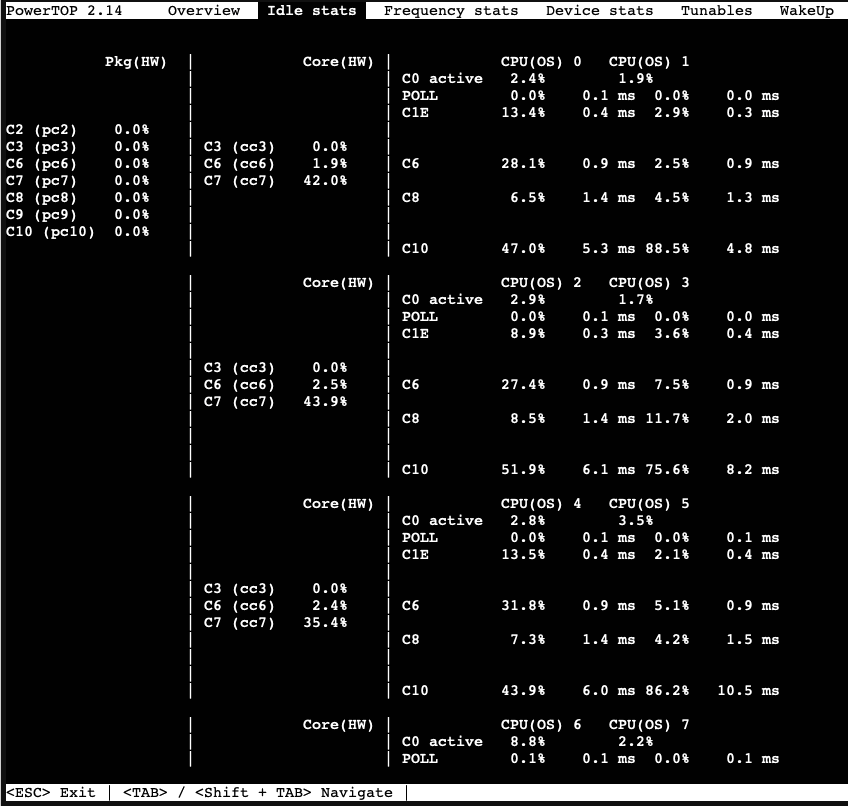
As you can see from the second and the third column, some cores will go into C6 or deeper, but very rarely they will all go into C6 or deeper together. So, the CPU won’t “idle” because Proxmox, as a hypervisor, has lots of processes to keep things in check.
Proxmox SMB/CIFS Polling
When a SMB/CIFS share is added to Proxmox as a storage endpoint, Proxmox would poll the mount every 10 seconds, effectively keeping it alive and spinning. So, if you are only using the share for backups at regular intervals and not VM instances, consider using a cron job to enable and disable the endpoint before and after the backup job so the disks can spin down.
Here’s a quick and dirty shell script to disable a storage:
#!/bin/bash

storage_id="YOUR-STORAGE-NAME"

/usr/sbin/pvesm set $storage_id --disable
Additionally, you can also re-enable the storage with this script:
#!/bin/bash

storage_id="YOUR-STORAGE-NAME"

/usr/sbin/pvesm set $storage_id --disable false
Remember to change the storage_id to your own names.
Choice of HBA for Synology VM
I went with a PCIe x1 JMB585 card because I know it would work, but there are other options out there. Synology used Marvell chipsets in their older machines so something like Marvell 9215 would also work, but it is PCIe 2.0 and fans out to four ports, so I’d take the JMB585 which is a PCIe 3.0 solution any day of the week.
Proxmox Passthrough Problem with ASPM On
In rare occasions, ASPM will cause problems for a PCIe device to be passed through. My WD Black SN750 NVMe drive has this exact problem, and ASPM has to be turned off in the kernel commandline. Here’s a post from Proxmox forum where an user experienced this exact same problem: https://forum.proxmox.com/threads/guest-internal-error-when-passing-through-pcie.99239/