Preface
In my last blog post, I said that I am working on a project for a Thunderbolt HBA. The reason behind it is simple: Apple Silicon is unparalleled when it comes to performance per watt, and the idle power consumption is very low (as low as 6-7 watts for the M1 Mac Mini that I am using for this tutorial).
However, people don’t like using it for anything other than a desktop computer, mainly due to the lack of internal expandability. The RAM and SSD in the Mac Mini can’t be upgraded, so using external drives is the only option.
There are a few external storage options that are readily available. For the sake of simplicity, I’ll be addressing them as DASes, or Direct Attached Storage since that’s what they are.
After doing some research, I came to the conclusion that these solutions are often expensive, and are focused to be put on a desktop, rather than tugged away in the server room. Take LaCie’s 2big as an example - it has two slots for 3.5” drives, an SD card reader, and a DisplayPort output, and does 550MB/s when in RAID 0 - not very performant.
Then, we have the OWC Thunderbay series ranging from four 2.5” drives to eight 3.5” drives. Now, this looks more promising than the LaCie already. Better yet, it claims a transfer speed up to 2500 MB/s or more, which is up against the bandwidth ceiling of a Thunderbolt 3 device. Nonetheless, this model costs $779.99 for the enclosure, and $899.99 if you add the SoftRAID package. Looking further, I learned that it uses Intel JHL-6540 Thunderbolt controller, and two JMicron JMB-585 chipsets for a total of eight SATA lanes. If you are unfamiliar with JMB585, you can read more about it in my other blog post here where I reviewed an M.2 HBA that has the same chip and a JMB575 port multiplier on it. Conclusion? Reasonably performant, but expensive for what it is.
My Solution
Since the Mac Mini is equipped with two Thunderbolt 3 ports, we can use readily available parts sourced from Amazon to make our own PCIe based SATA Host Bus Adapter from those Thunderbolt connections. In the context of this blog post, I will use the term "Thunderbolt" and "USB4" interchangeably since the core functionality, which is PCIe tunneling, works the same for both of the protocols.
This is how it works: I will use the USB4 NVMe enclosure to act as a PCIe adapter. Then, I will put a PCIe SATA controller - in the form factor of M.2 - into the enclosure. Finally, we will use the SATA ports coming from the M.2 HBA to connect our drives. Of course, don't forget to connect the NVMe enclosure to the Thunderbolt port found in the Mac Mini.
The concept works because both Thunderbolt and USB4 have the ability to tunnel PCIe lanes. Thunderbolt 3 in particular can tunnel a PCIe 3.0x4 connection, enabling a 32Gbps data transfer speed on paper. In reality, this limit is closer to a bit less than 29Gbps, or about 2800 MB/s. Needless to say, this kind of bandwidth is more than enough for the drives and HBA we are going to use.
After I retired Synology RackStation RS3413xs+, I have a few HDDs lying around for me to experiment on stuff. This time, I’d be using them in this project - a Mac Mini NAS with eight disks.
First and foremost, let’s go over some of the parts used.
- Mac Mini, M1, 8 GB RAM, 512 GB SSD
- Inateck 40 Gbps USB4 M.2 NVMe Enclosure, ASM2464PD USB4 Chipset
- IOCREST M.2 HBA, JMB585+JMB575 Chipset
- Samsung 870 EVO, 2 TB
- Samsung 860 EVO, 1 TB
- Crucial MX500, 500 GB x 2
- Western Digital Red Plus, 12 TB x 2
- Western Digital Red Pro, 8 TB x 2
- SFF8087 to Four SATA Ports Cable x 2
- SATA Power Cable, 1-to-5, x 2
- CMT SFF 750W Power Supply
- ATX 24 Pin Jumper
…and a few miscellaneous hardware like hard drive cages and stuff.
Wiring it All Up
Per my previous review, the ports on this particular M.2 HBA aren’t created equal. The first four ports are from the JMB585 chipset itself, which are the full bandwidth SATA 6Gbps ports. Then, the last four ports are multiplexed by taking one port from the JMB585 and fans out to four extra SATA ports, so these would only share bandwidth of one SATA 6Gbps lane when accessed together. If only one disk is accessed at a time, it should come very close to the full bandwidth.
So, the for the first four ports, I connected the two Samsung and two Crucial SSDs. As for the last four ports, they will be occupied by the HDDs.
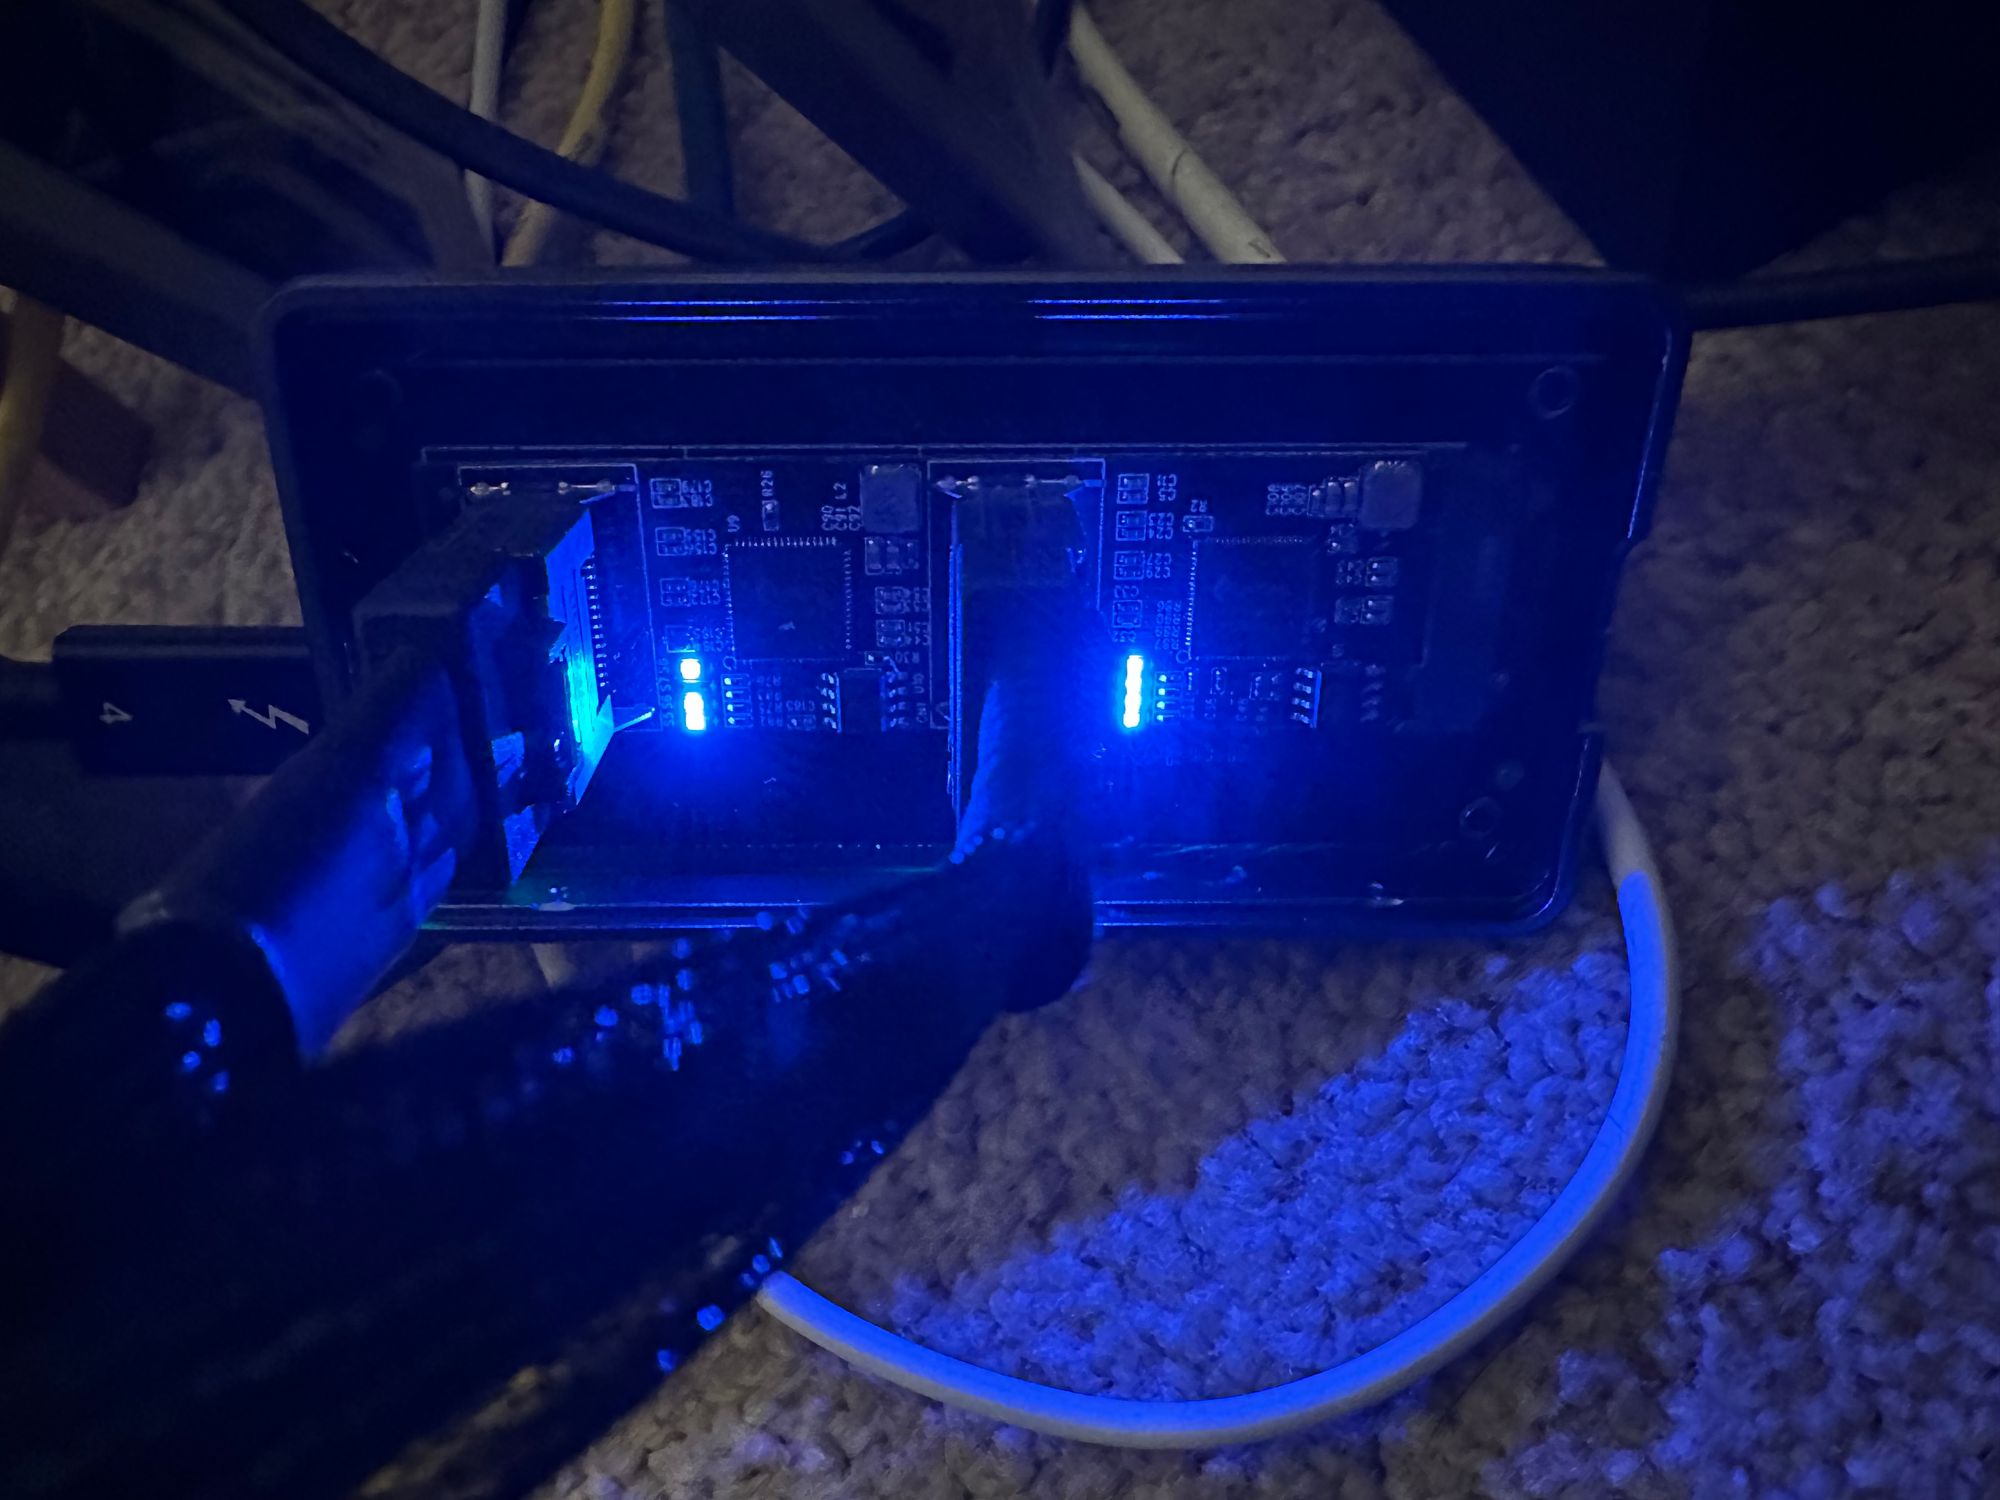
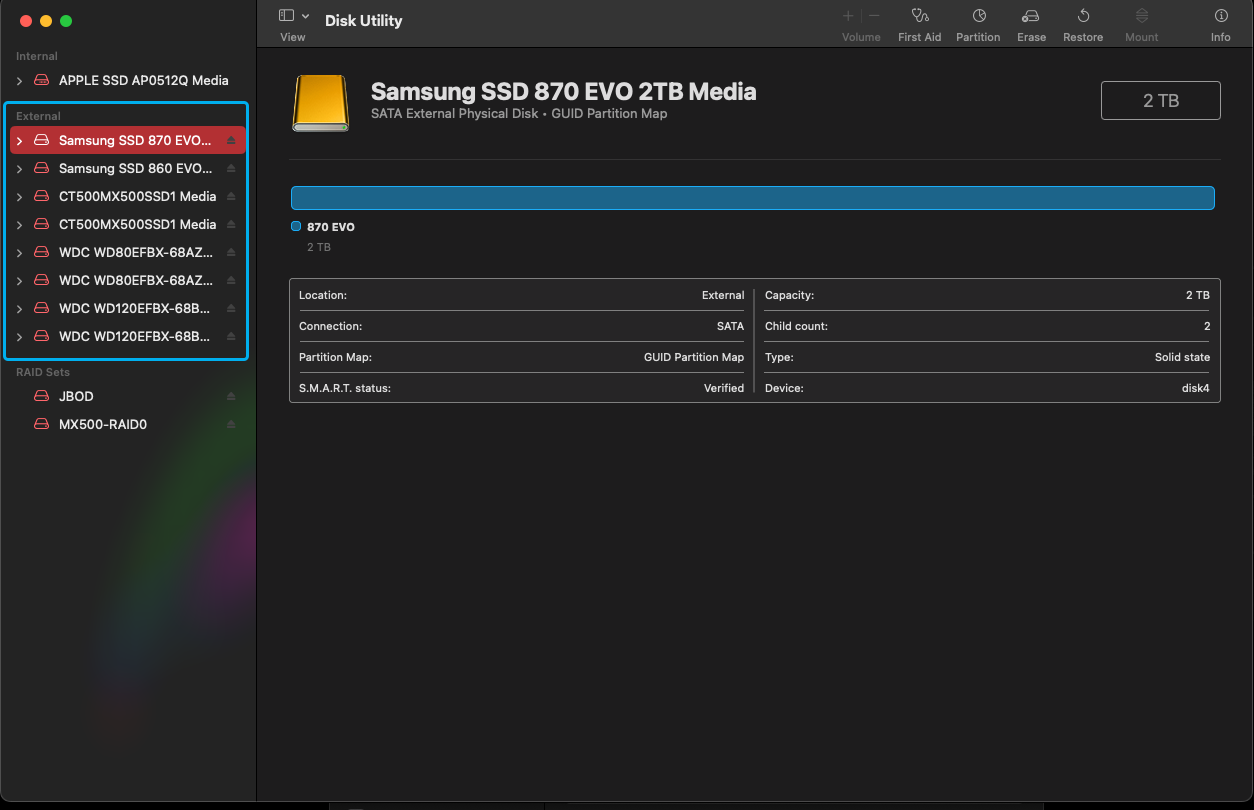
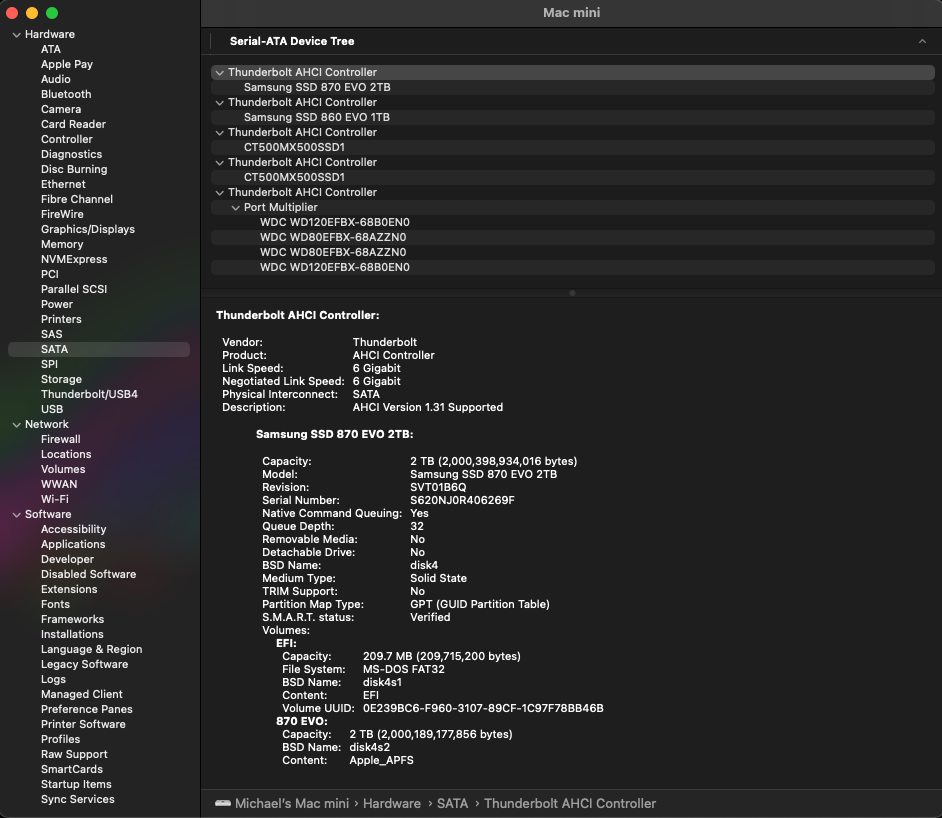
Here’s what it looks like in MacOS:
Both the USB4 controller, SATA controller and port multiplier are correctly identified in System Information app:
Setting Up the Disks
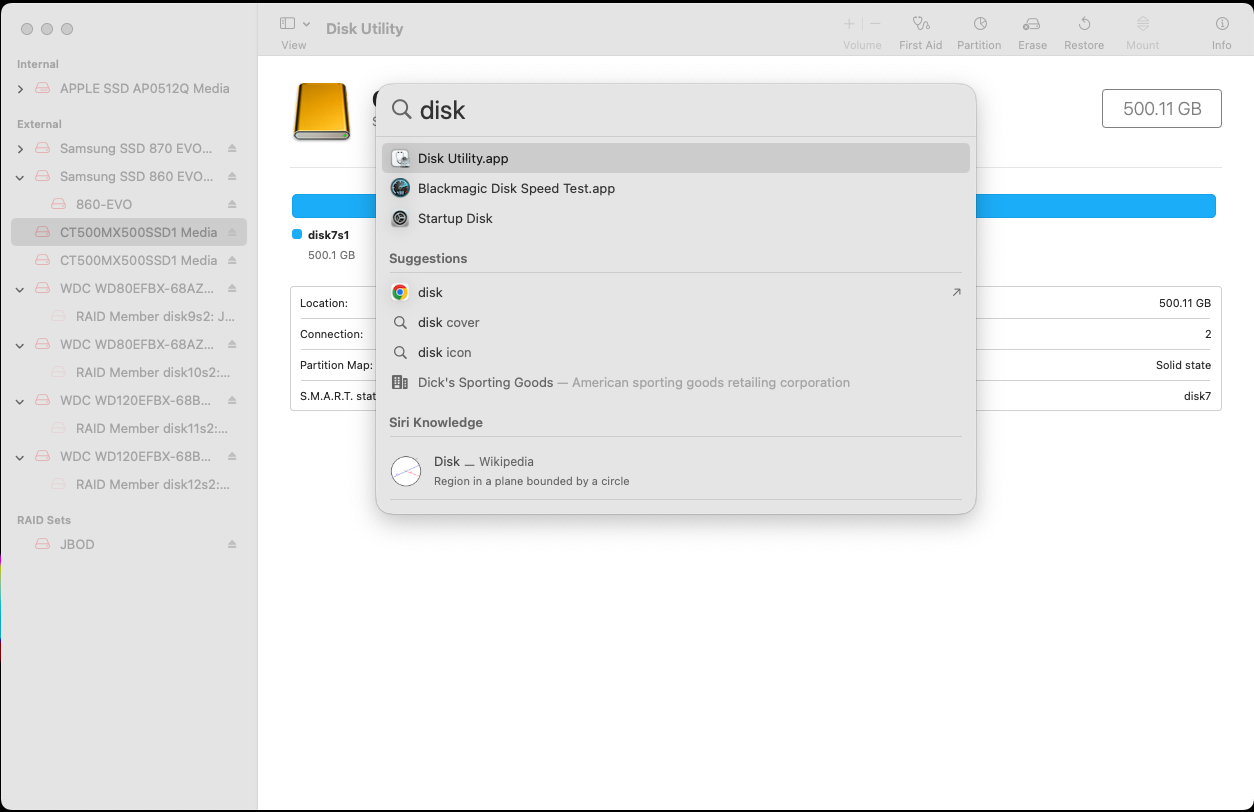
This is very easy to do in MacOS. First, go to “Disk Utility”. If you don’t know where it is, just type it out in Spotlight by pressing CMD+Space.
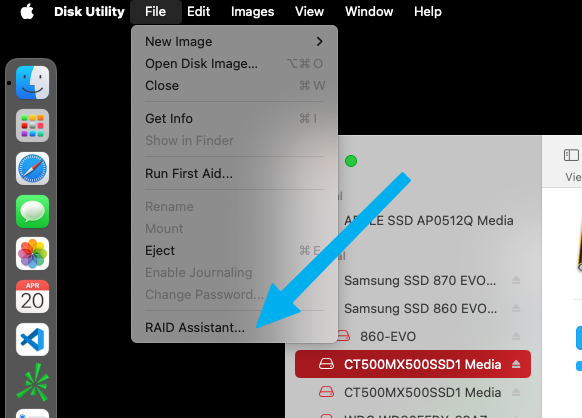
Then, go the upper left corner, click on “File”, and locate the menu item called “RAID Assistant”. Click on it to bring up the RAID setup screen.
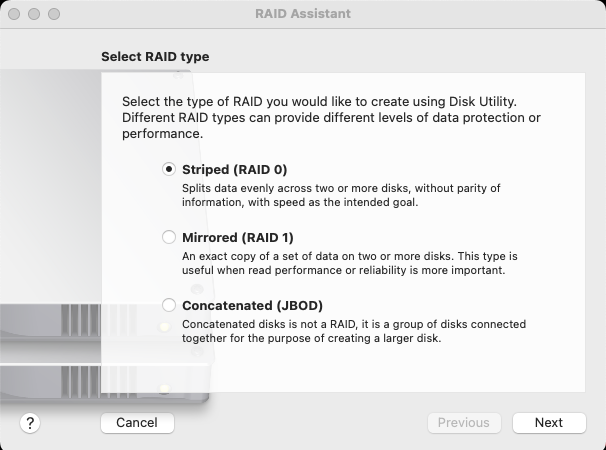
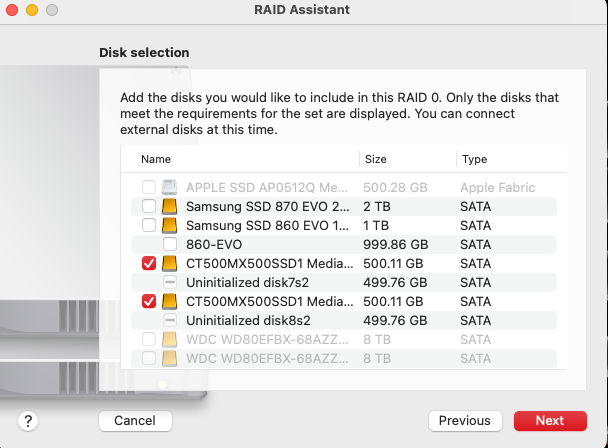
The first step is to choose a RAID level. There are three options: RAID 0, RAID 1, or JBOD. I am not going into too much detail here about each RAID level. In this example, I am going to use two Crucial MX500 to build a RAID 0 array.
Next, we will select the target disks for building this RAID array. Here, I selected the two Crucial SSDs.
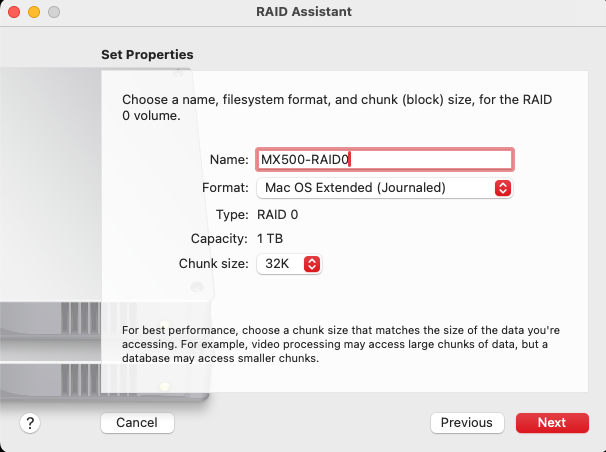
After that, give it a name so you can identify the array more easily. I left everything else in default.
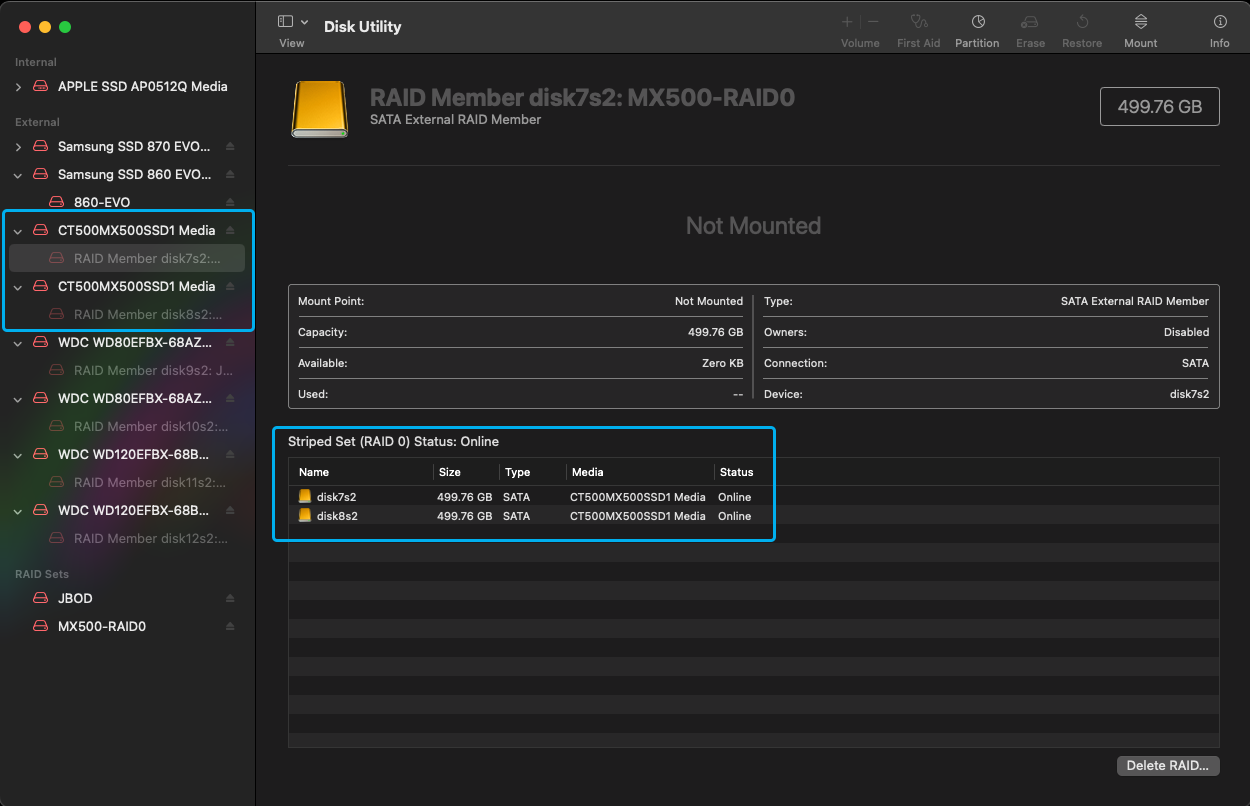
Finally, MacOS will do its thing and start building the array. When it is done, you will see it show up in the Disk Utility app.
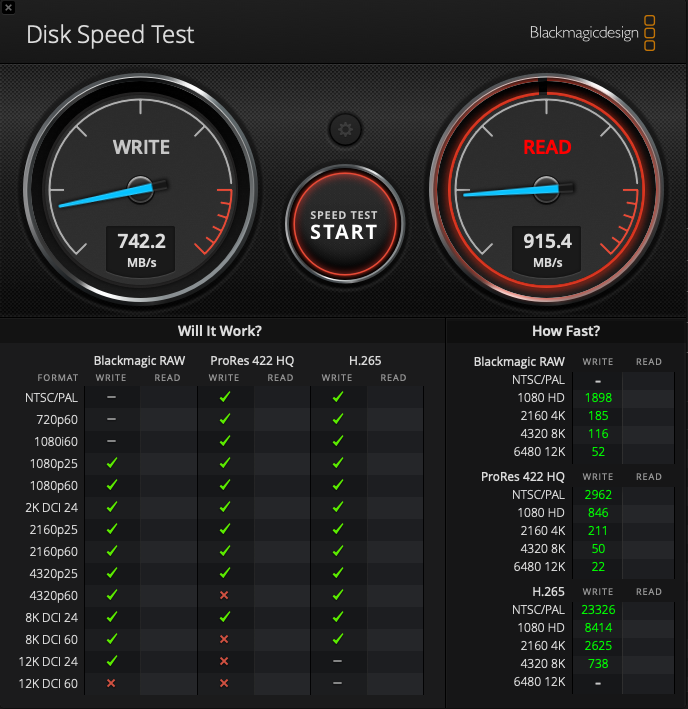
So how fast is it? I ran a Blackmagic Disk Speed Test, the RAID 0 array achieved a write speed of 742.2 MB/s and a read speed of 915.4 MB/s. Not quite the speed I am looking for in a SATA SSD RAID 0 array, but these drives are old. But, do you remember the LaCie 2big? That thing can only do 550 MB/s, which is way slower than my janky setup here.
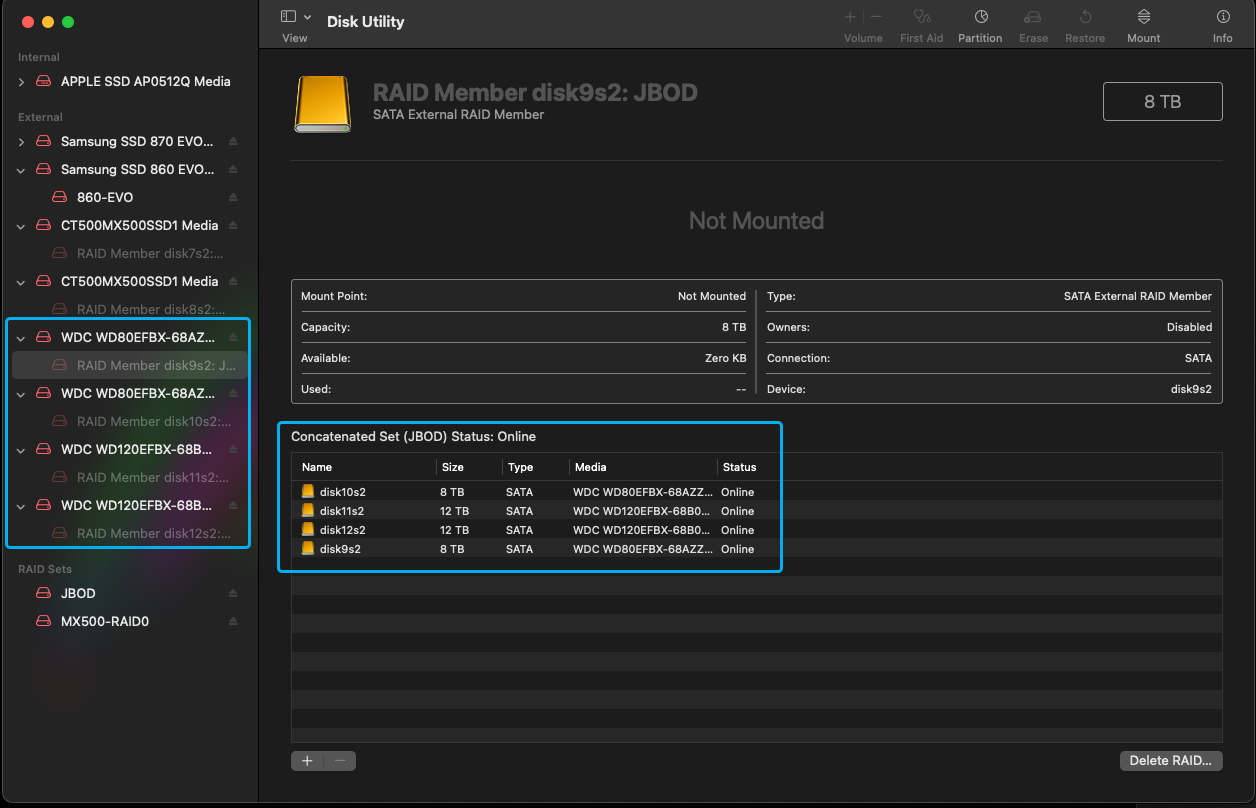
By following the steps above, I’ve also set up a JBOD array for the four HDDs for storage. Normally, for four disks, I would at least run a RAID 5. But since these drives are mixed, and this most likely won’t be my long term setup, I couldn’t care less. Here’s what the 40TB JBOD array looks like:
Enabling NAS Features
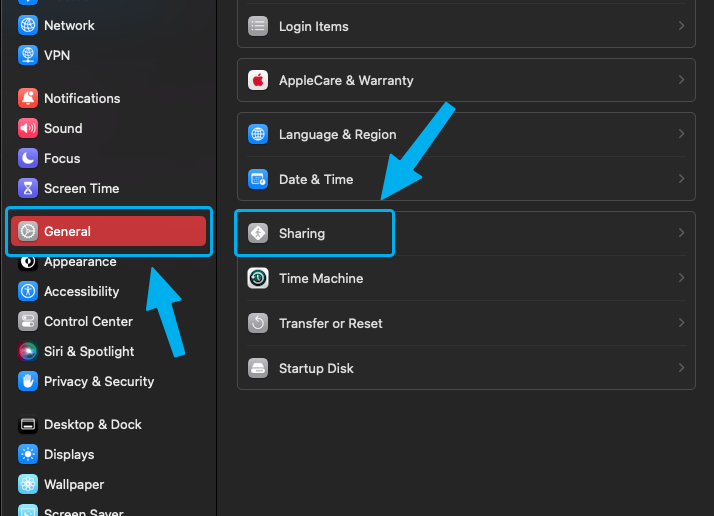
This too is very easy to do in MacOS. First of all, head to System Settings and go to “General”, then look for “Sharing” on the right panel.
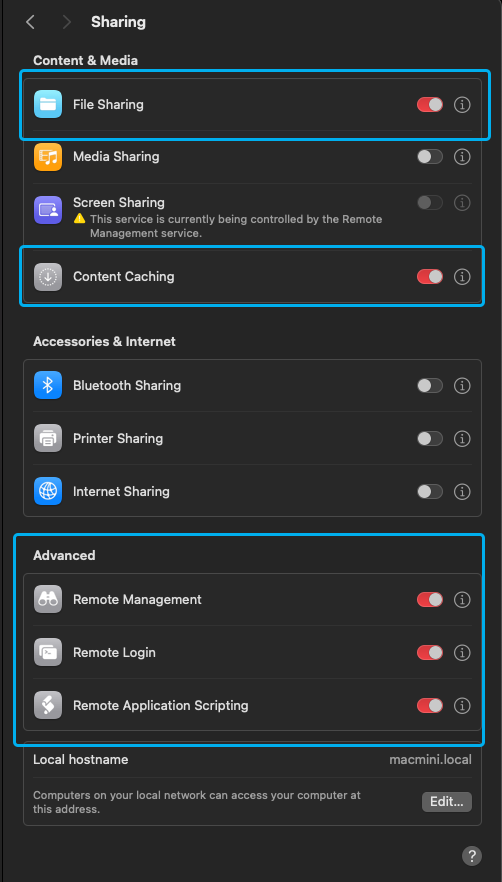
In Sharing menu, turn on “File Sharing’ to share files over the network.
Another good feature to enable is “Content Caching”. If you have lots of iOS and MacOS devices, this functionality will cache the system updates so that if one device gets an update, all others would get the update from the local network, instead of from Apple’s server.
If you want to run this server headlessly, which I think most NAS users do, turn on “Remote Management” and “Remote Login” at the minimum. If you want to have more advanced usage like running scripts unattended, turn on “Remote Application Scripting” as well, which I am not going to cover in this post.
When the needed features are enabled, click on the circle exclamation mark next to “File Sharing”. In this panel, you can setup ACLs for each share, and what folders should be shared. I added all the disks plus a partition to be shared as a network Time Machine Backup.
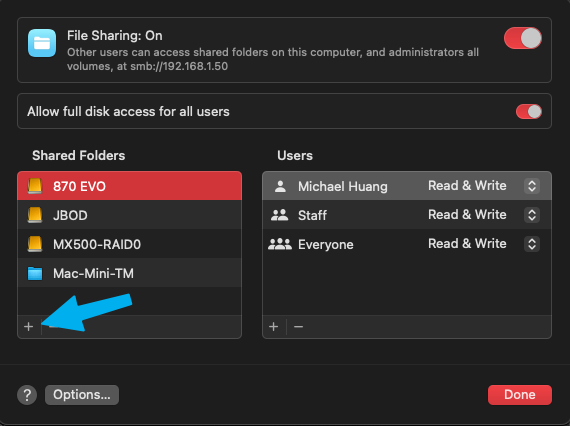
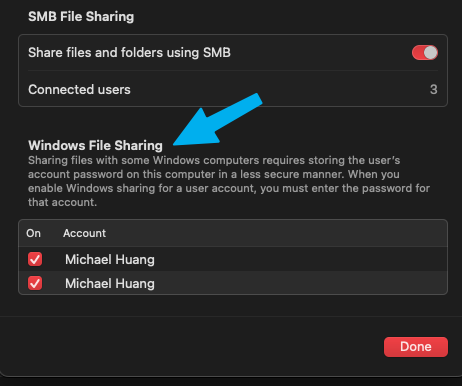
When all that’s added and configured, head on down to “Options...” menu. If you have anything other than Apple devices that need to access the NAS, make sure to turn on “Windows File Sharing” for the user. For example, if my Jellyfin library is on this Mac, and I need to stream it from my TV which runs Android, I would need to check the box next to my user name so I can connect to the SMB shares.
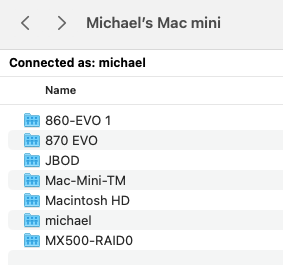
Now it should be all set up and ready to go. This is what it looks like from my Mac Studio:
If you are using a Windows PC or Linux PC, just set it up like you would normally do when setting up a SMB share.
Extra System Settings
Power On After AC Loss
For a server-like experience, I suggest turning this feature on so in the event of power loss, after the power comes back on, the Mac will just turn itself back on without human interference.
You can find this setting under “System Settings” - “Energy Saver” - “Start up automatically after a power failure”.
HDD Spindown
In the same menu, you will find the option to spin down drives to save power when they are not in use. I find it very useful so I turned that on.
In addition to that, you could also use a terminal command to set the spindown timer - mine is set to 15 minutes.
sudo pmset -a disksleep 15
This command sets the spindown timer to 15 minutes. Change the “15” to whatever value you see fit.
Wake on LAN
Usually, this Mac NAS won’t be going to sleep, at all. However, there’s a remote possibility that it does, so, in the same “Energy Saver” menu, turn on “Wake for network access” option to access it when it enters sleep.
Disable Spotlight Search for Shared Folders
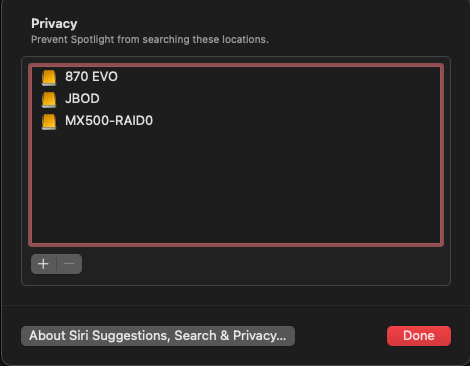
Since these folders would most likely to be access over the network and not on this machine, you could turn off Spotlight indexing for them. Go to “System Settings” - “Siri & Spotlight”, scroll down to the bottom, and click on “Spotlight Privacy”. Then, use the plus button, and add all the locations that won’t normally be accessed from this machine locally. Click on “Done” when finished.
Setting Up iOS to Access The NAS
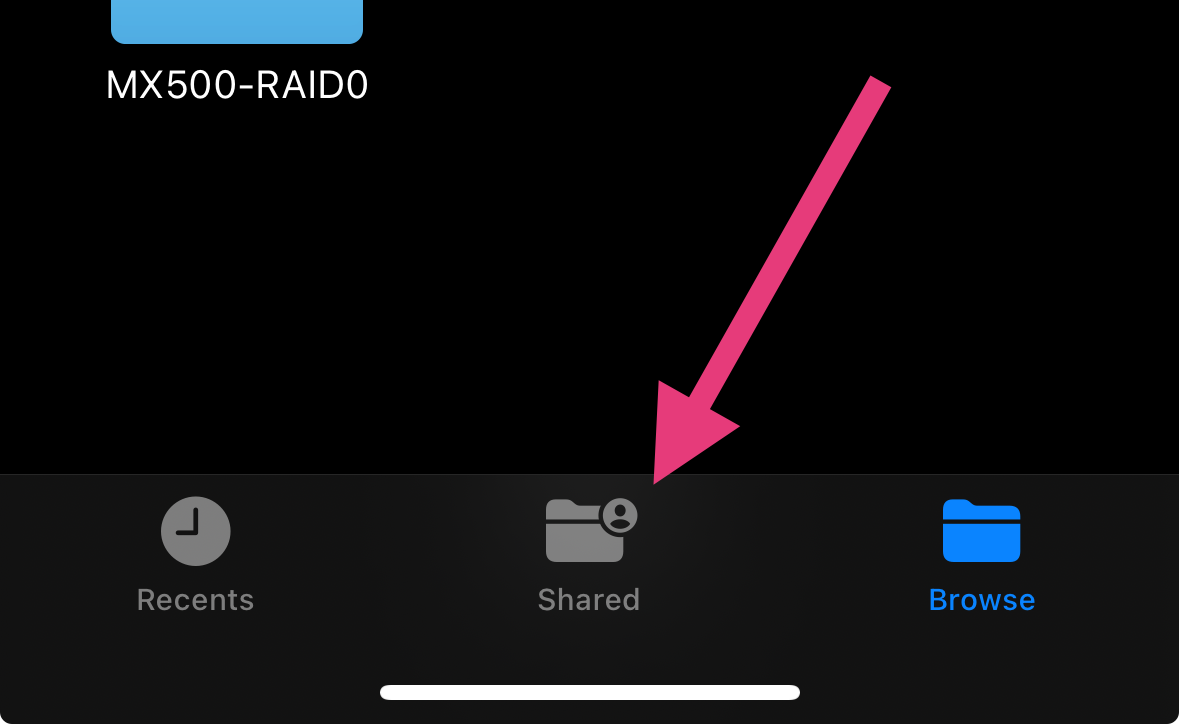
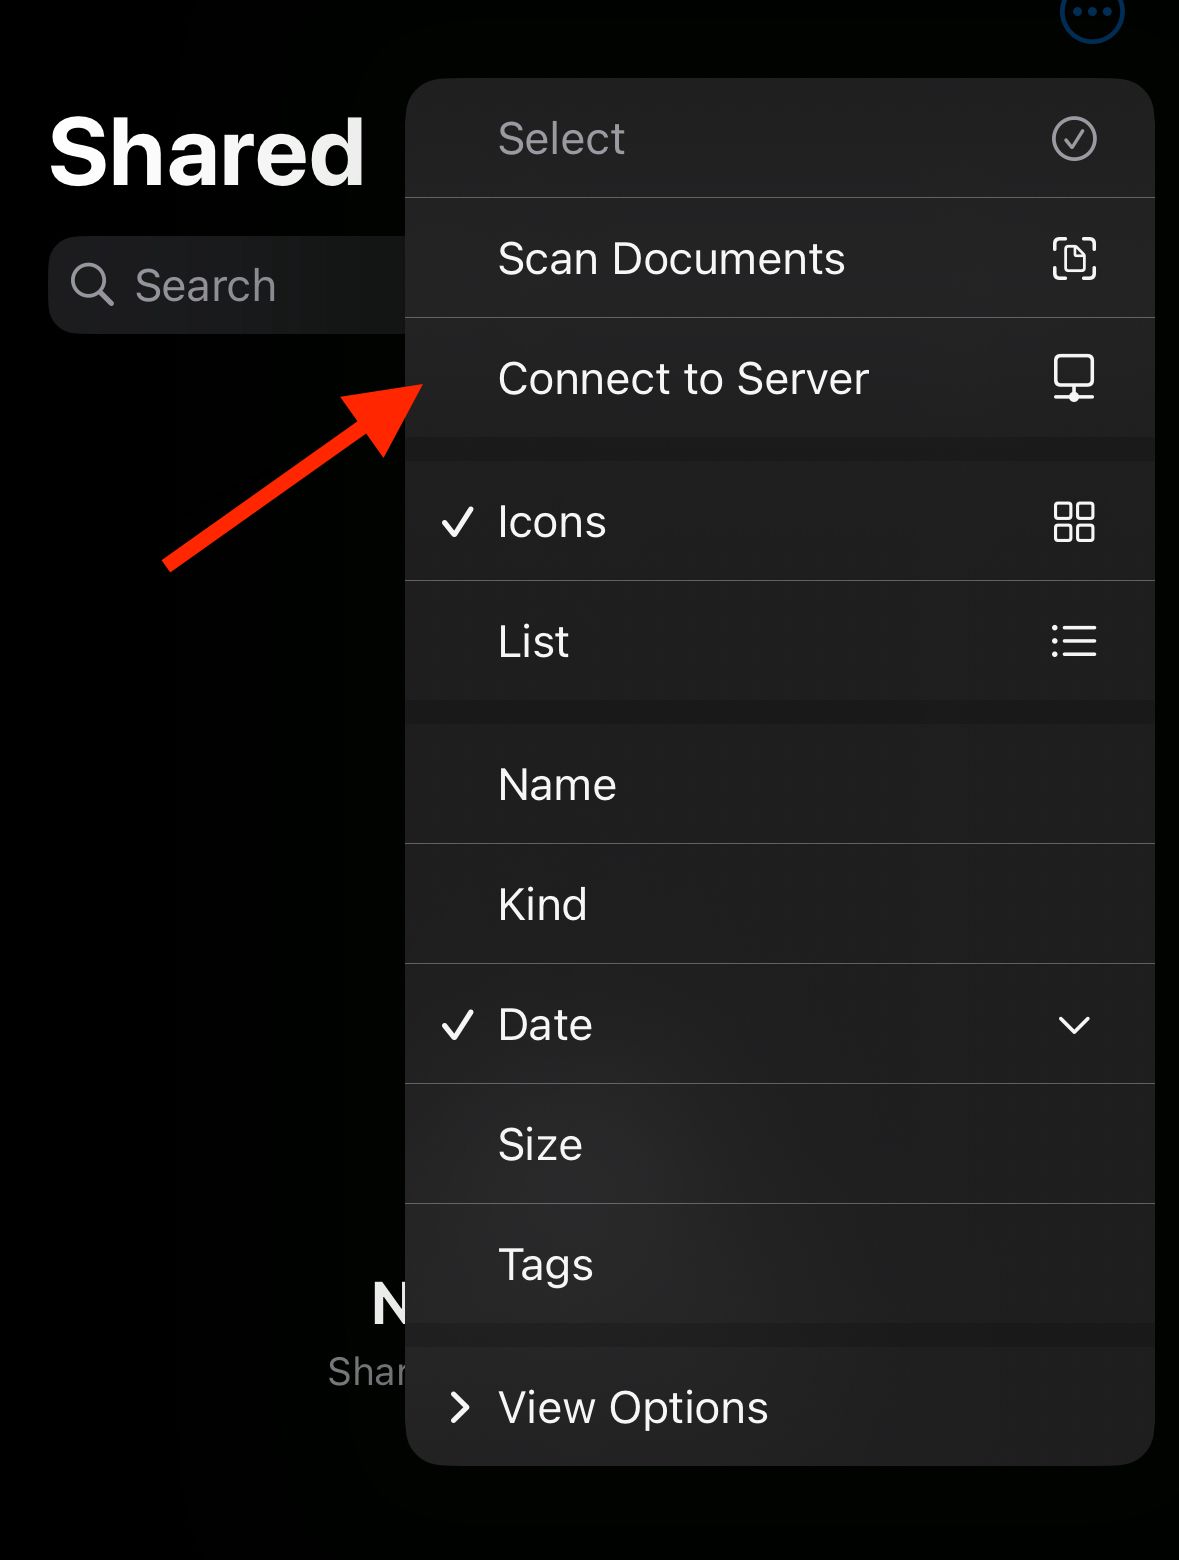
In your iOS device, open “Files” app. At the bottom of the screen, tap on ‘Shared”.
Then, go to the upper right corner, tap on the three dots, tap on “Connect to Server”.
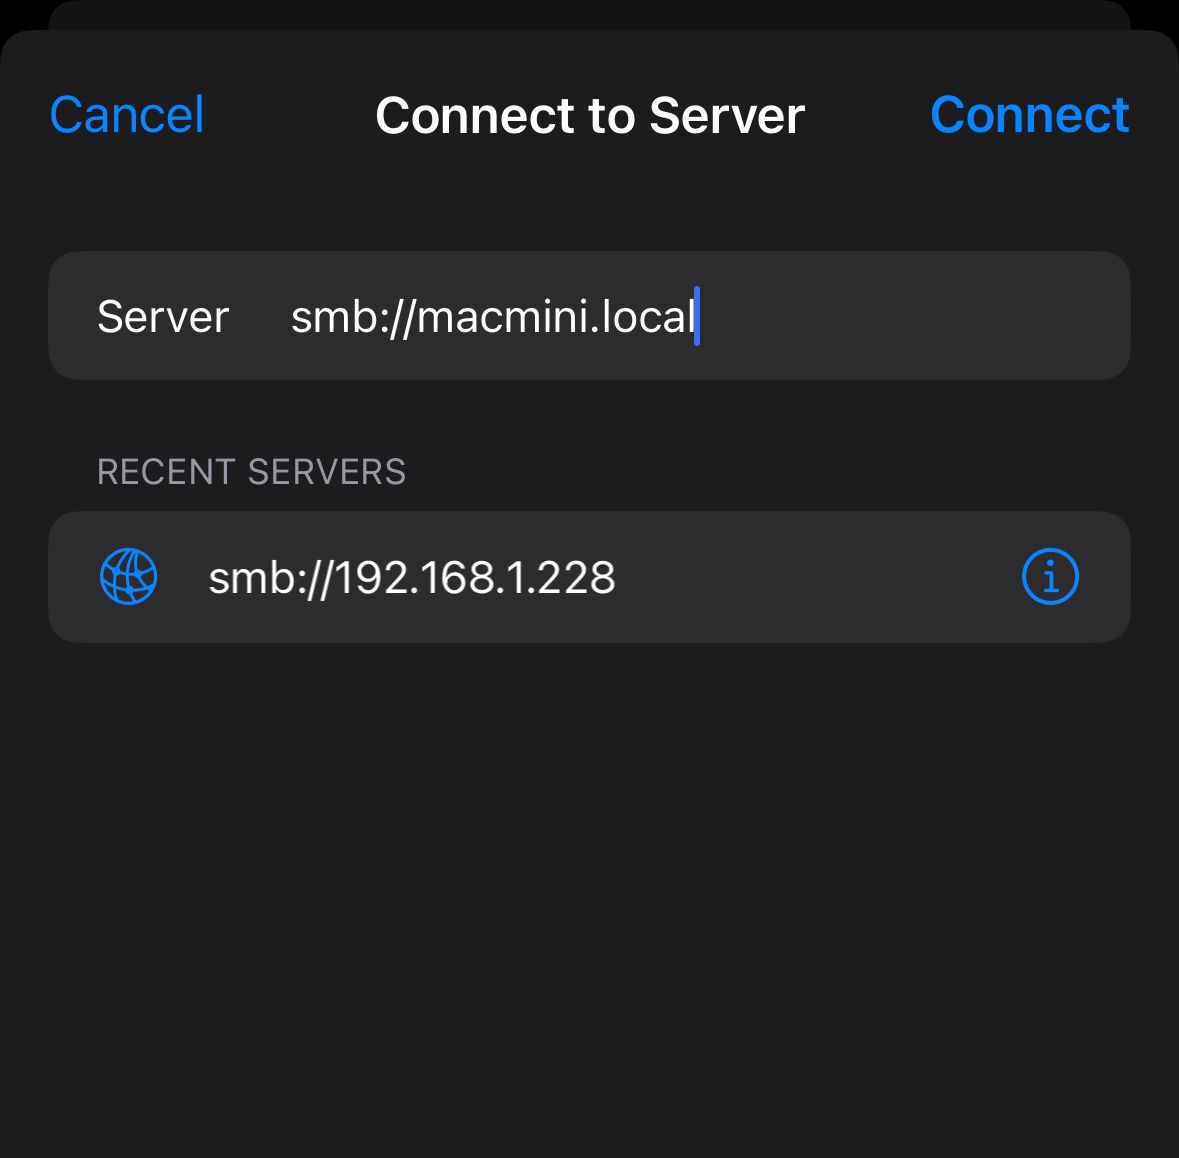
In the next screen, enter the IP address or local domain name of your Mac NAS, then tap “Connect”.
After that, fill in your user login information for the Mac NAS that you are accessing.

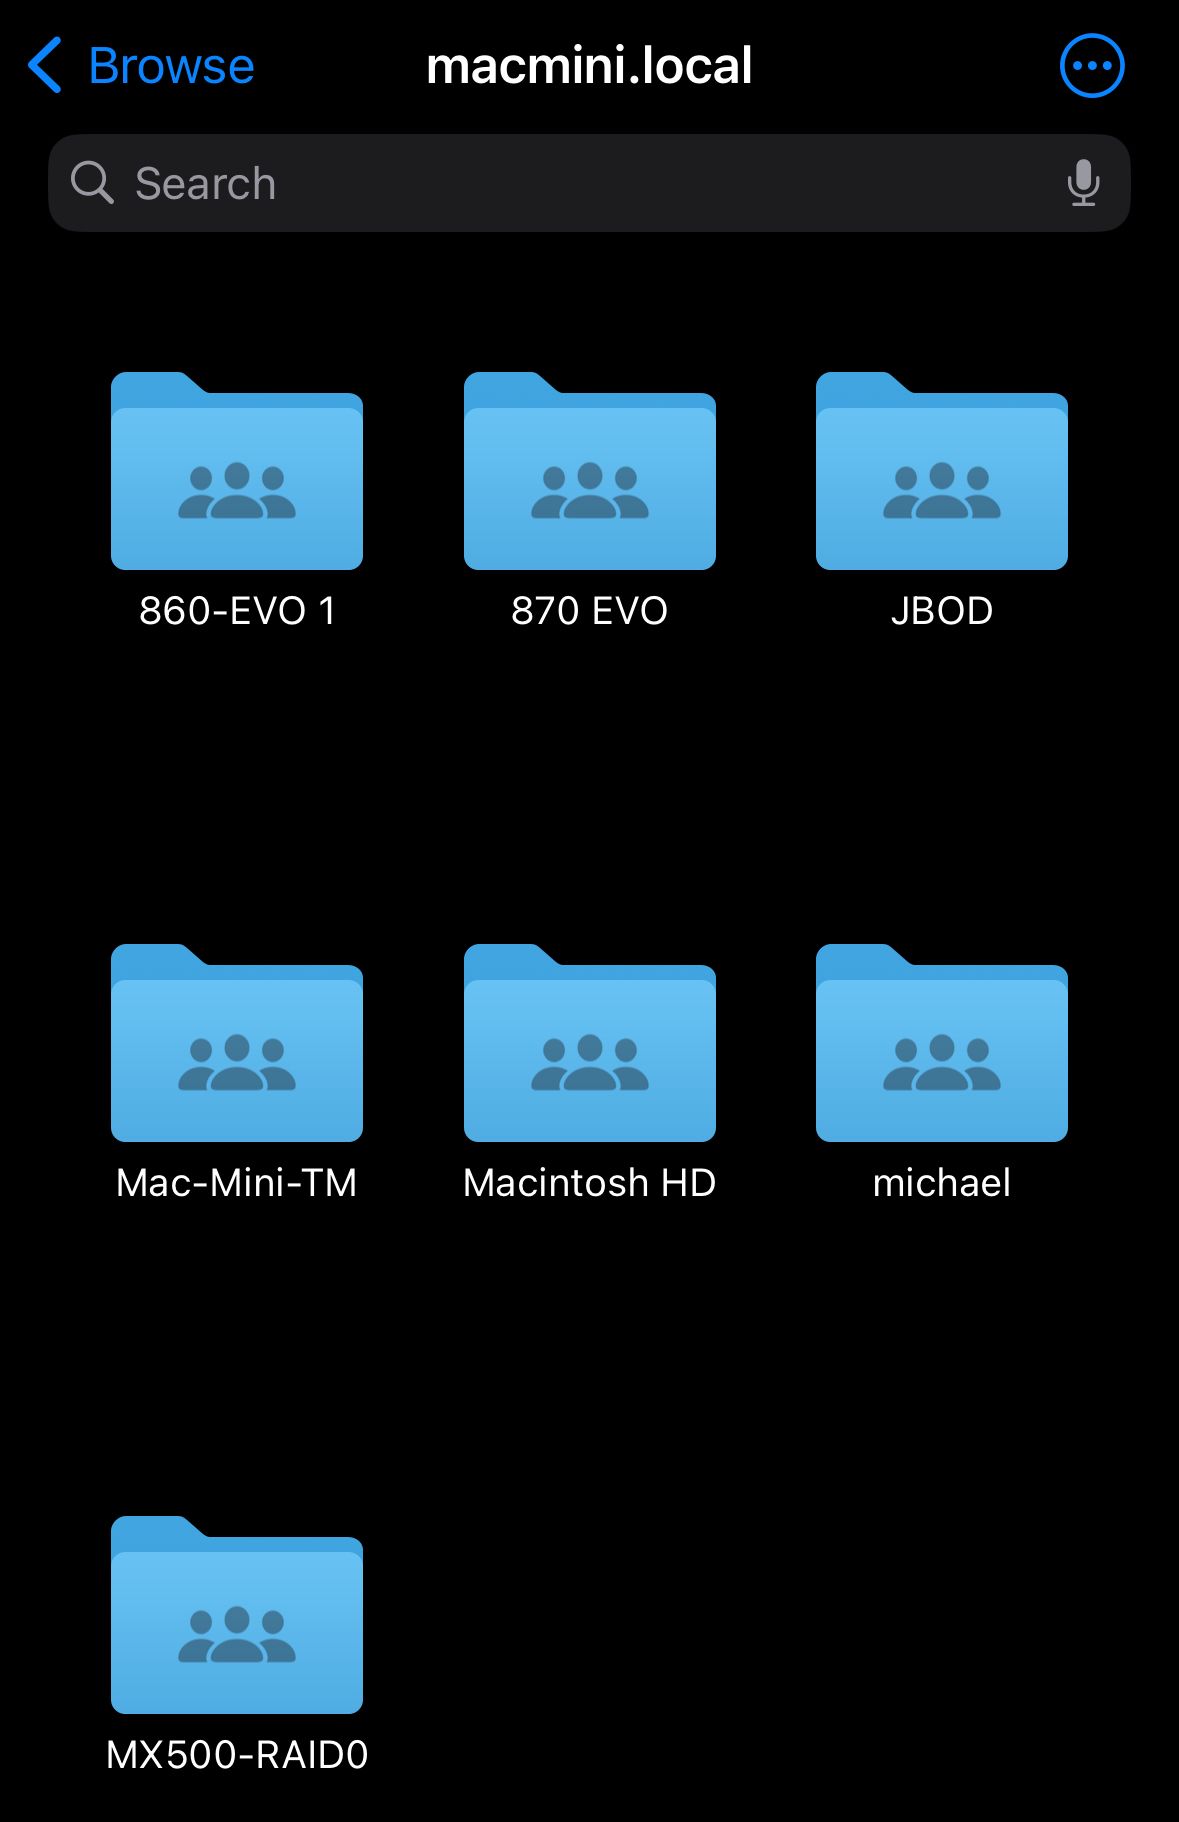
If it all checks out, you should see the shared folders on your iOS device.
Power Consumption
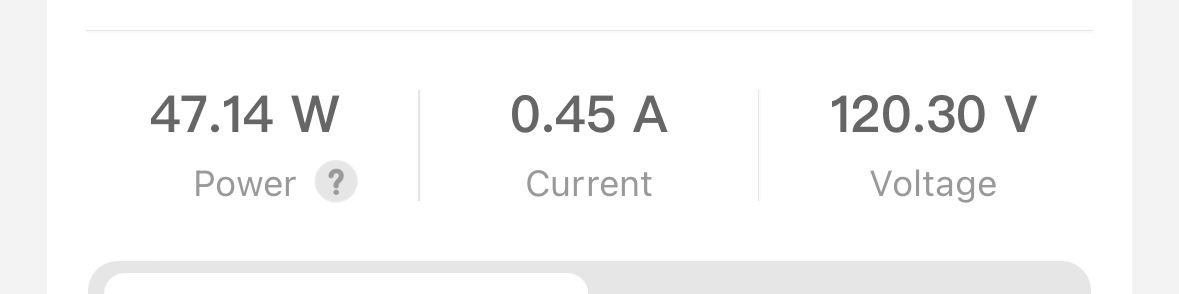
These are the numbers I get from my Govee smart plug, which measures the power from the wall for both the Mac Mini and the drives powered by a seperate PSU.
Please note that the power supply itself uses about 5-7 watts when powered on with a jumper and doing nothing.
When the disks are not in spindown and the system is up, it uses about 48 watts in total.
When the HDDs spun down, it uses about 20 watts. Given the WD Reds uses about 7 Watts each when active, this number seems about right:
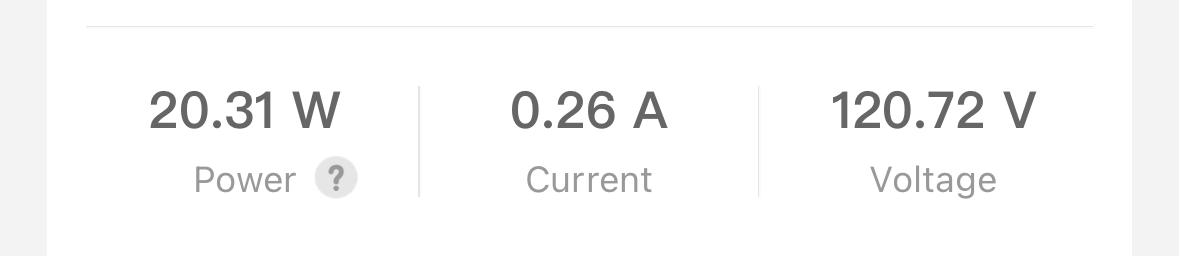
If we take the base power usage from the PSU, which is about 6 watts, subtract that from the total power usage of 20 watts, we’d get 14 watts used by the Mac Mini and four SATA SSDs. The Mac Mini itself idles at 7 watts, so the four SSDs are using about 7 watts, too. If I size the PSU correctly by going with a 350W or even a 250W unit, it should use even less, but that’s not worth my time to cut down another 1-2 watt at idle.
The Catch
Well, everything is looking all rosy and butterflies, but there is one big caveat: this Mac NAS is capped at 1GbE speed networking. Thankfully, the Mac Mini does come with two Thunderbolt ports, and we can utilize the other one for a 10GbE connection.
Of course, there are USB ports that you can plug an extra 2.5GbE USB dongle in, but I find that way too finicky. That’s why I am adding 2.5GbE networking hardwired to PCIe in my other project.
At the moment, I will just stay with 1GbE speeds, which means about 110 MB/s of transfer speed over the network.
Cost Breakdown (Without Drives)
The links below are Amazon Affiliated Links. If you buy from these links, I would get a small cut from Amazon, which helps me to push out more contents.
USB4 Enclosure: $71.99
IOCREST HBA: $32.79, SFF8087-SATA cables included
PSU: About $50, any PSU would work
SATA Power Splitter: $11.99
Drive Cages: $24.99 - I got these from a Hong Kong Website a long time ago, the link is the closest I can find on Amazon.
Total: $141.76 Without the drives.
What’s Next
In this blog post, I detailed the thought process and the actual assembly of how to turn a base spec Mac Mini into a NAS power house with flash storage and 40 TB of HDDs. In my next post, I will be showing you guys how to setup some actually useful NAS apps with Docker to get more out of the system.
If you like the idea and would like to further explore the possibility of Thunderbolt, you can read more about my another project here, where I am taking the core concept of this blog post, and turn it into a single device that can do the job better, and make the whole setup a lot cleaner.