Preface
After I published my Mac Mini NAS guide, a Reddit user pointed out that having flash-based storage in a GbE-limited Mac Mini seemed pointless. While they had a valid point, my setup isn't just for a one-off review—it's part of my ongoing configuration. Everything I document on this blog reflects my current setup that I continue to use and improve. I have plans for the Mac Mini NAS down the road, and today, I'm excited to add 10GbE to it with this Thunderbolt 10G NIC from IOCREST.
IOCREST Thunderbolt 10G NIC
I bought this from IOCREST’s official store on AliExpress for about $85. This is an exceptional price for a 10G RJ45 NIC, especially a Thunderbolt one. OWC sells one for $199.99, Sonnet has one for $199.99, and Sabrent prices its offering at $159.98. I don't have other Thunderbolt 10GbE NICs to compare it against, so I'll just document my experience with the product.

The packaging is very simple, which may have contributed to such a competitive price.

After opening the box, the Thunderbolt NIC is presented.
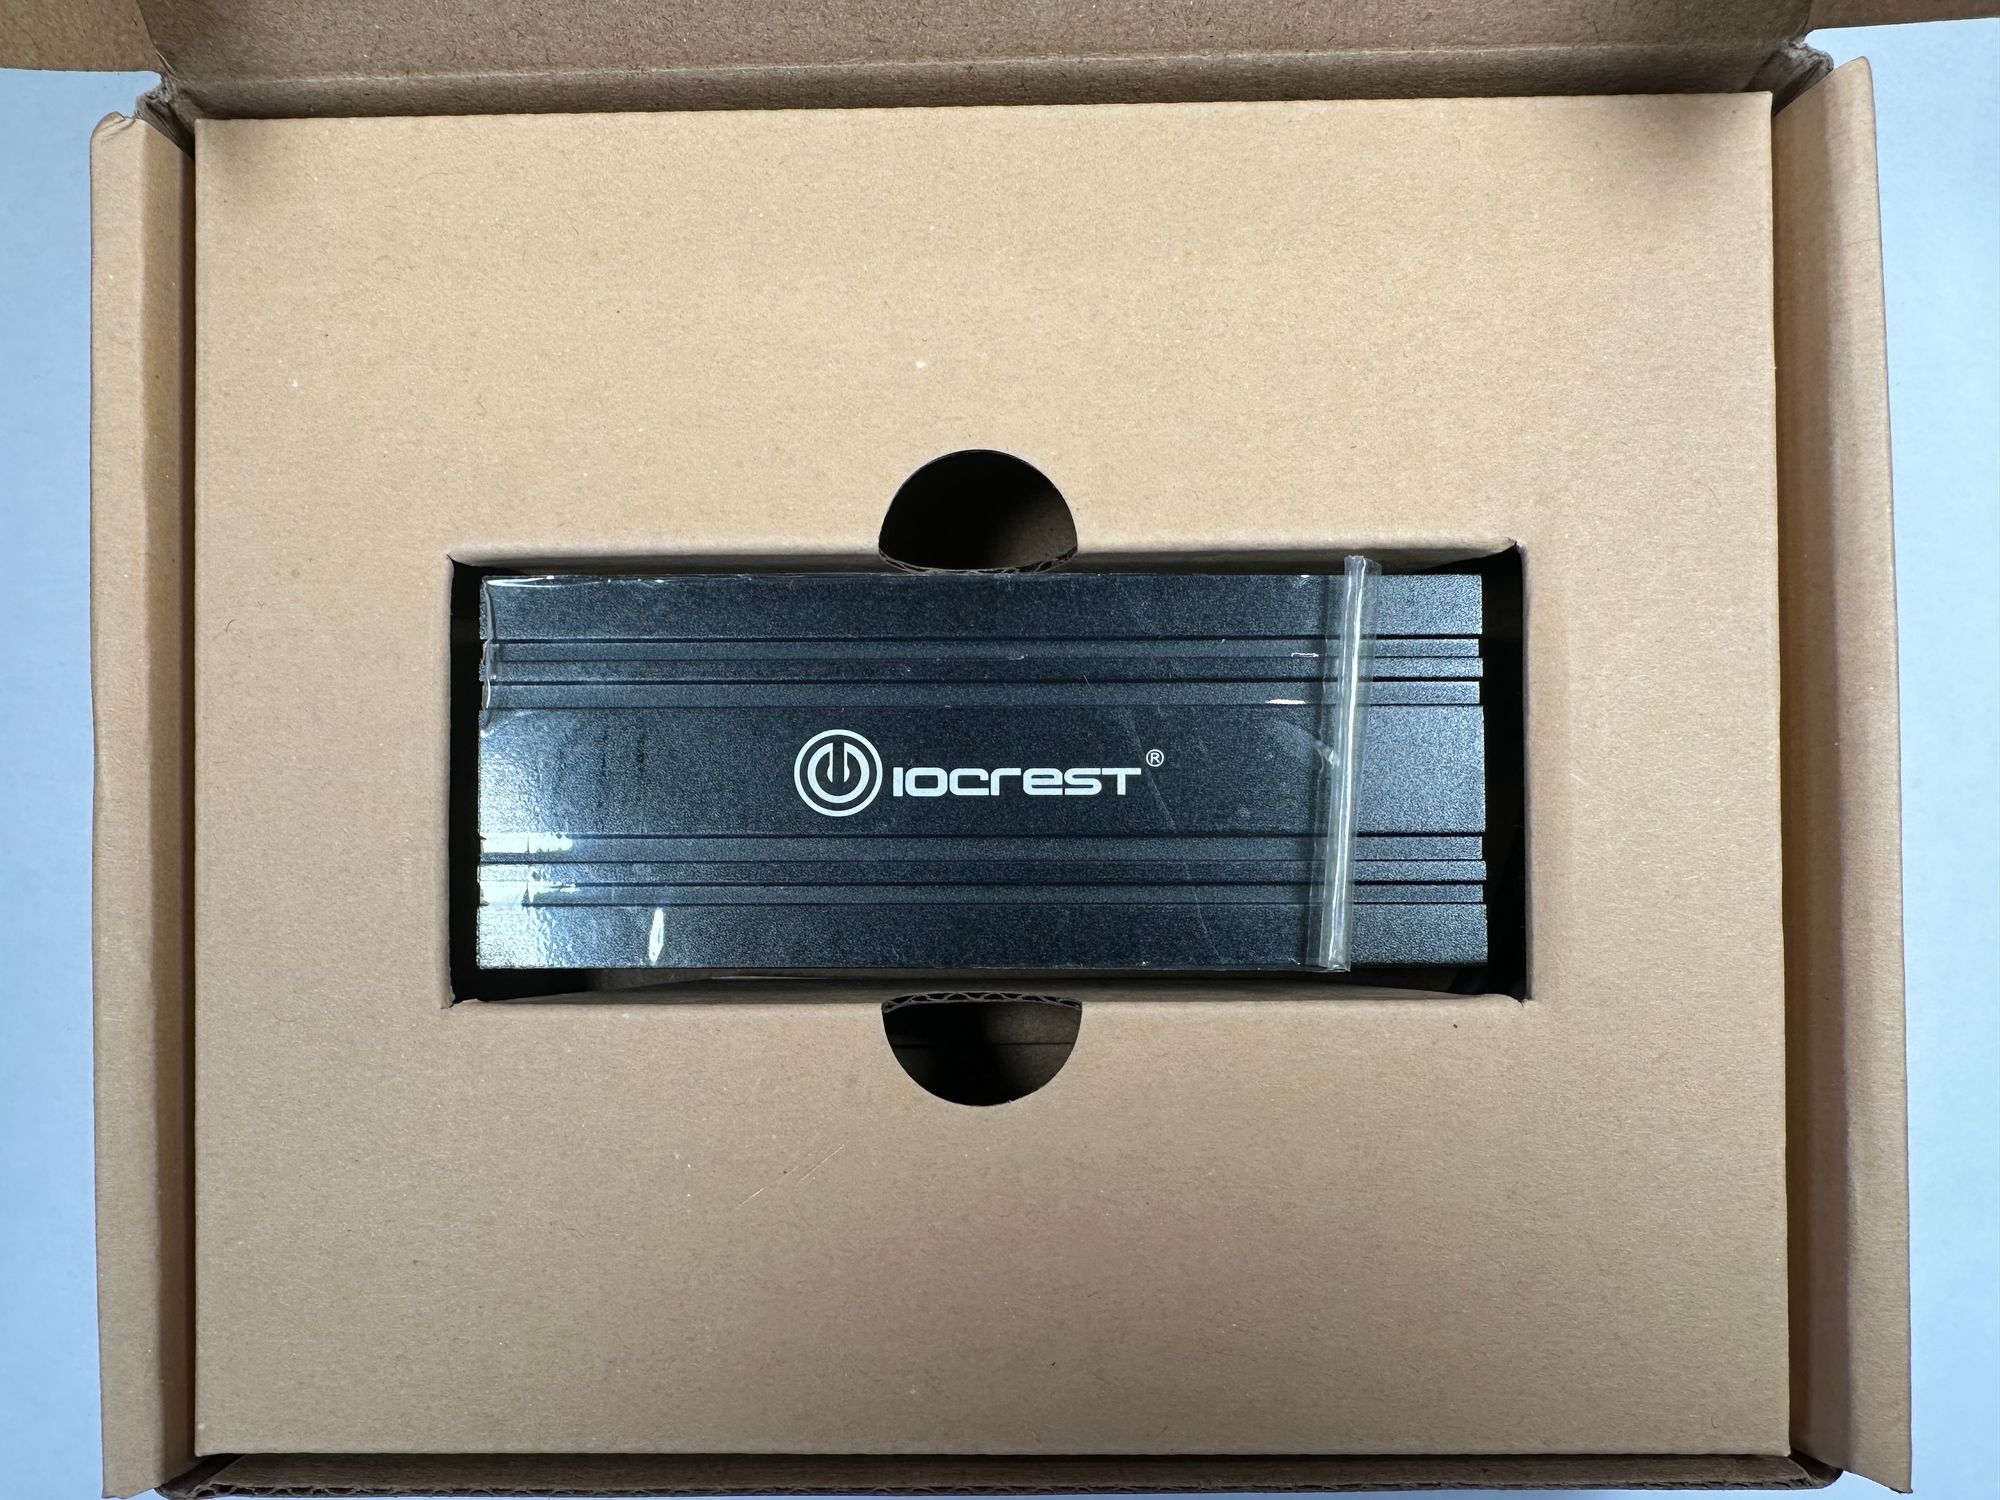
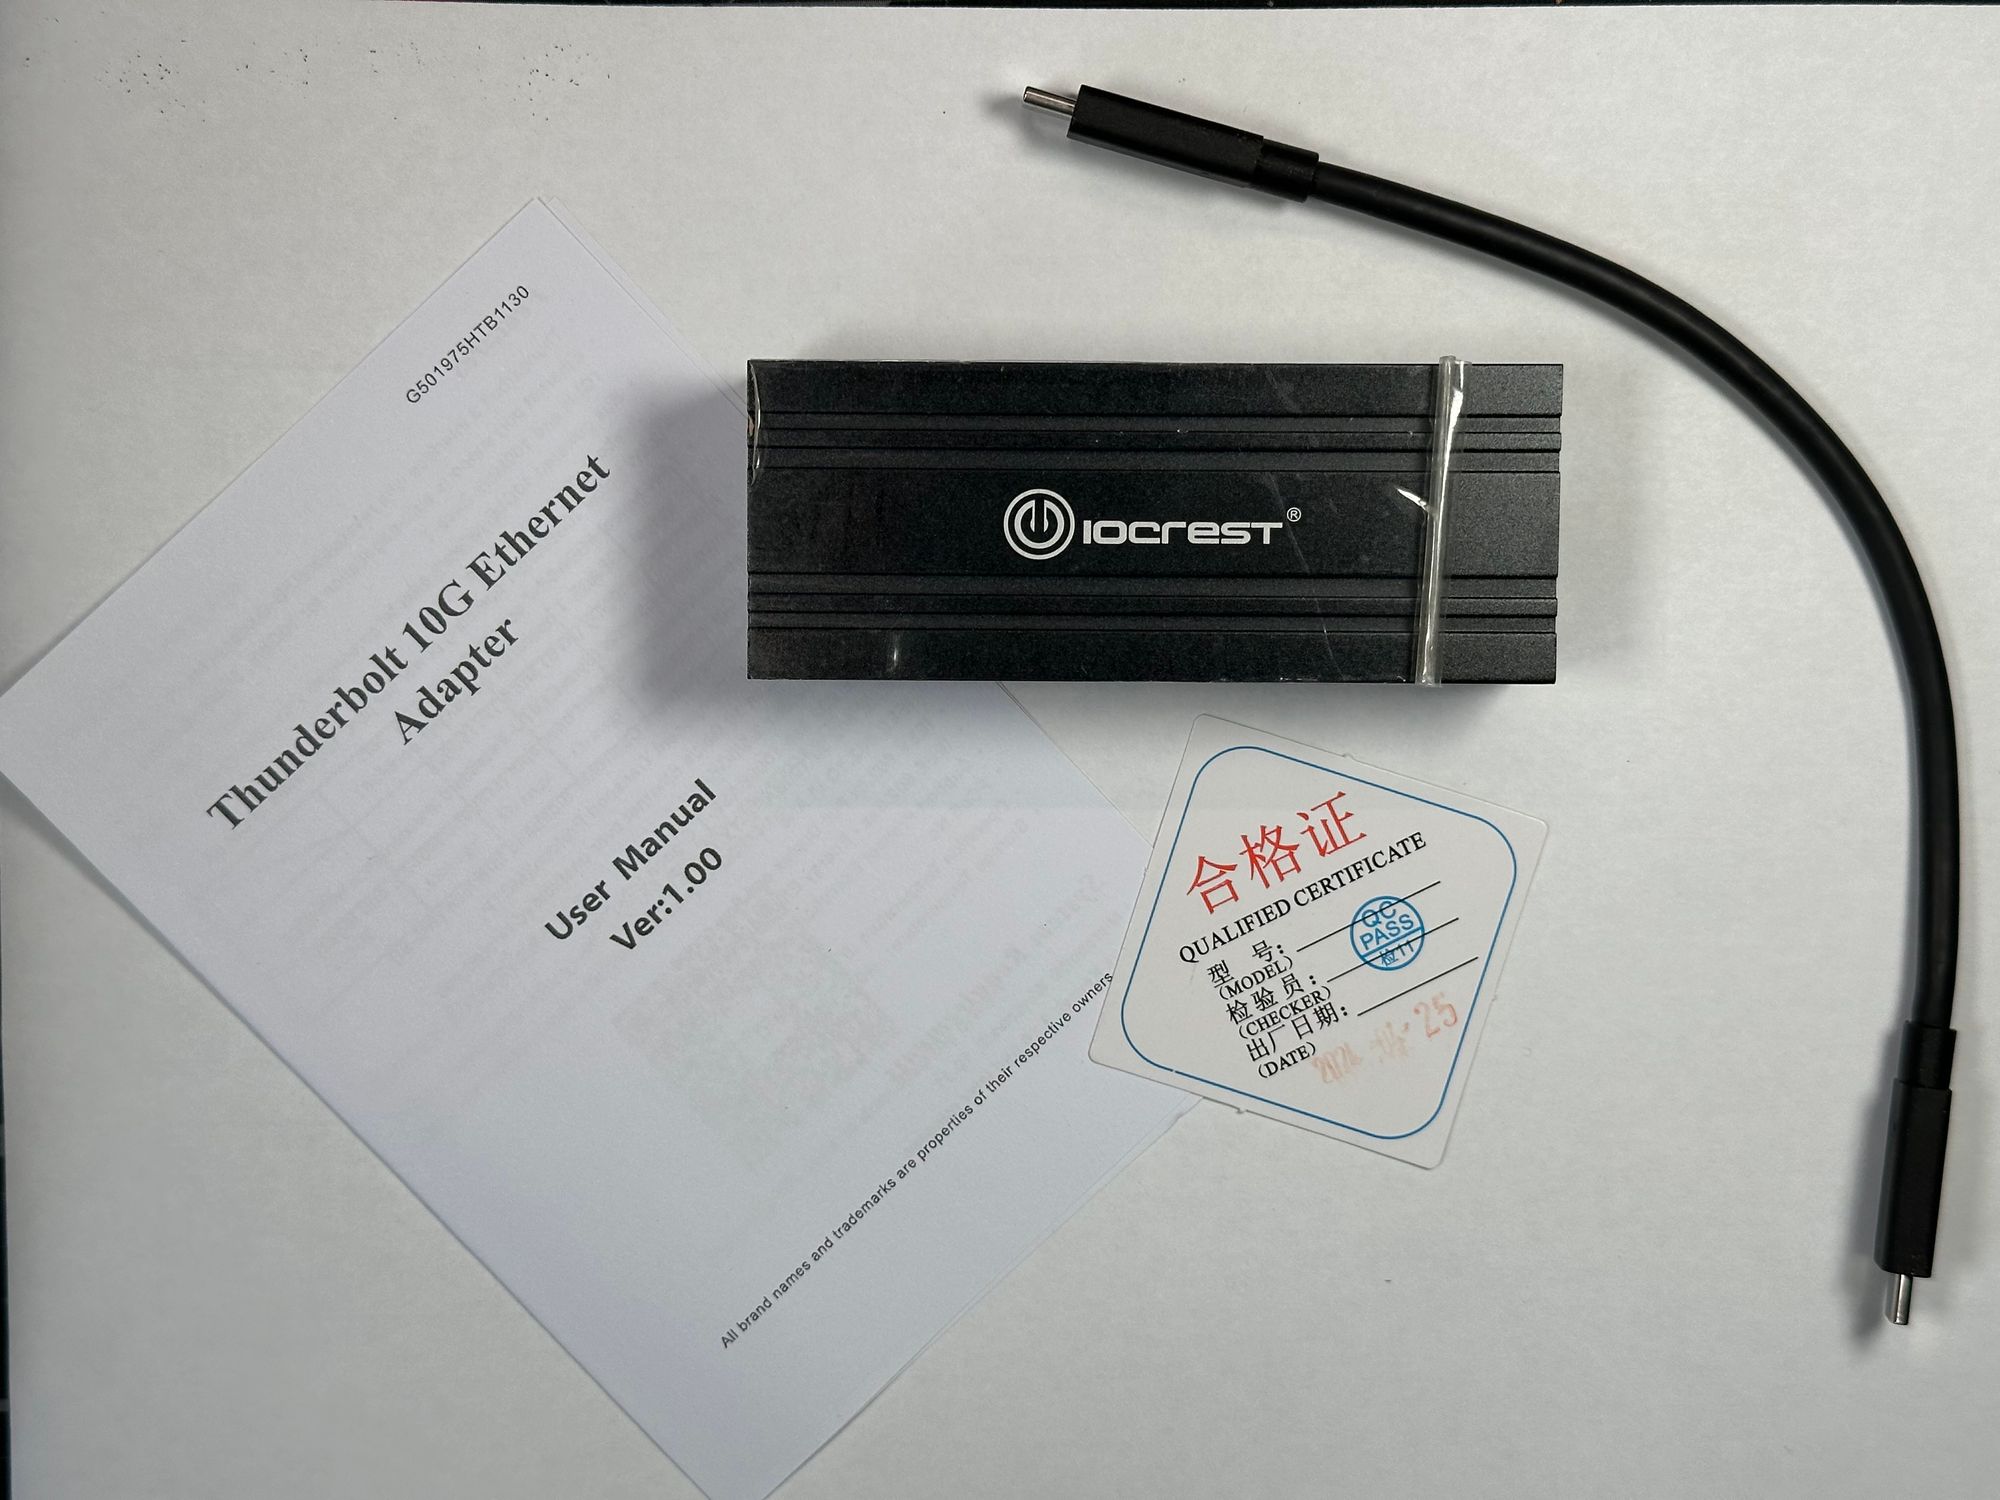
There isn’t a lot to it. A NIC, a generic Thunderbolt cable with no number markings, and a few thin pieces of literature.
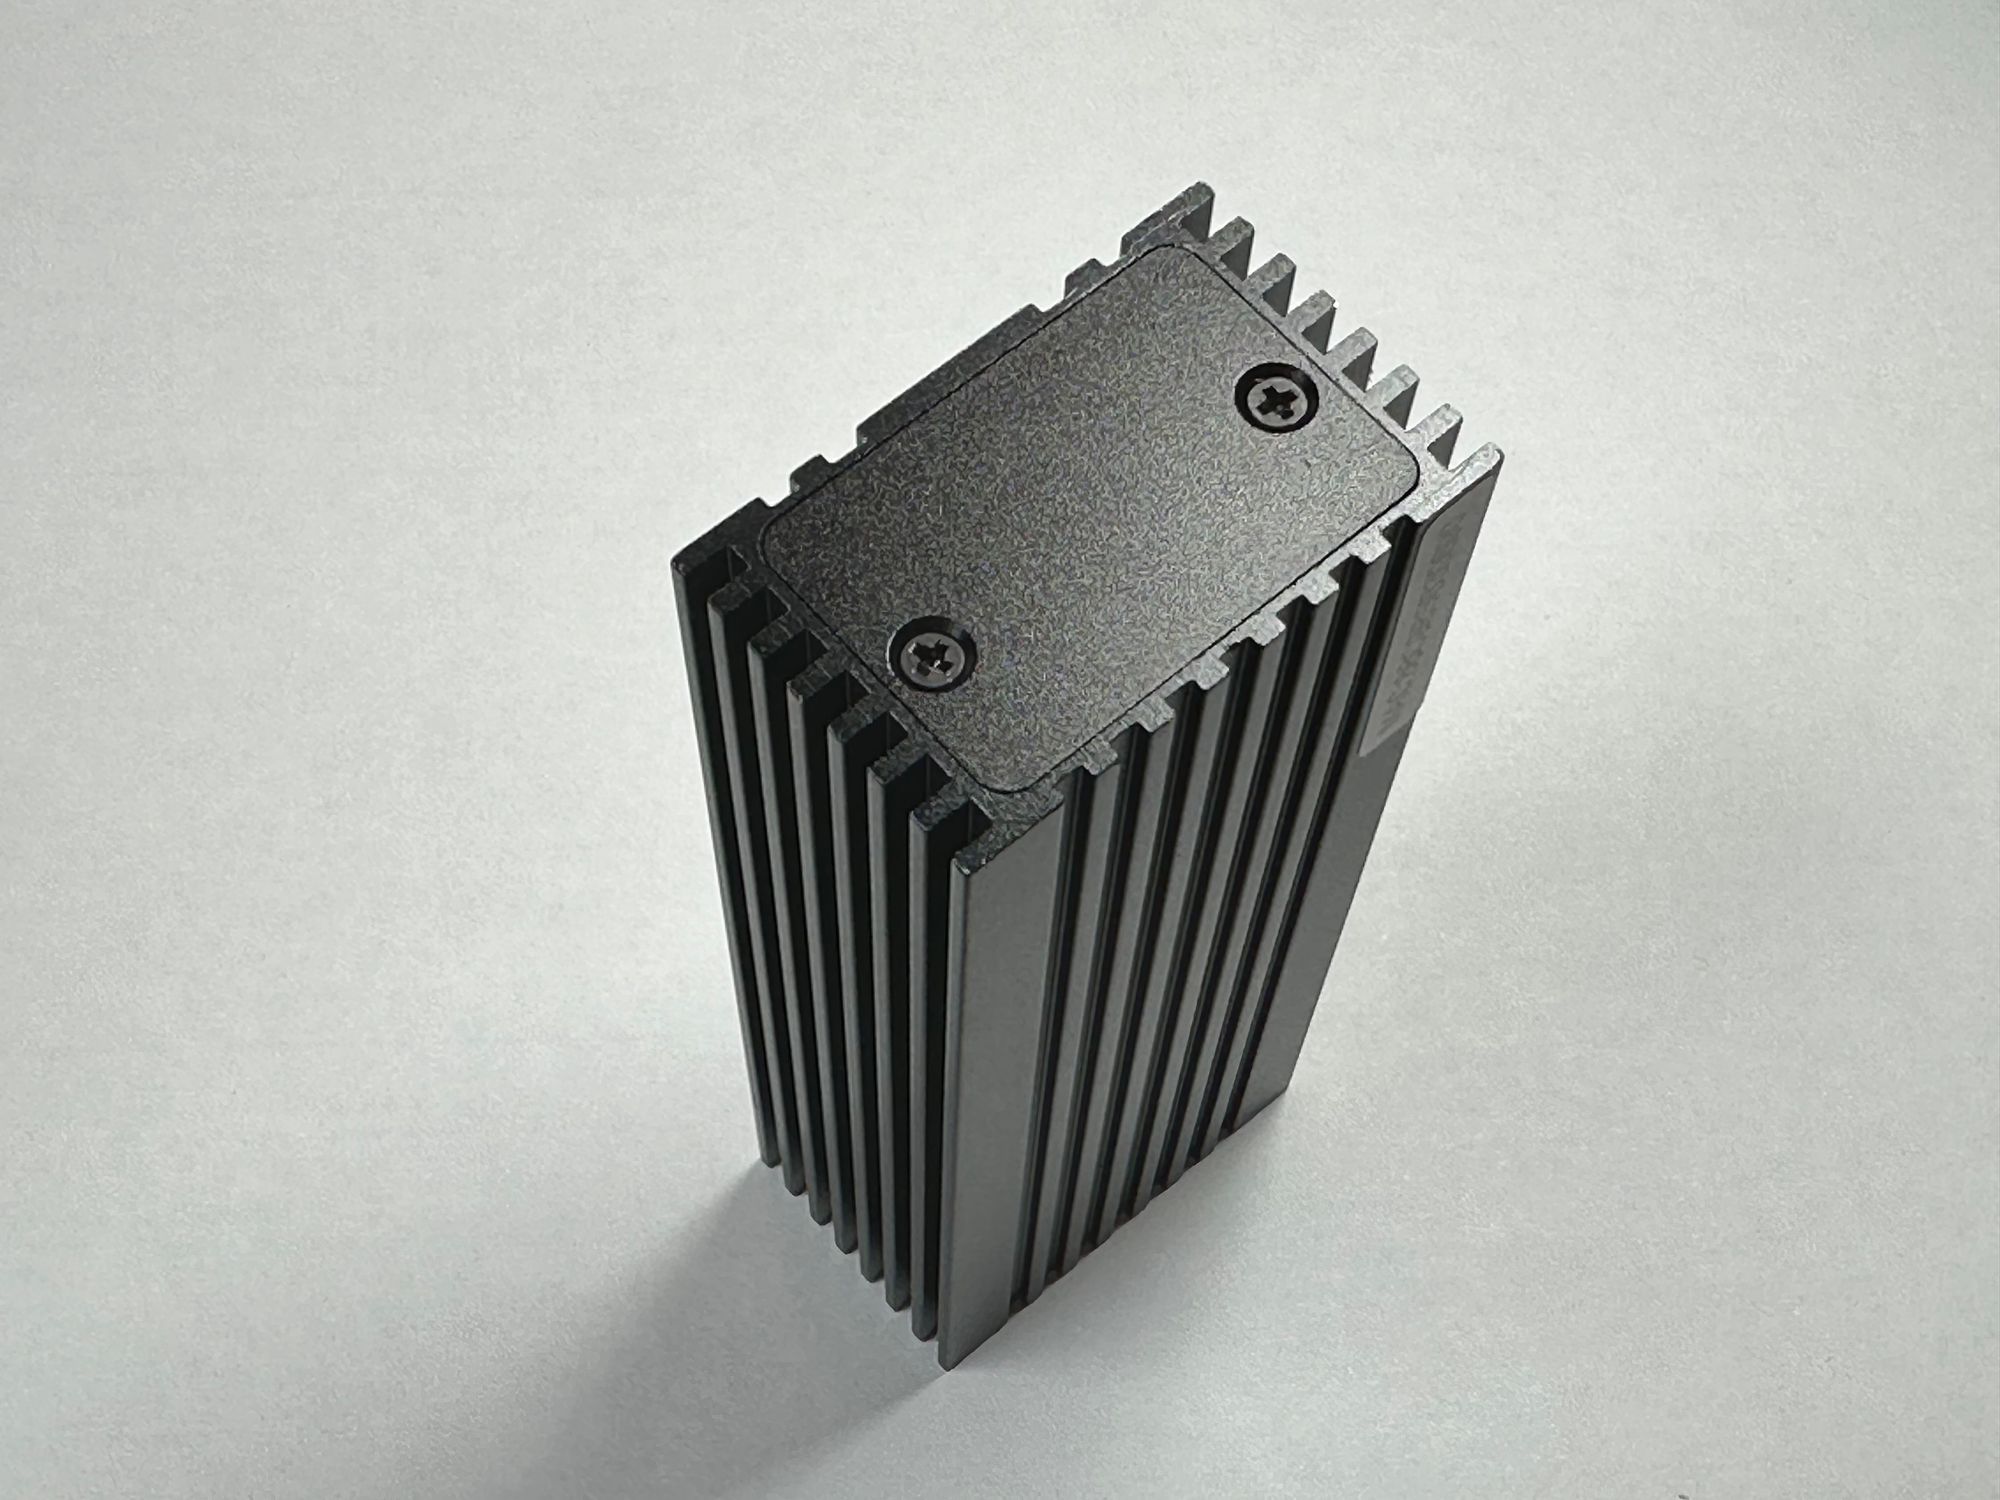
Let’s examine the NIC. It is very compact, measuring in 102.7x40.4x25.6mm.

One design quirk is that IOCREST put the Thunderbolt port and the RJ45 port on the same side of the NIC. I find it kind of awkward.

The other side is very plain. Just two screws and a metal plate that hold the components in.
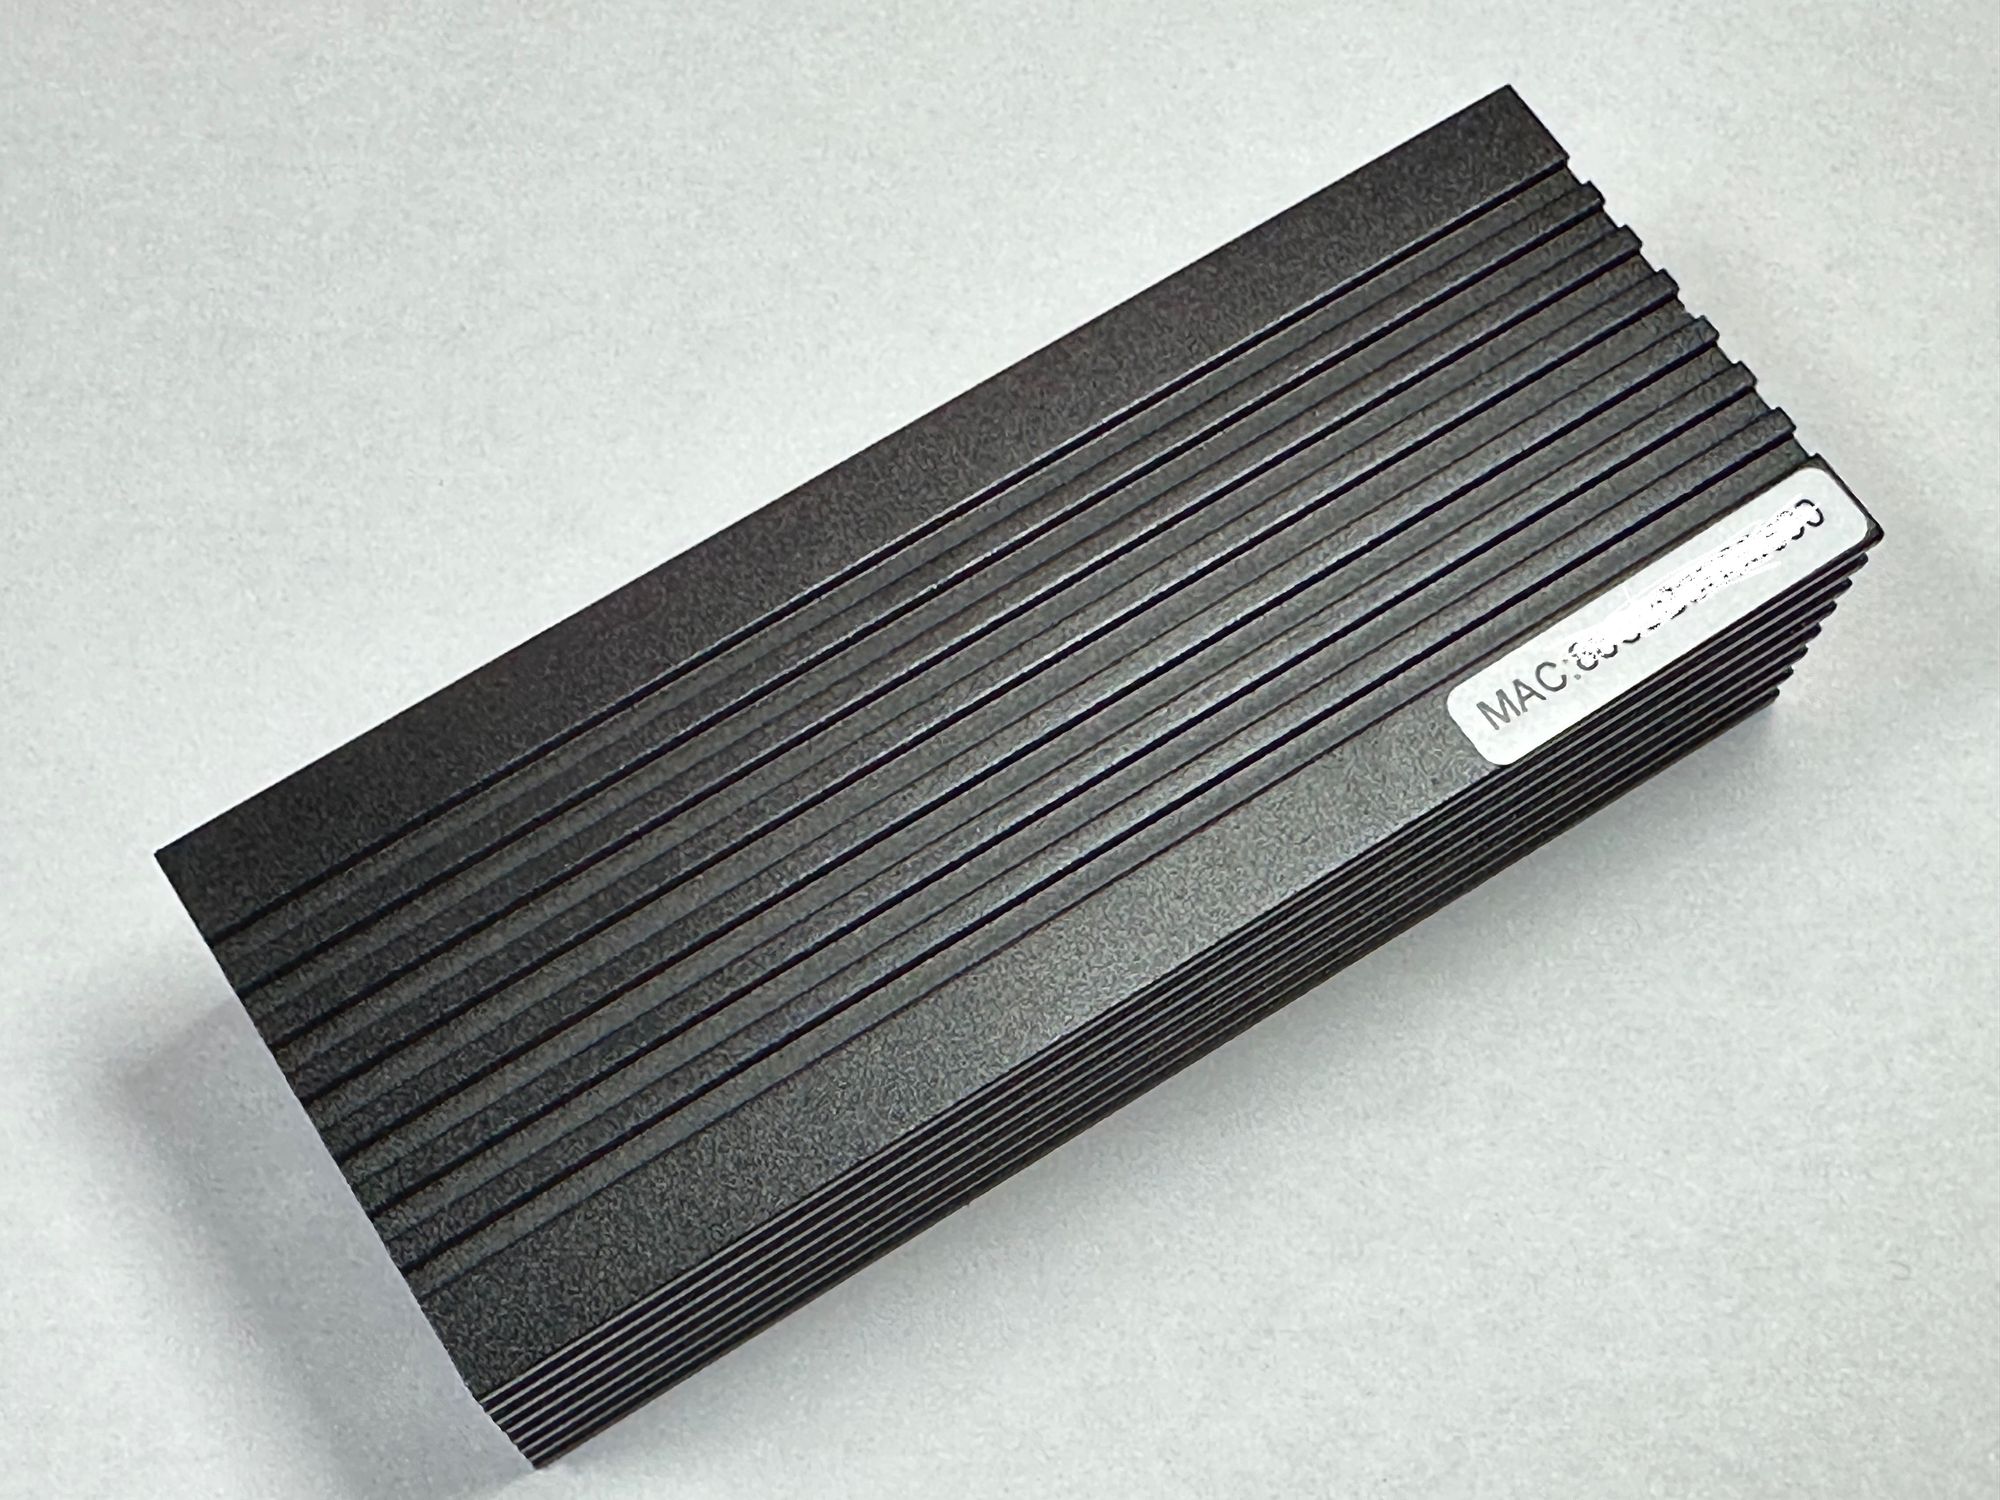
The underside (the side without the logo) has the MAC address of the NIC taped.
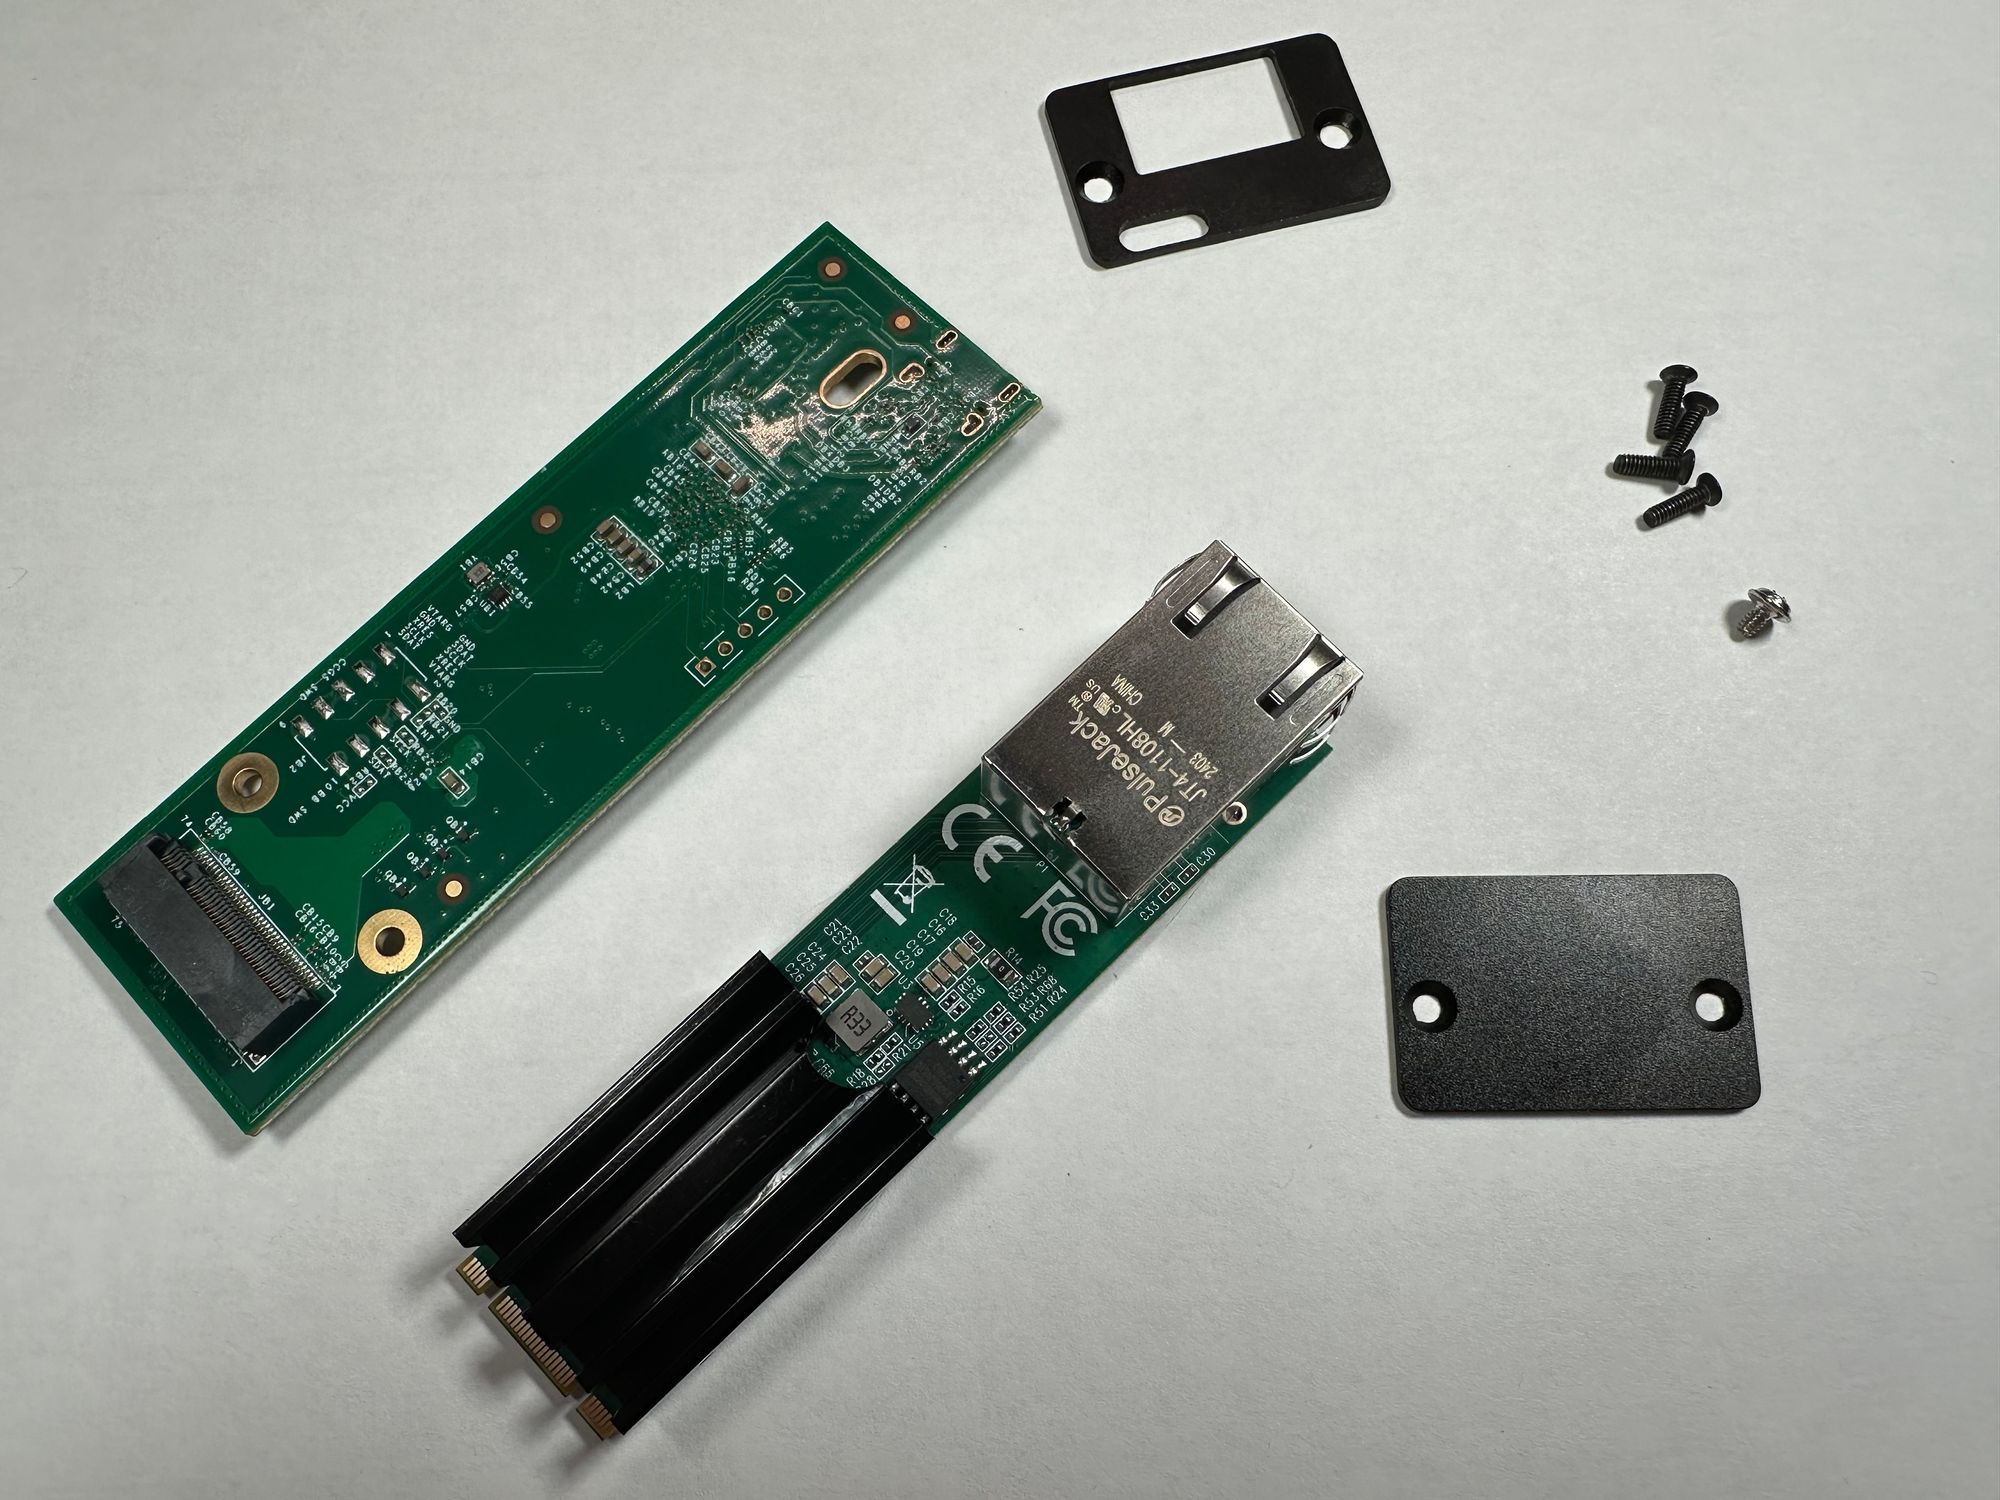
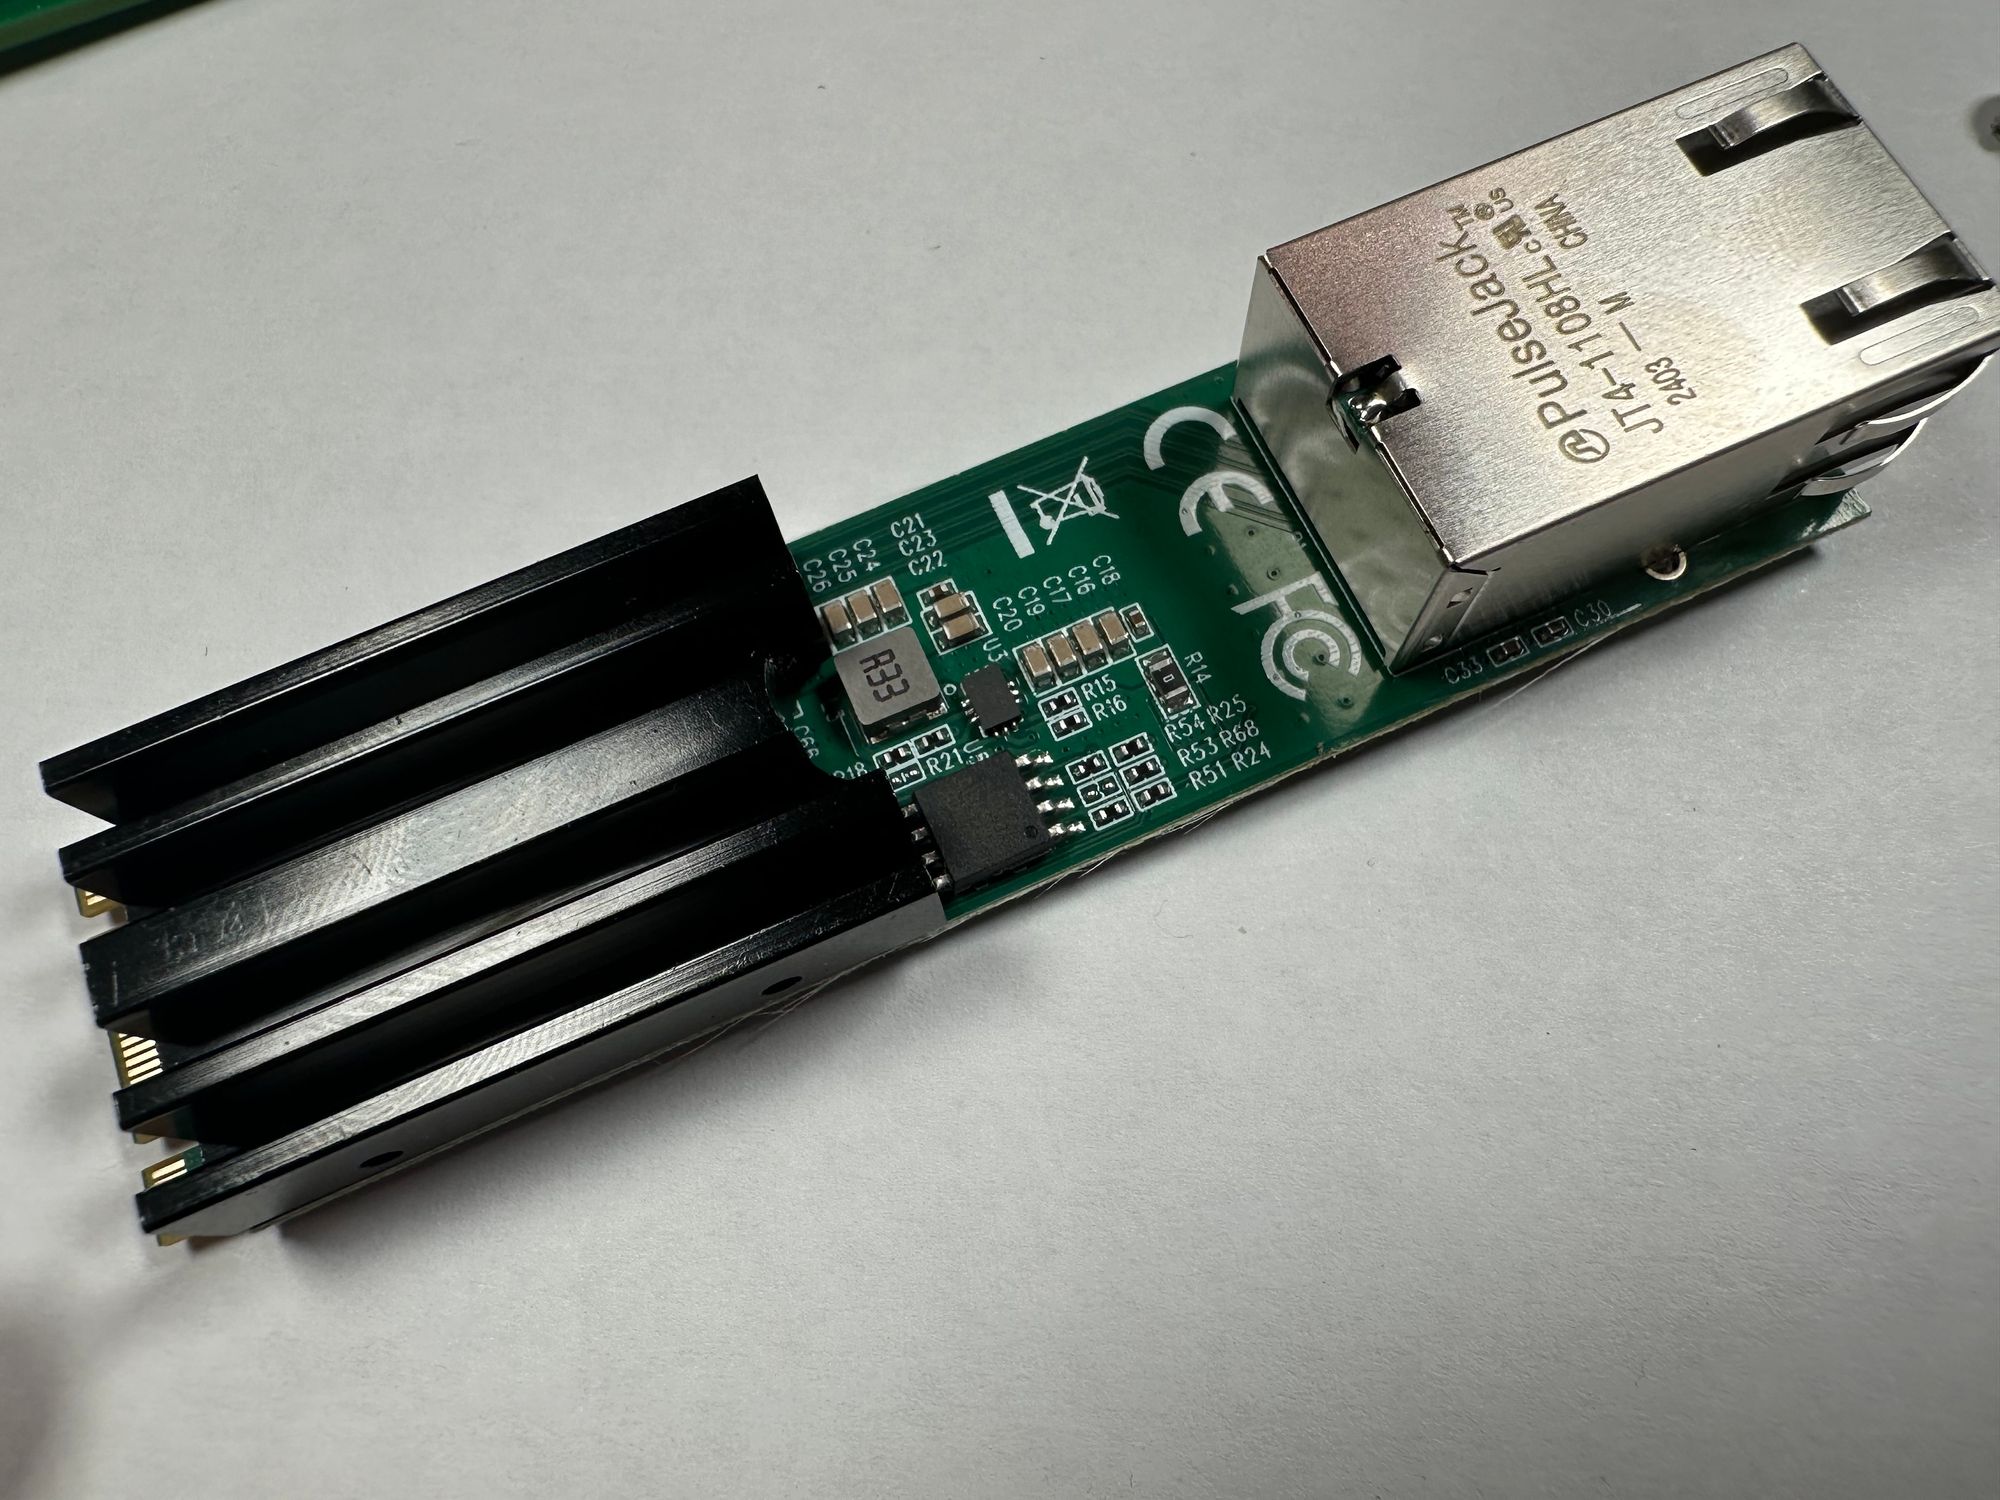
After undoing all four screws, the NIC can be taken out of the enclosure by sliding it out. Here’s what it looks like.
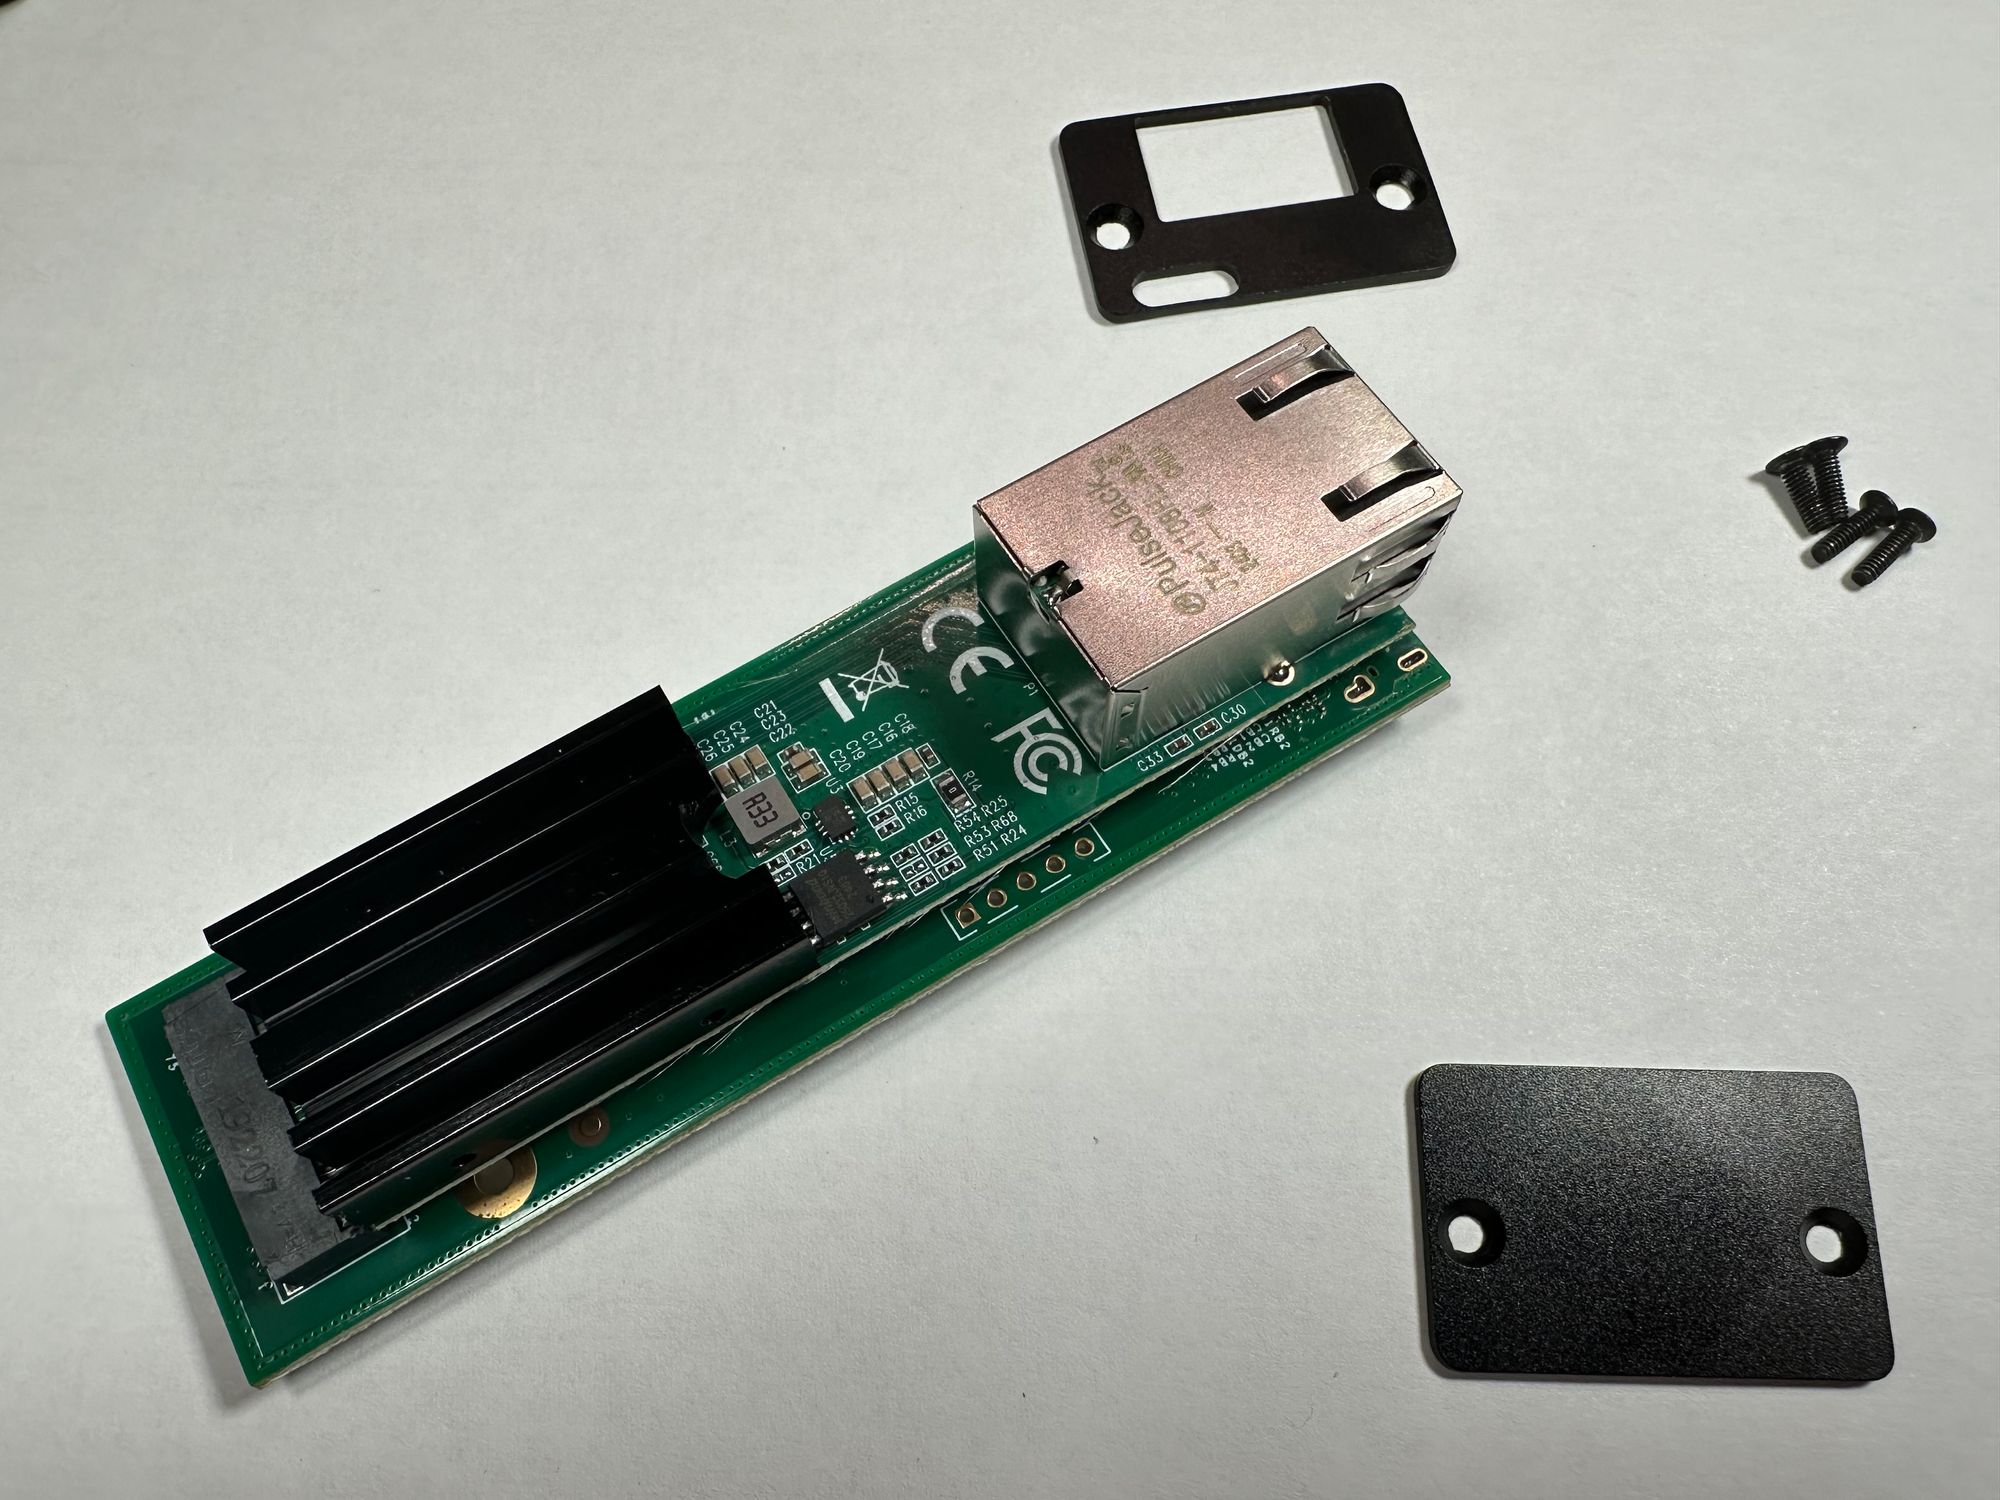
It is a very interesting design. IOCREST basically takes an M.2 Thunderbolt NVMe adapter, and put an M.2 10GbE NIC on it, and it works well. This is unsurprising since I’ve put an M.2 PCIe HBA on one in my Mac Mini NAS.
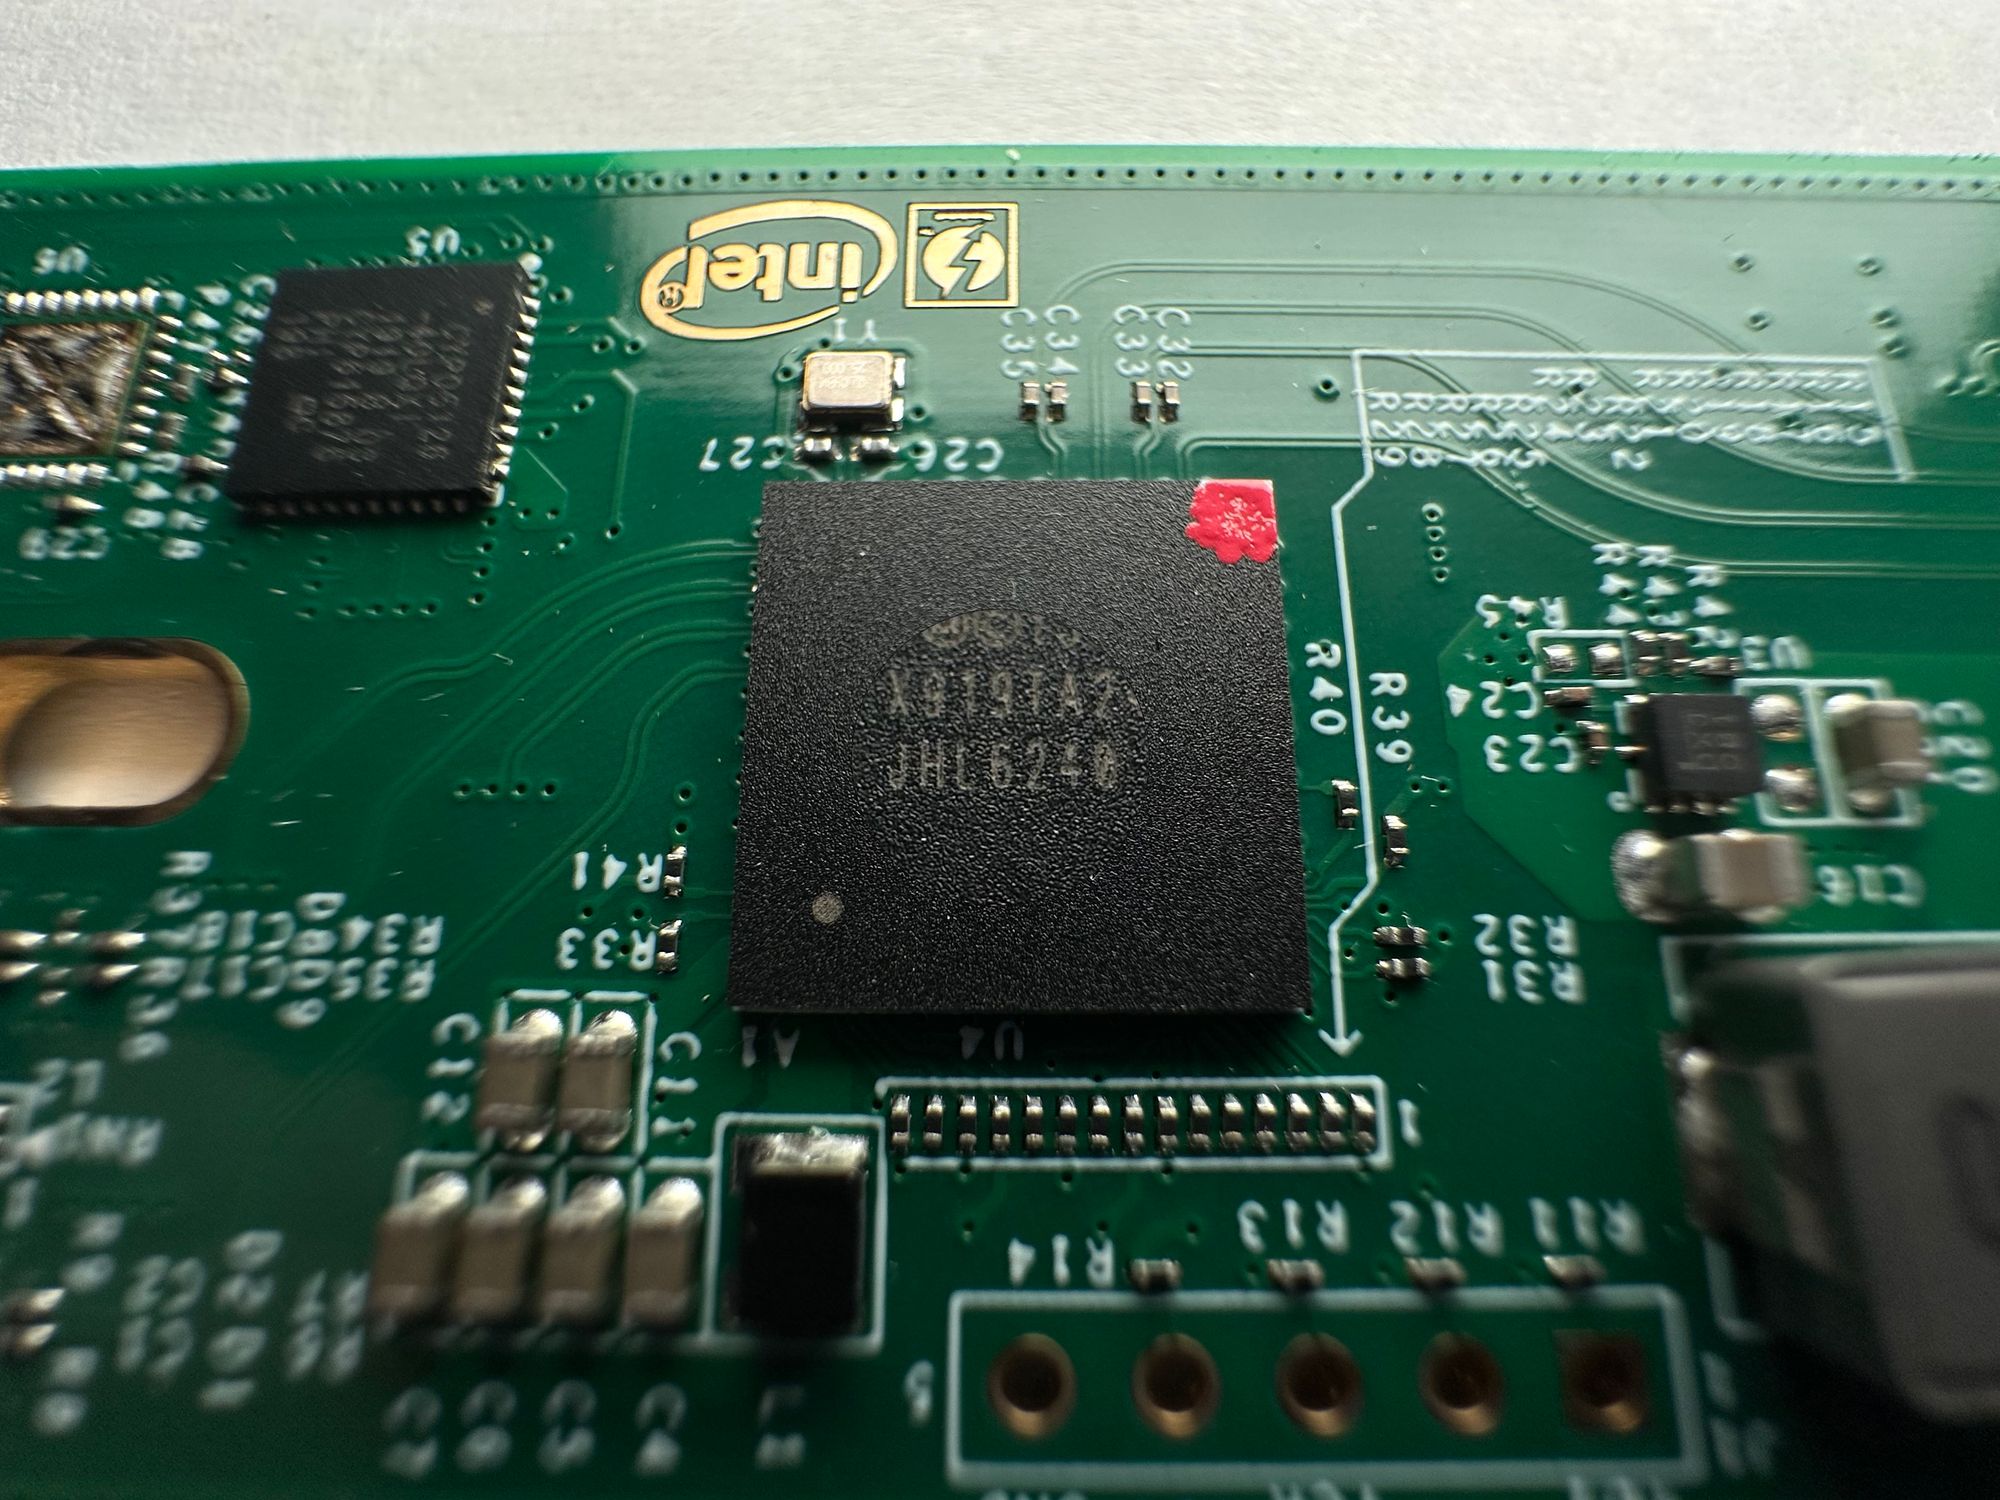
In this zoomed-in picture, we can see the Thunderbolt controller of choice is the Intel JHL6240, an old, low-power Thunderbolt 3 two-lane 20Gbps chip that can provide the bandwidth the NIC needs.
Here’s the NIC itself in M.2 form factor. Unfortunately, the RJ45 port is blocking the position where a normal M.2 set screw goes, so it can’t be installed into a normal M.2 slot. The NIC chip is covered by a heatsink with a layer of TIM in between and I was unable to take it off.
MacOS Installation
It doesn’t get easier than this. Apple devices are known to have great Thunderbolt implementation, and it is once again proven here. Simply connect the NIC with the included Thunderbolt cable to the Mac, and it shows up in MacOS automatically with no extra setup needed.
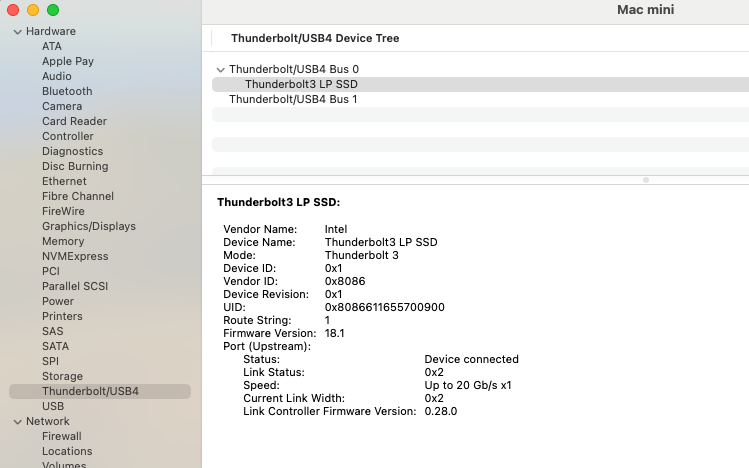
First, let’s inspect the Thunderbolt device section. It shows up as a “Thunderbolt 3 LP SSD” device, which is expected since it is an M.2 NIC installed onto a Thunderbolt M.2 SSD baseboard.
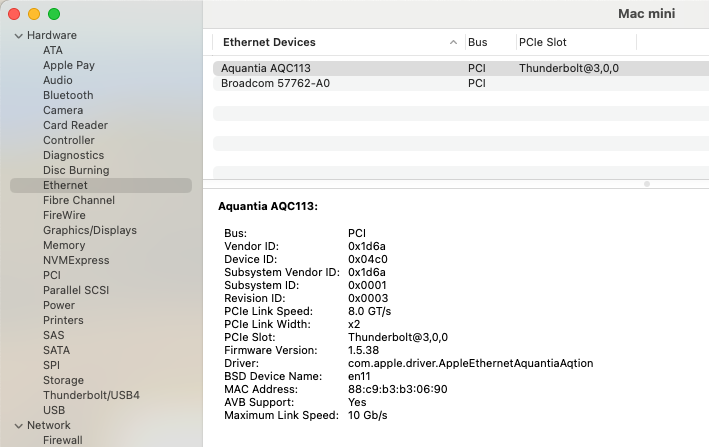
Now let’s take a look at the Ethernet section. MacOS identifies the NIC as Marvell/Aquantia AQC113, which is a great 10GbE NIC that can operate at PCIe 4.0x1. It is the OEM NIC used in Macs with 10GbE options, like my M1 Mac Studio. In this configuration, it is running at PCIe 3.0x2 tunneled by the Intel JHL6240 chip.
Testing
For testing, I ran a point-to-point connection from an M1 Mac Mini to a Windows PC equipped with an ASUS XG-C100C 10G NIC, which uses the Aquantia AQC107 chip.
Testing condition:
- MTU: 1500 (Default)
- Connection: Point-to-point
- Software: iperf3 3.17.1 ARM64 (MacOS) / iperf3 3.17.1 win64 (Windows)
- Cable: Cat5e, 10ft
- Server: Mac Mini
- Client: Windows PC
First, I ran a basic test with iperf3 -c IP. Since I have multiple NICs, I bound iperf3 to use the 10G NICs on both devices and omitted this part of the command. The test completed without breaking a sweat at 9.49 Gbit/s.

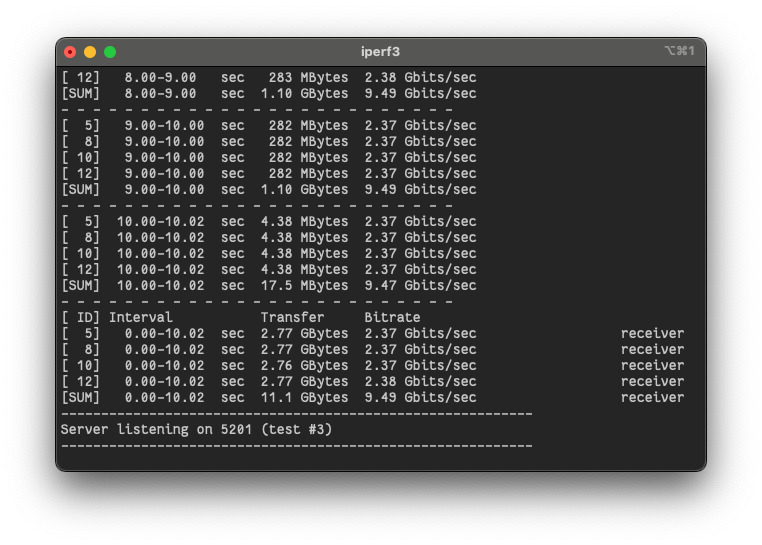
Next, I stepped it up to four streams using -P 4 flag, and the NIC handled it just fine.
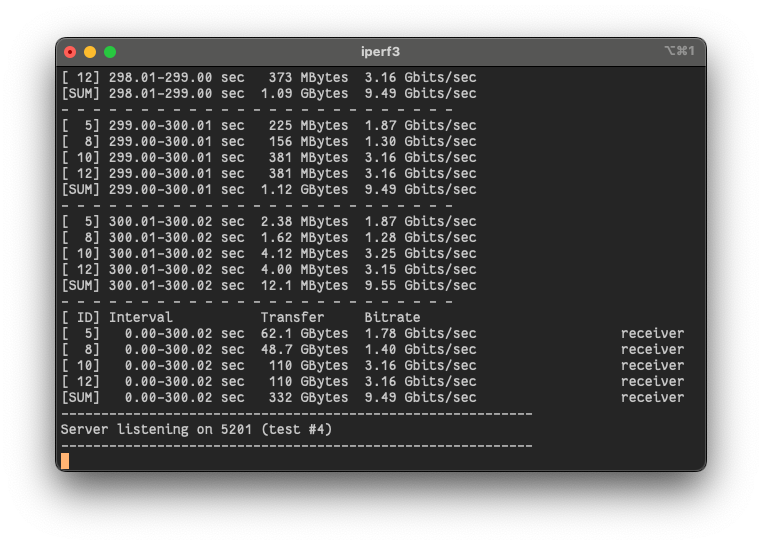
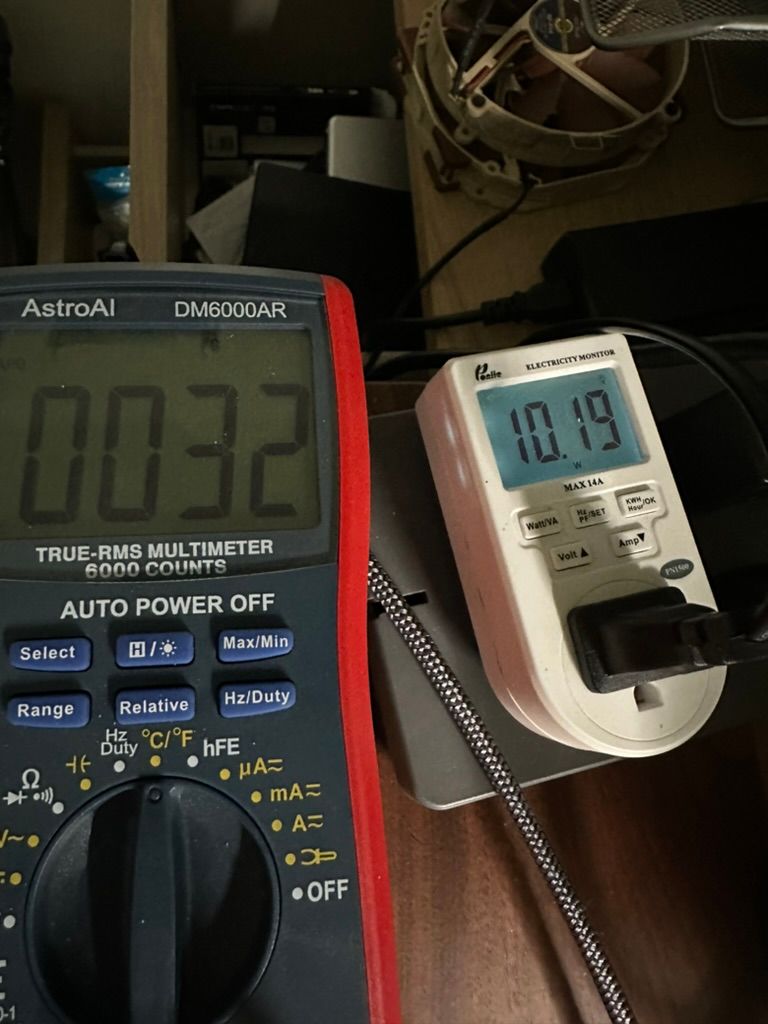
I then ran a longer test for 5 minutes to observe both the speed and the temperature of the NIC. I taped a temperature probe to the enclosure and measured the temperature with my multimeter in Celsius. Here’s what it looked like when running four streams for five minutes (300 seconds) with -P 4 -t 300 flag. The ambient temperature was about 26 degrees Celsius.
The test completed successfully without missing a beat, while the temperature stayed at +2 degrees above ambient.

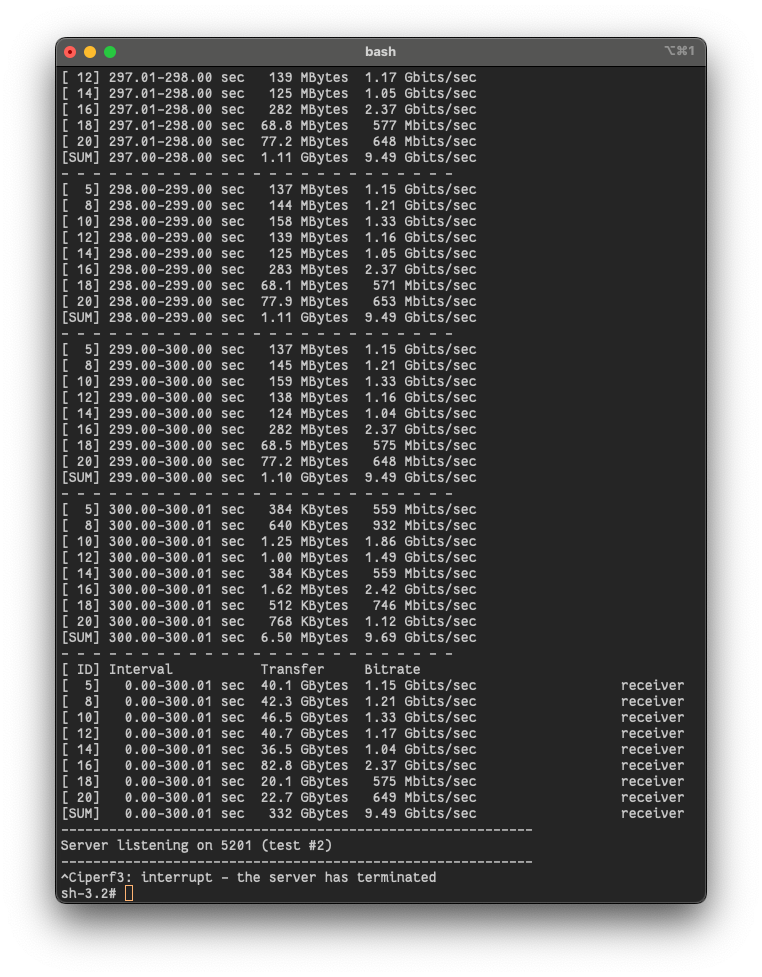
Finally, I ran a “torture test” by sending eight streams for five minutes and did two passes. Normally, I wouldn’t run this test on client-focused NICs since many cheap 2.5G USB NICs would be decimated by this test. However, since I intend to use this with my Mac Mini NAS, it had to pass this test for me to feel safe using it.
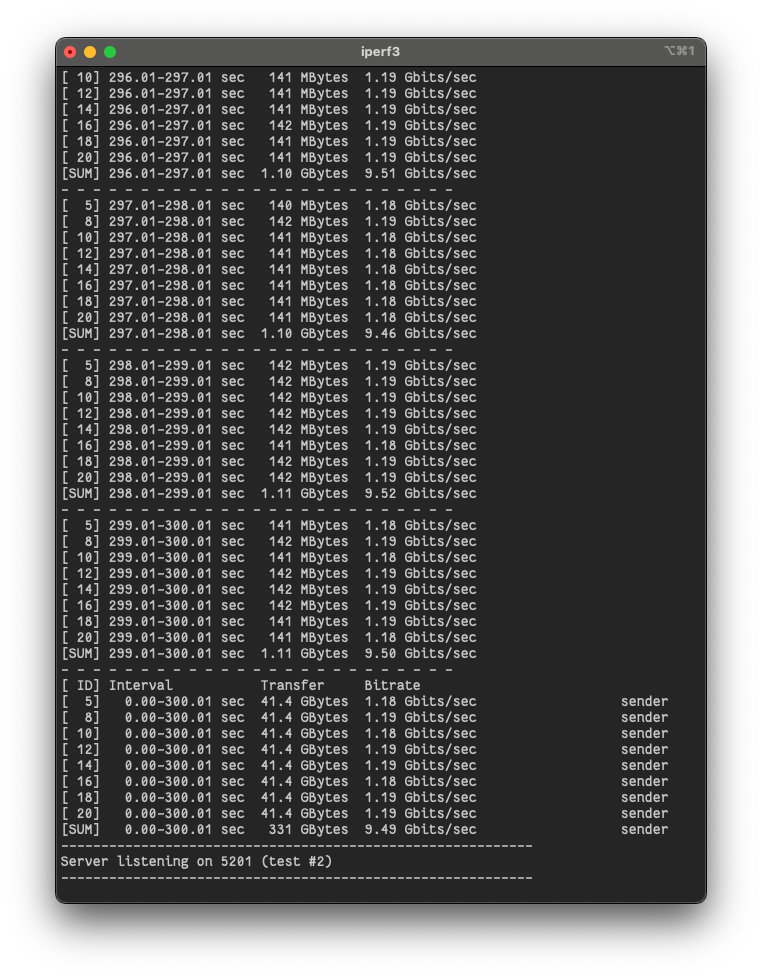
Here’s the result by running iperf3 with -P 8 -t 300 flag. It passed with flying colors, and the temperature reading was only +5 degrees above ambient.

I also ran a reversed test just to make sure — no surprises, just one degree hotter.
Thoughts and Conclusion
As I work to streamline my lab's storage layout, I don't have the infrastructure to conduct more in-depth tests right now. I'm in the process of segregating my storage into cold, warm, and hot layers. This NIC paired with my Mac Mini NAS will be a crucial part of the whole plan. I plan to run the "hot" part with my Mac Mini NAS with SSDs and just two HDDs since they will be running 24x7.
I want them to be as power-efficient as possible, and the Mac Mini is ideal for this as it idles at only 8 watts. However, the Mac Mini was limited to a 1GbE network interface, which didn't take full advantage of an SSD array. Now, with this IOCREST Thunderbolt 10G NIC, those SSDs can stretch their legs and show their true potential.
The product isn't without its flaws. While it performed well in my tests under room temperature, I'm still a bit skeptical about the cooling solution. As seen from my teardown pictures, the enclosure does not make contact with the NIC or the Thunderbolt controller. Granted, it's not a high-power device like a Thunderbolt NVMe enclosure, but I believe the next iteration should focus on better heat dissipation by ensuring the NIC and the Thunderbolt controller chip make contact with the enclosure so it wouldn’t thermal-throttle even under the most extreme operating conditions.
Overall, I'm impressed by the performance of this NIC. For $85, it's a fantastic option if you want 10G networking for your Mac. While the Apple OEM $100 upgrade is still the best route if available, this IOCREST 10G NIC is a solid alternative for those with Macs that only have GbE networking. It successfully upgrades the networking capabilities of your Mac without breaking the bank.
If you are interested in this product, click the link below to purchase it.